
There’s a reason so many websites use pricing tables. They enable you to showcase a lot of important information side by side, and they can look very stylish while doing so. However, creating, styling, and adding a pricing table to your website can be a lot harder than you might expect.
That’s where Uncode comes to the rescue. With our multipurpose WordPress theme, you can easily design stylish pricing tables and add them to any pages or posts you like, using an intuitive visual builder. All it takes is learning a few simple steps, and you’ll be making awesome pricing tables in no time.
In this article, we’re going to talk a bit more about pricing tables, why they’re so effective, and when it makes sense to use them. Then we’re going to show you how to create your own pricing table using Uncode. Let’s get to work!
An Introduction to Pricing Tables (And Why They’re Useful)
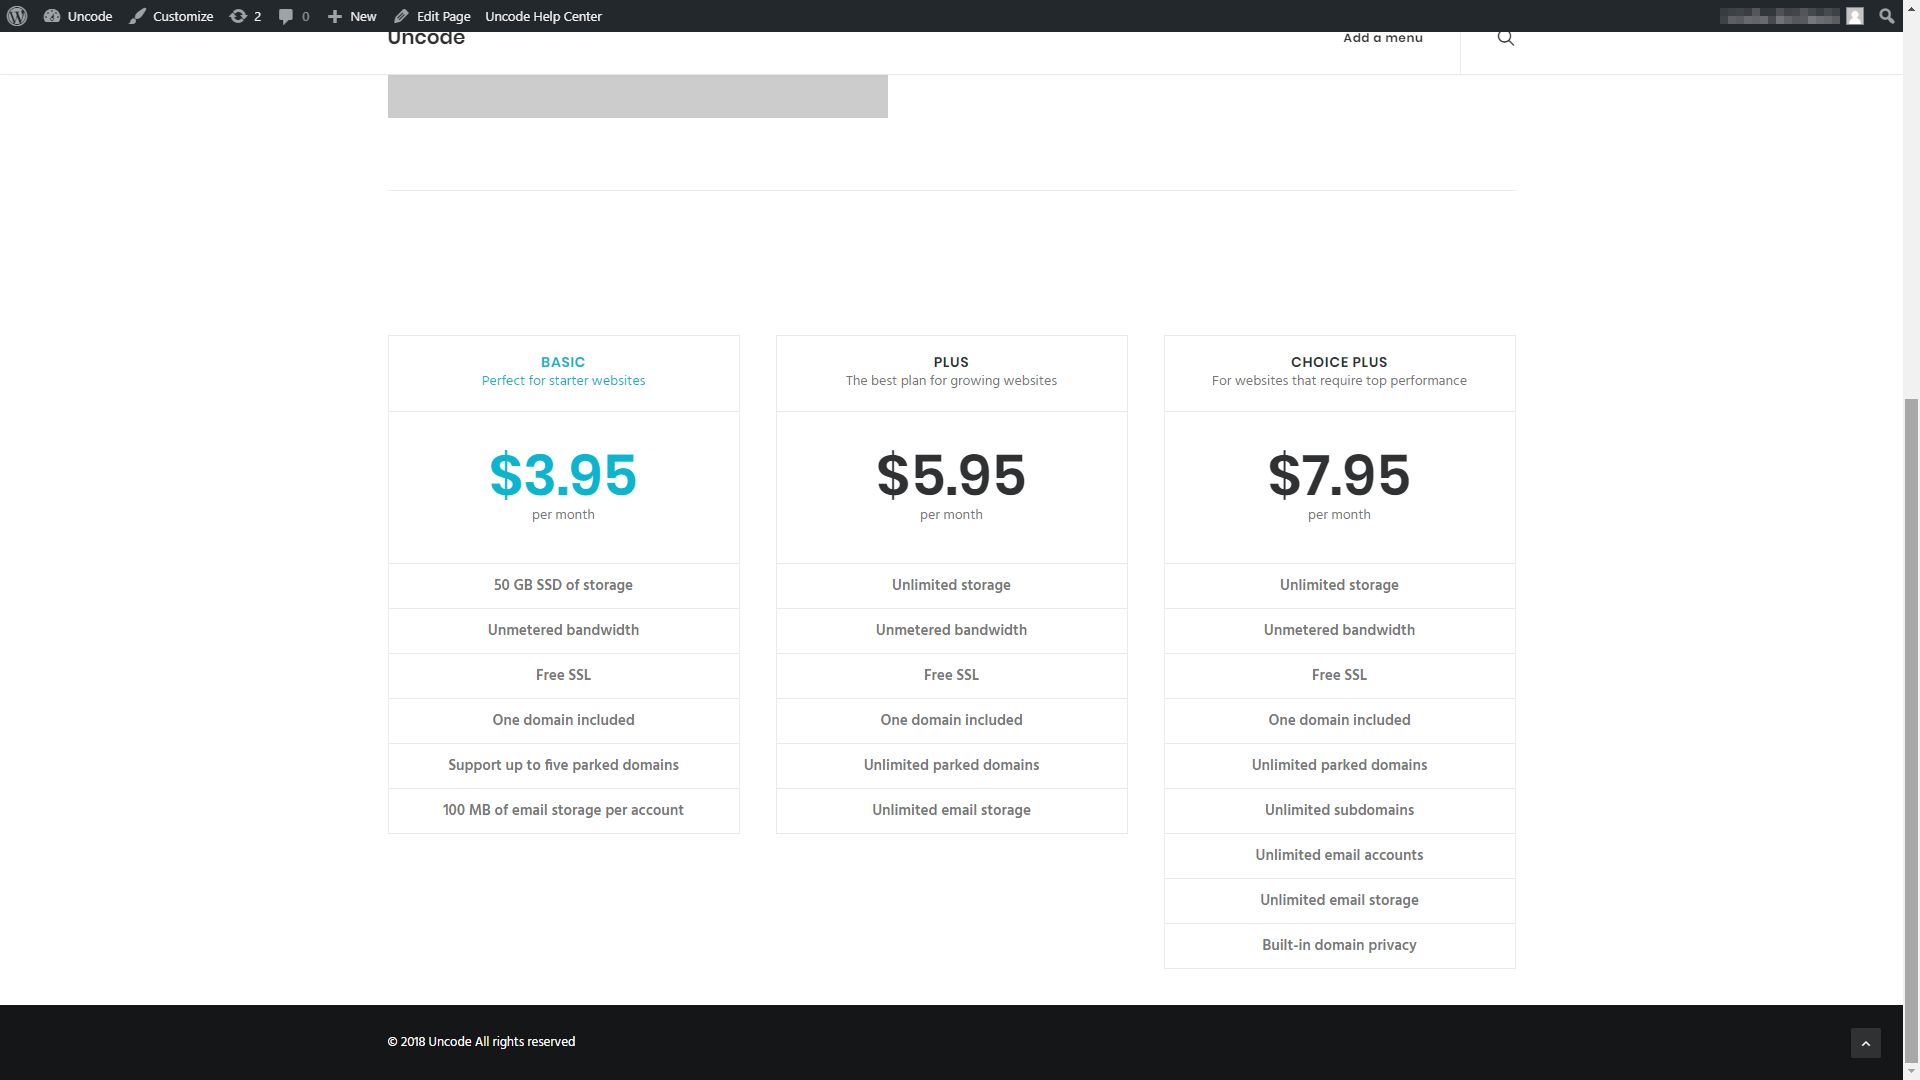
Once you start looking for them, you’ll find that pricing tables are everywhere. For example, if you check out any hosting provider’s site, we’ll bet that you’ll find at least one table listing that company’s plans or tiers:
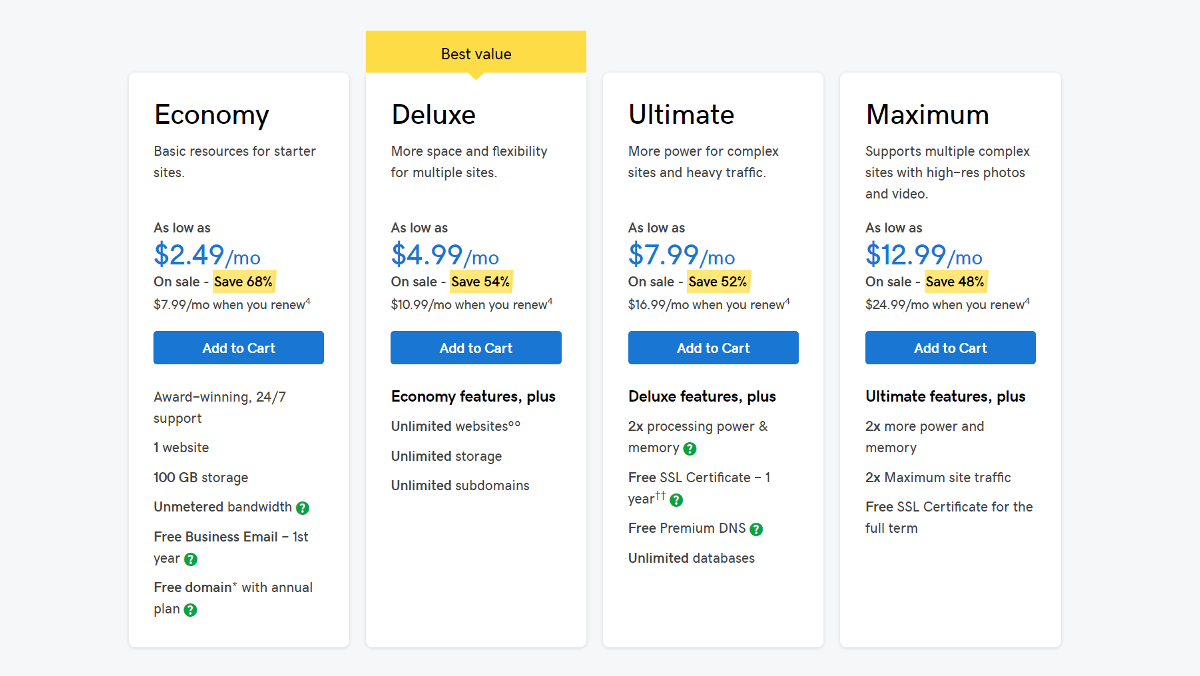
The general structure of pricing tables is fairly simple. You’ll see multiple columns – each one focused on a single plan, product, or other option – divided into sections with further details. In the example above, you can see the names of each plan, along with its key features and prices.
With a pricing table, you can compare what your options are at a glance, and give visitors a summary of what they can expect from each of them. On top of that, using pricing tables also enables you to draw attention to the plans or products you want visitors to choose.
If you check out the above screenshot again, you’ll notice there’s a plan that’s highlighted with a Best value sticker. In most cases, this is the plan that’s most profitable for you and useful to your customers.
Although the structure of pricing tables is always similar, their style can vary a lot. Here’s a cool example from an Uncode site, which uses a very minimalist approach:
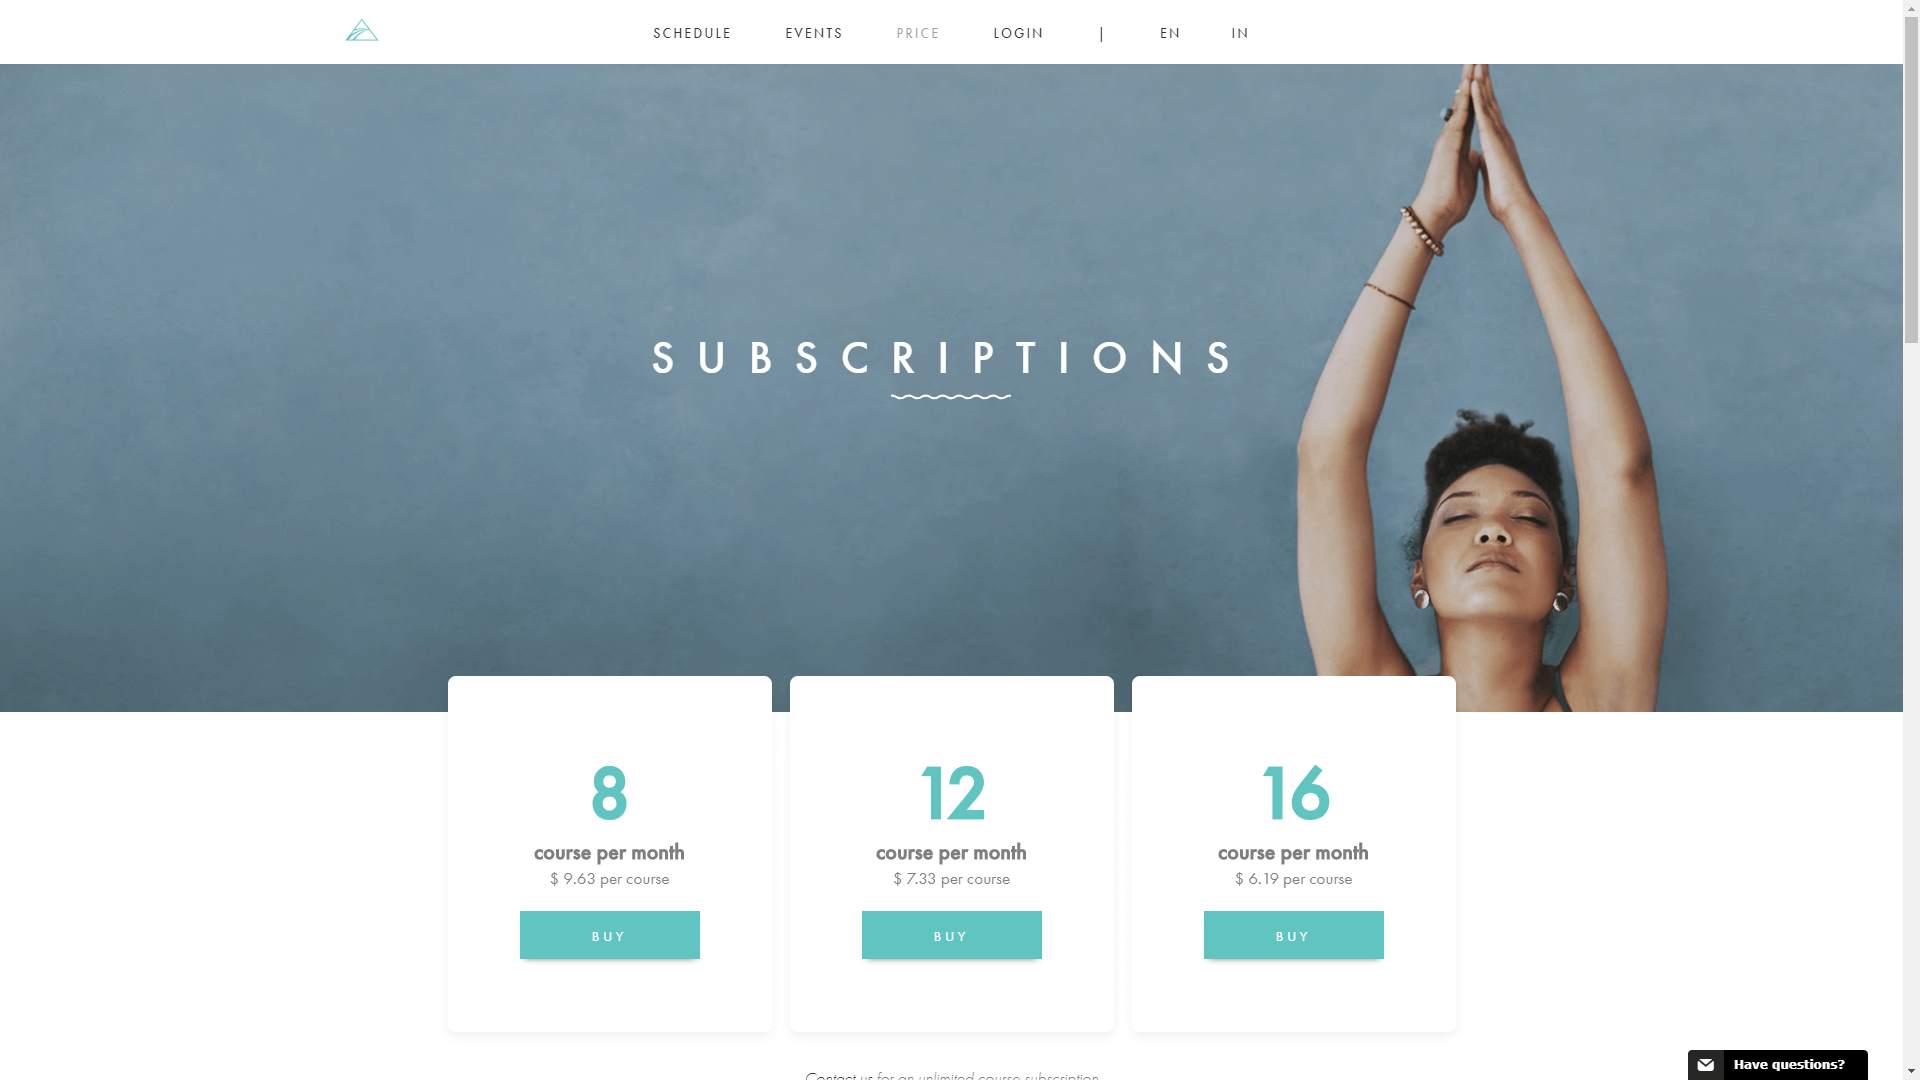
You can also eliminate borders altogether, and go for a more seamless style:

Notice that even in this case, the information is divided into segments and you can quickly find what you’re looking for. This just goes to show that you can use any style you want for your pricing tables, as long as the information is well organized.
Generally speaking, pricing tables are an excellent fit for service and membership websites. That is to say, they’re almost essential for sites that offer multiple tiers of plans. You can also use pricing tables to compare individual products. Finally, if you have an online portfolio and offer fixed-price services, you might also benefit from using pricing tables.
How to Create Attention-Grabbing Pricing Tables Using Uncode (In Just 2 Steps)
Creating a pricing table using Uncode is pretty simple. The real work lies in customizing its style. We’ll go over both steps of the process in the following sections.
Step 1: Add a Pricing Table Module to Your Page or Post
For the purposes of this tutorial, we’re going to assume that you already have Uncode set up and activated on your website. After that, the first thing you’ll need to do is open up the editor for any page or post where you want to place your table, and make sure you’re in the Uncode visual builder:
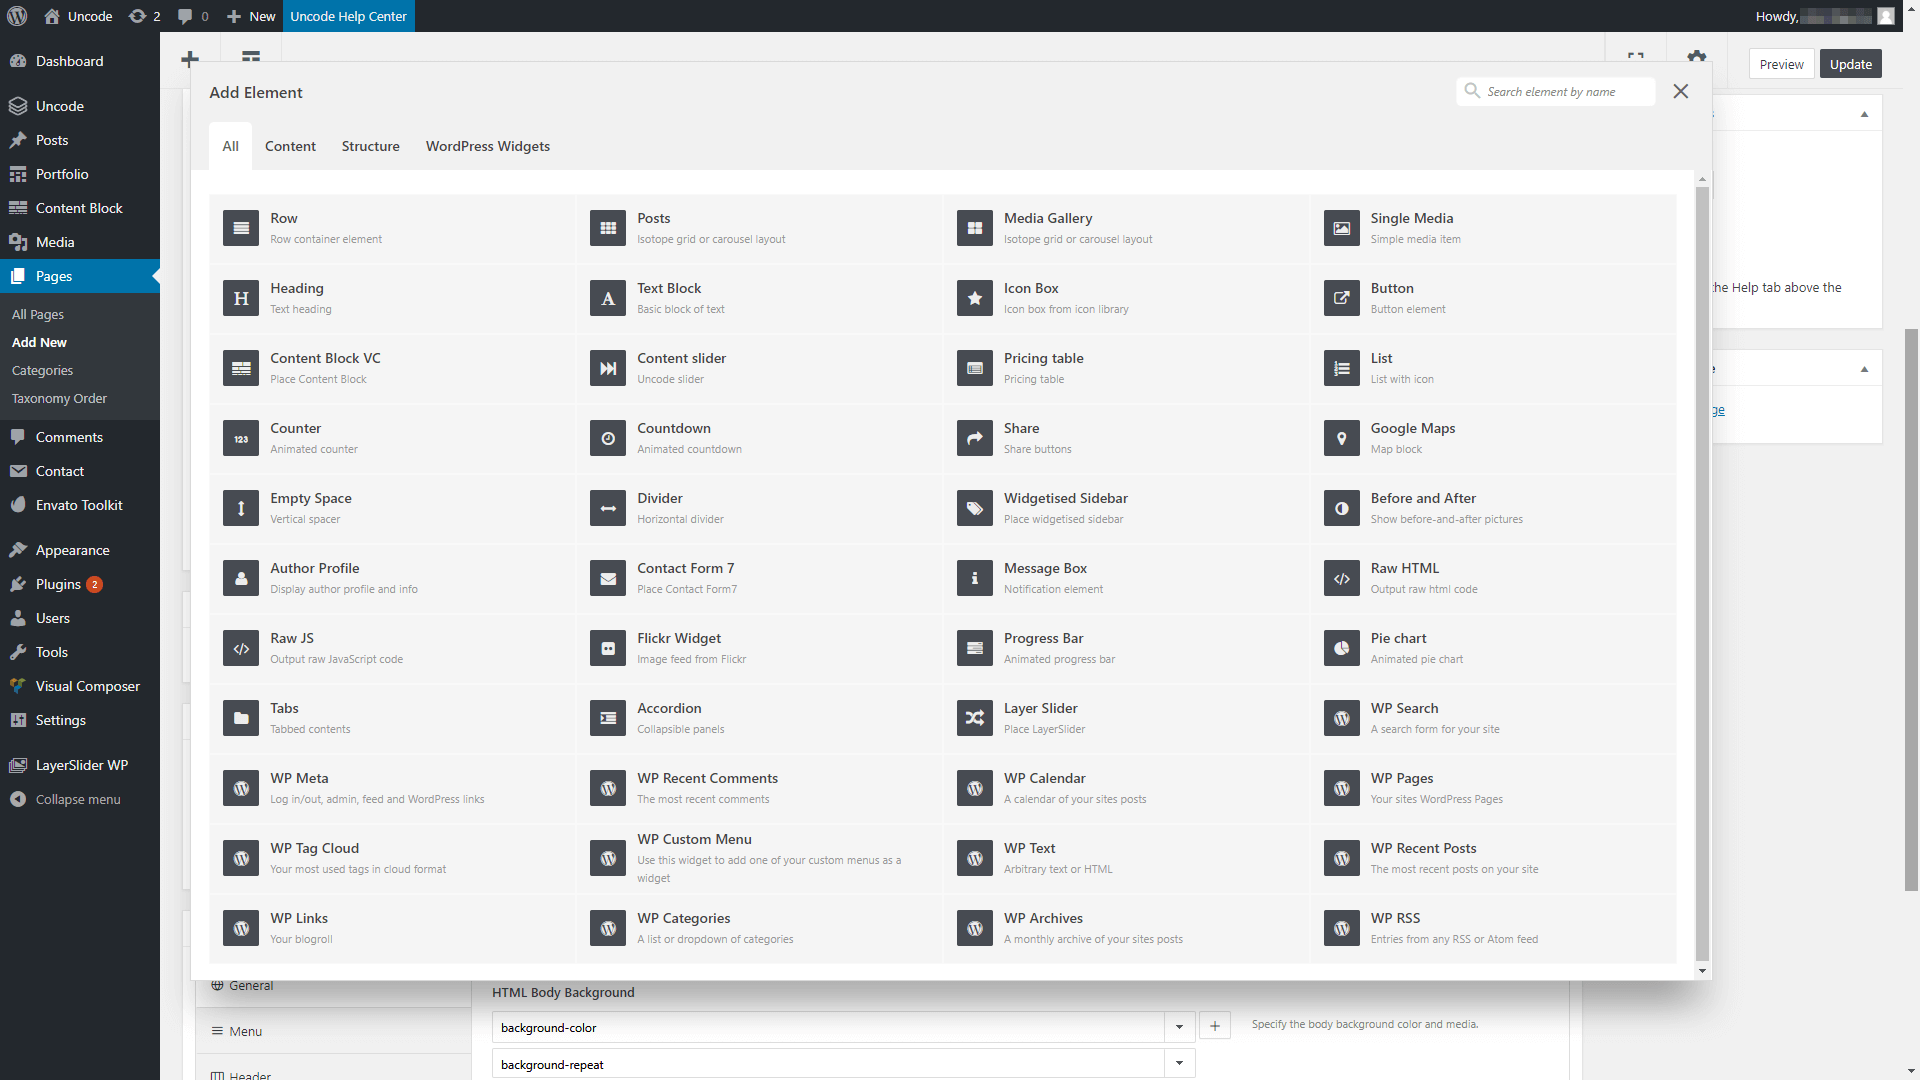
Click on the plus icon for the section you’d like to use, and you’ll be presented with a list of module options. Find the one called Pricing table, and select it:
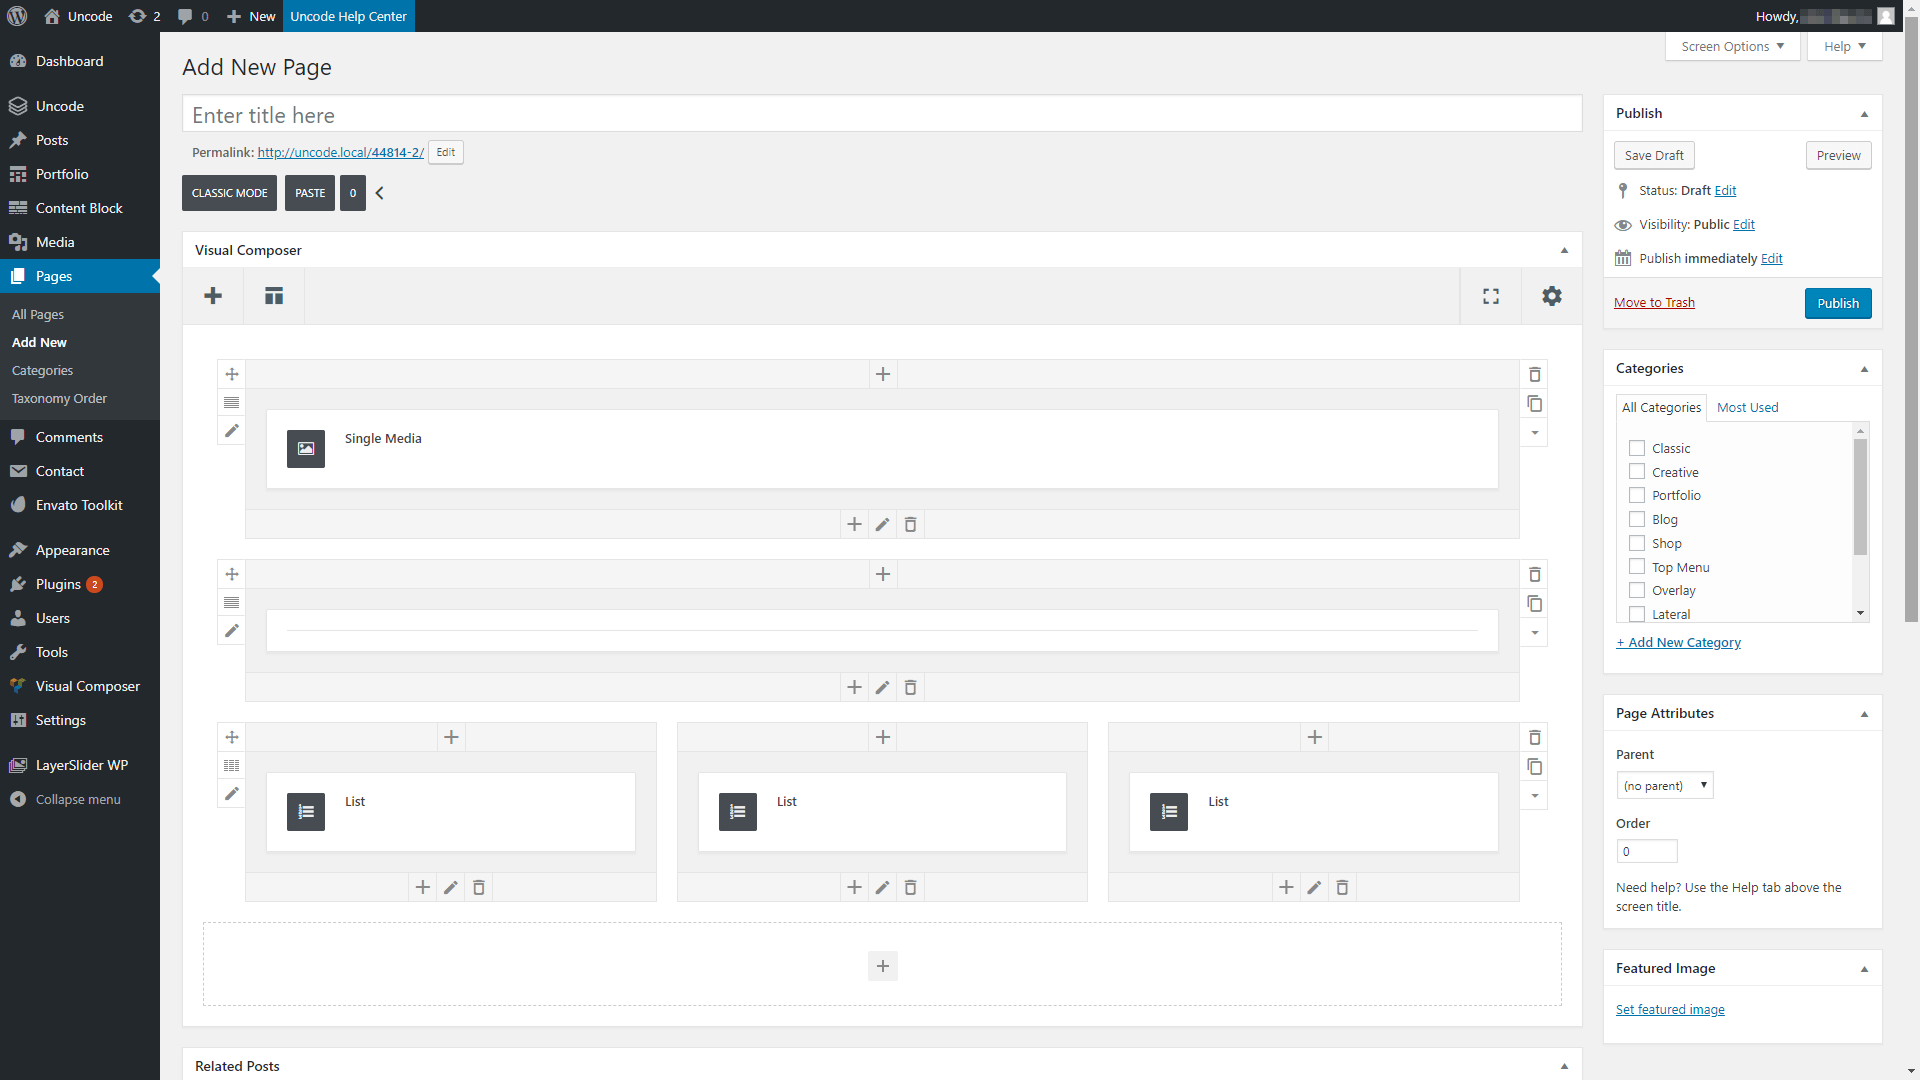
Just keep in mind that you’ll need to add a new Pricing table module for each column you want to include. For example, we’re creating a pricing table with three options, so we placed three side-by-side modules. This is what our page looks like now:
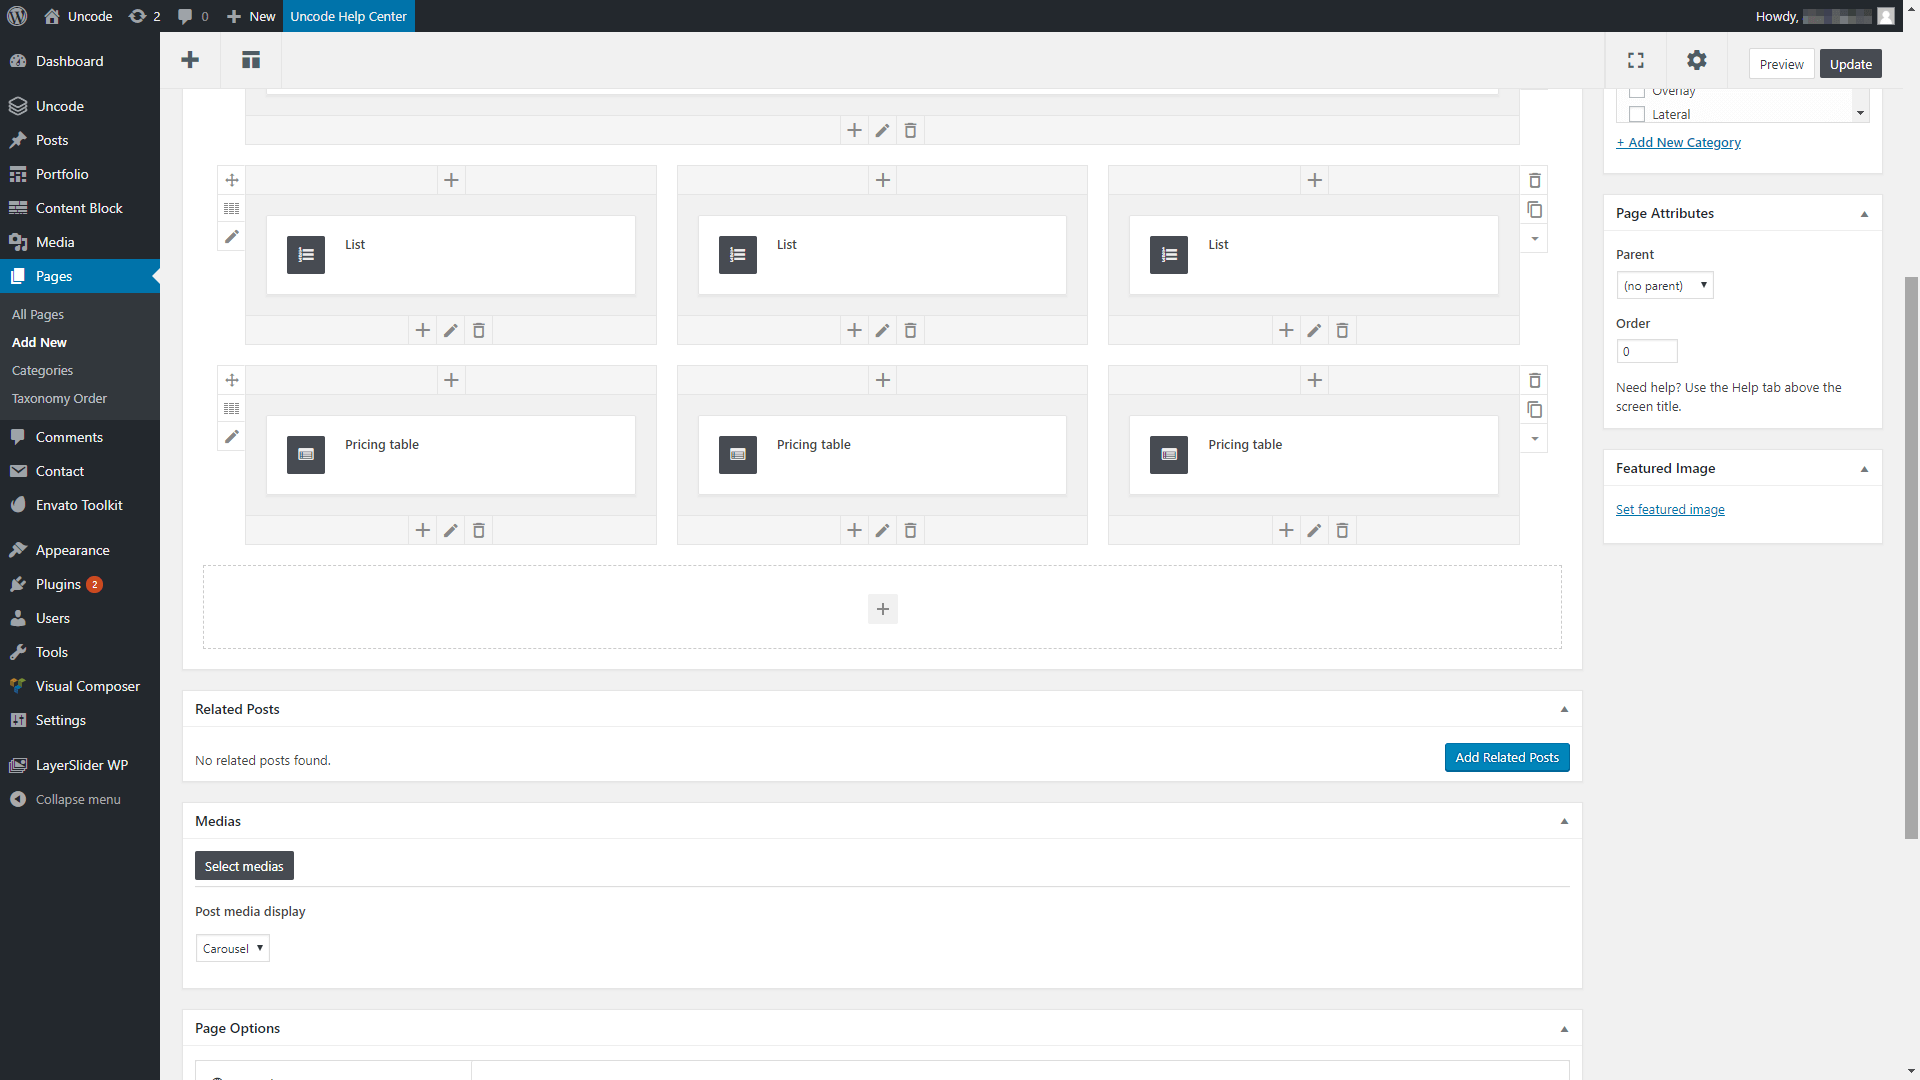
This provides you with the structure for your pricing table, but that’s not enough. Your next step will be to add in the information you want each column to include. To do that, choose one of the modules you just placed and select the Edit icon to make some changes.
A new window will pop up now, where you can enter the text for that column of your pricing table:
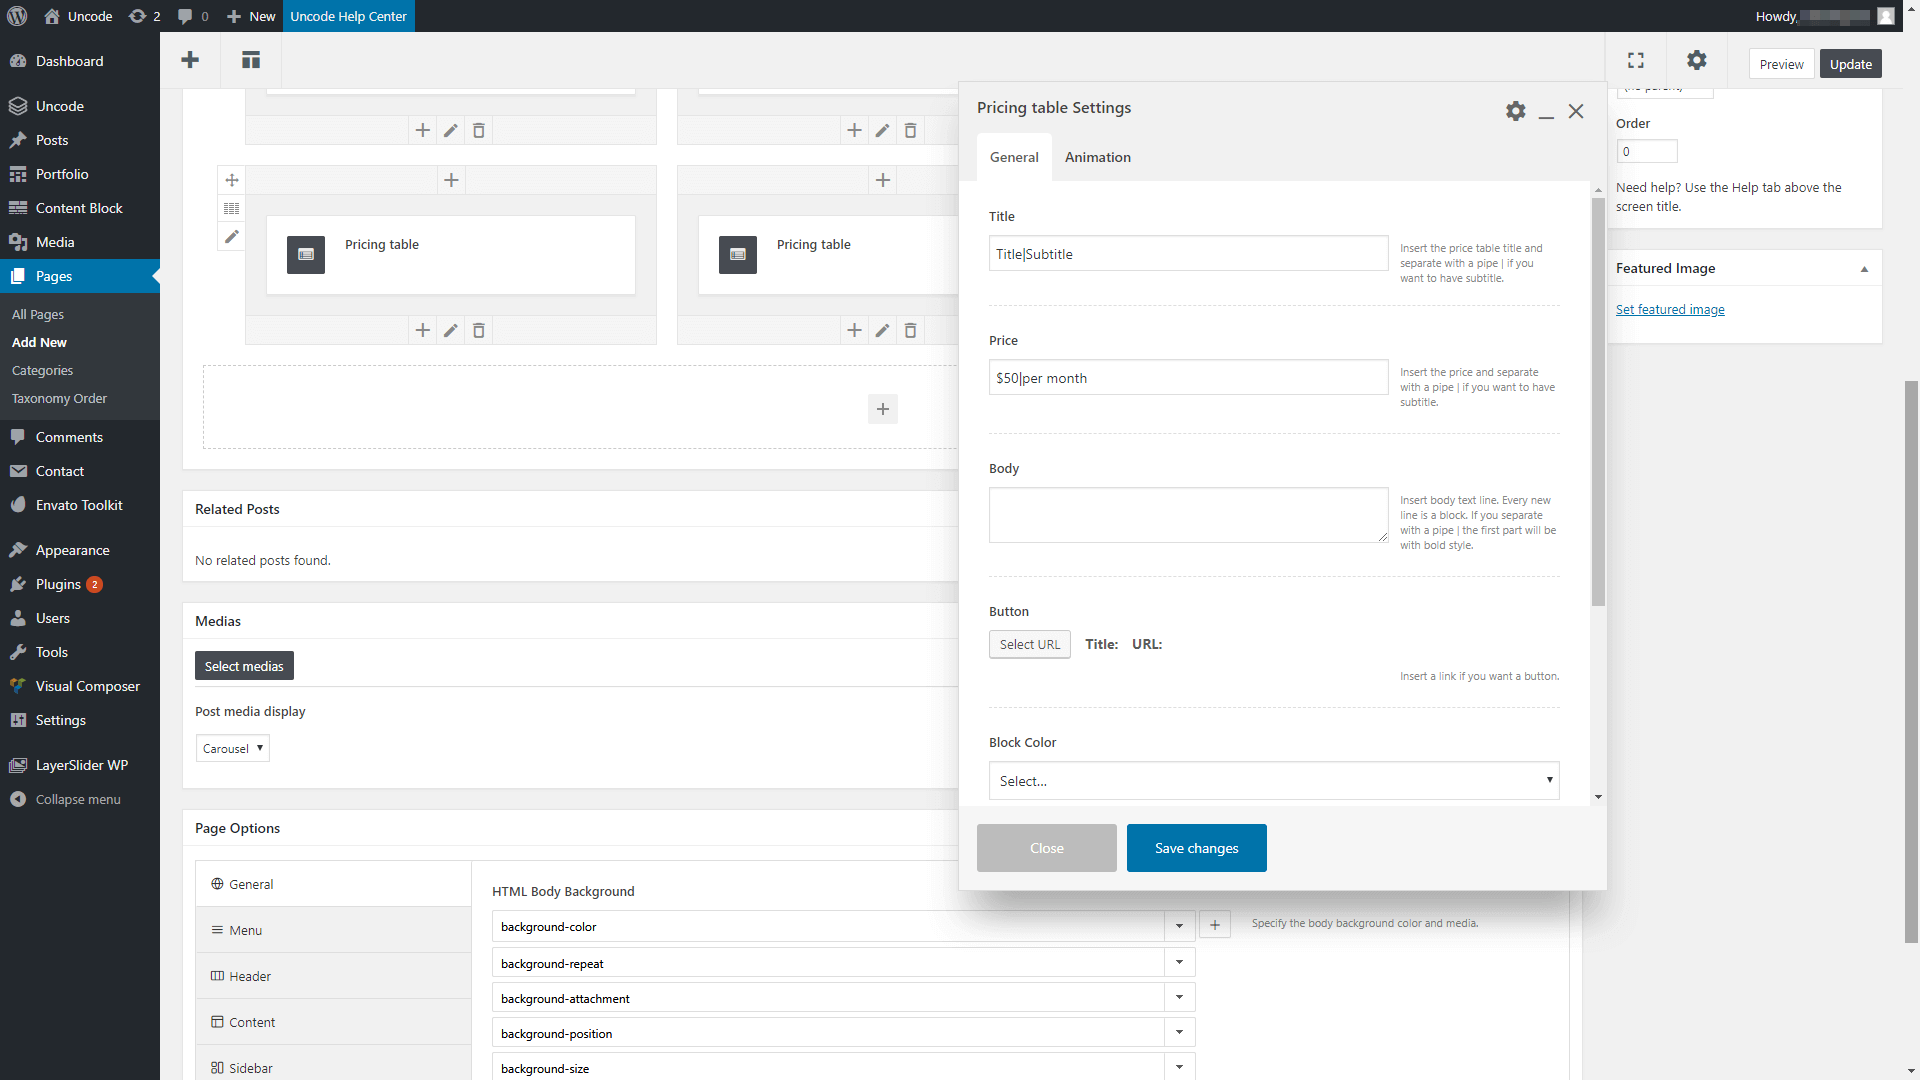
There will be some default text here, which you can replace with anything you like. Of course, you can also enter the price for that particular plan or option.
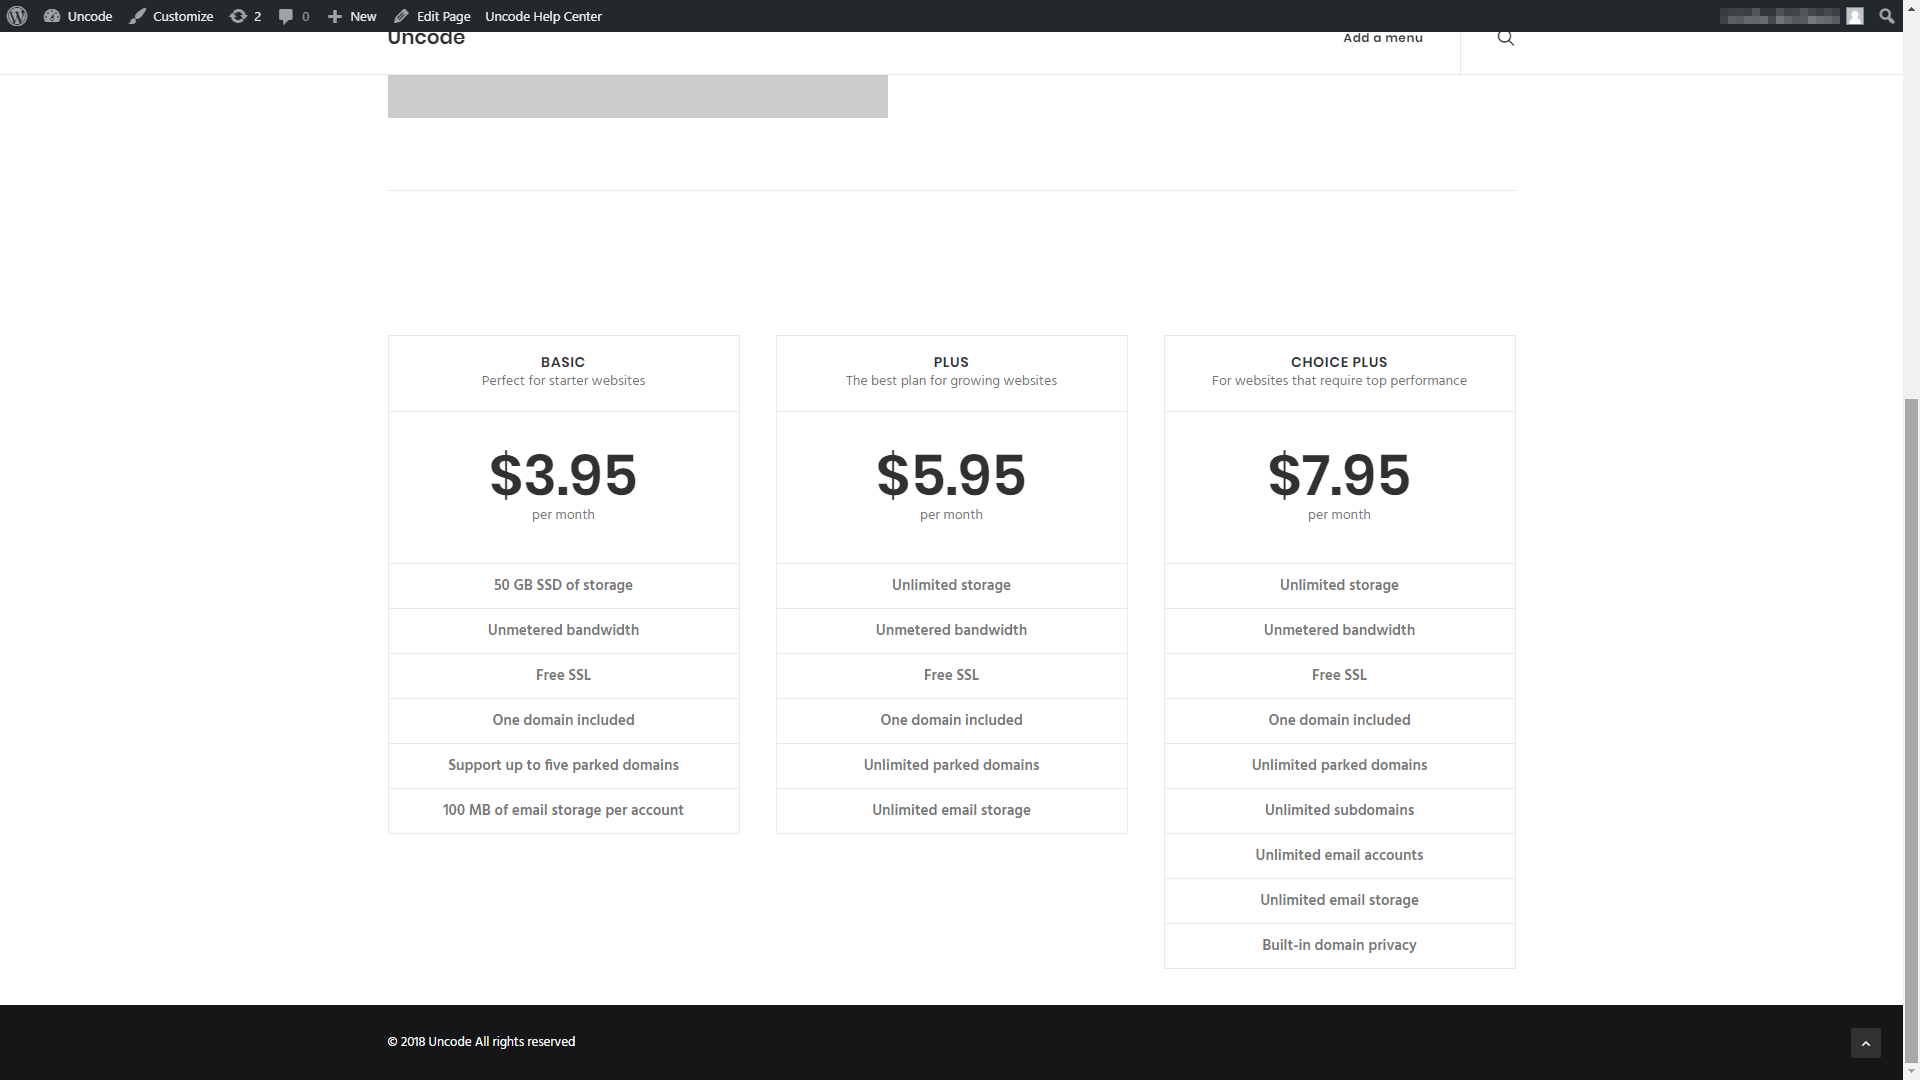
After you save your changes, repeat this process for each other column you want your table to include. By the time you’re done, your pricing table should be looking something like this:
At this stage, you could call it a day and publish your new pricing table. However, Uncode provides you with lots of customization options you can use to make your tables more visually appealing, which we’re going to cover next.
Step 2: Customize the Style of Your Pricing Table
To customize your pricing table, you’ll need to open up the edit window for each of its elements once more. In the previous step, you used the resulting menu to change the text and prices in each column. However, if you scroll down further within the settings window, you’ll notice that you also have some stylistic options:
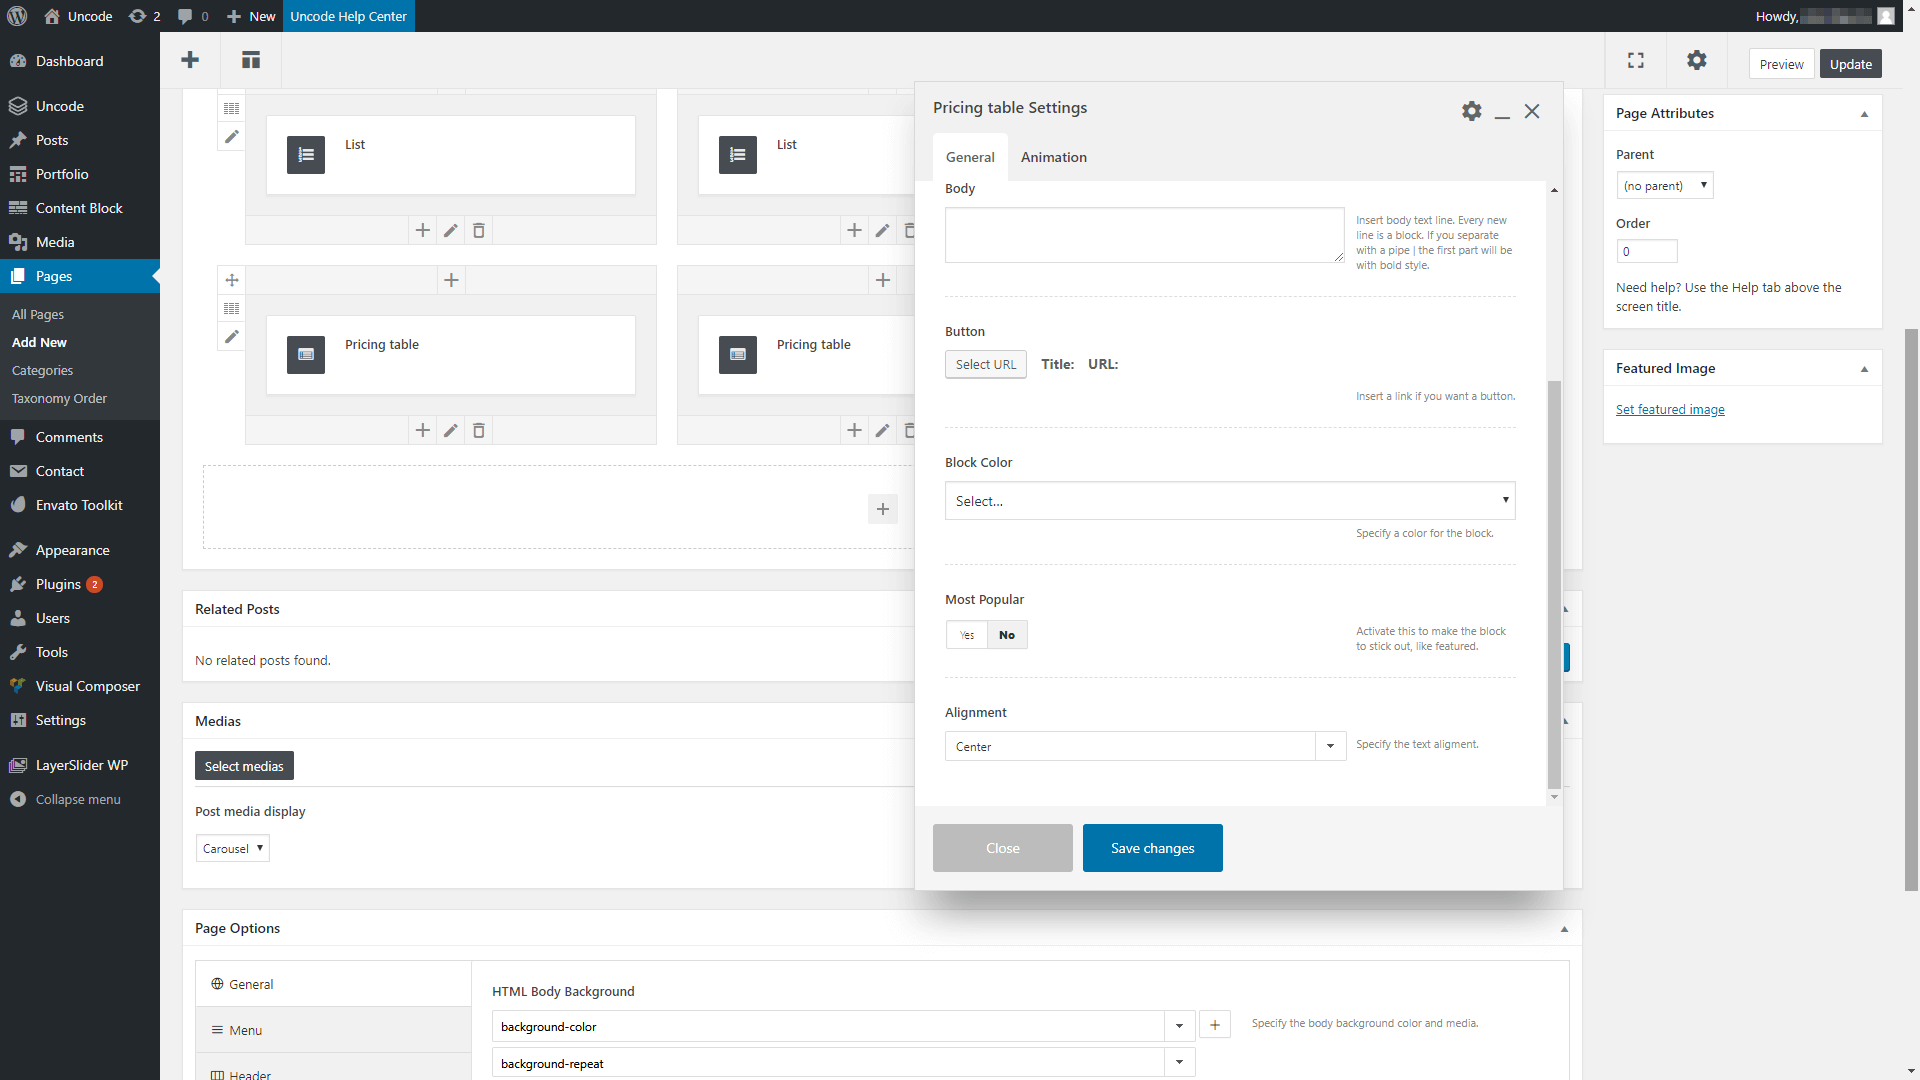
The two most important settings you can customize here are called Block Color and Most Popular. The first enables you to choose accent colors for the content within each column, as in the example below:
You have plenty of color options to play with. So feel free to test them all, until you find a combination you like. As for the Most Popular setting, you can use that option to make a particular column within your table more prominent, like this:
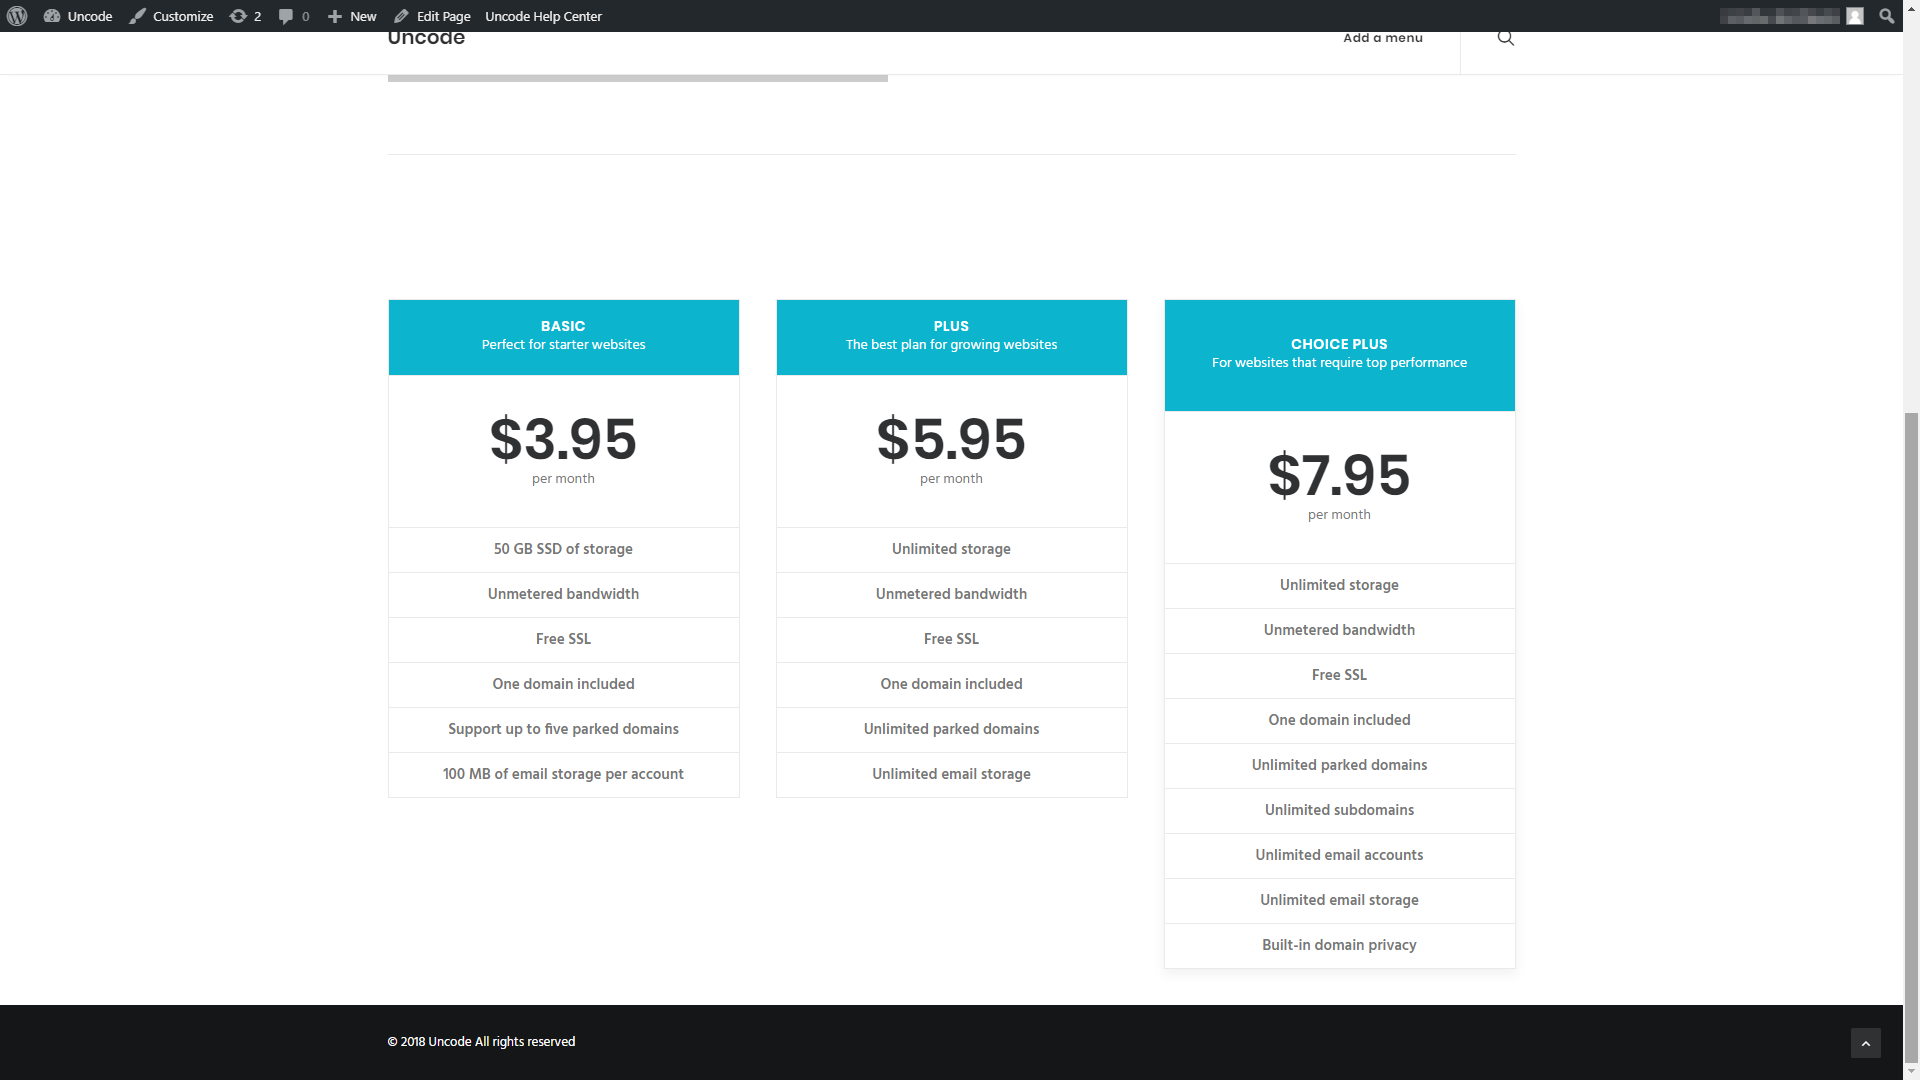
This is useful since in many cases, you’ll have one plan that you want people to pick over the others. By highlighting it, you’ll ensure that your visitors’ eyes are drawn to that column. However, keep in mind that you’ll still need to convince them the plan is worth their money, which depends on the content within that column.
In practice, you can complete this entire process in a matter of minutes if you already have all the content you want to include in your table ready to go. After that, it’s just a matter of making a few simple stylistic changes, and your table will be ready for publishing. Of course, you can continue to play around in the Uncode visual builder as much as you’d like, tweaking the look and layout of your pricing table until it’s just right.
Conclusion
There are a lot of situations where using pricing tables can be a game-changer. Service websites, for example, can benefit from showcasing all their plans and options side by side. That way, potential customers will be able to get the information they need quickly.
When it comes to creating pricing tables, Uncode makes your life simpler thanks to its dedicated Pricing Table element. This makes it simple to add a pricing table anywhere on your site. Then you can customize it as much as you’d like, in order to make it stand out.
Do you have any questions about how to design effective pricing tables? Let’s talk about them in the comments section below!