
The internet can often feel like a disconnected place, but the last thing you want is for your website to feel impersonal. Your organization’s site should represent who you are through its design and features. However, these elements are not always enough to make your site feel friendly and welcoming to visitors.
To add a more human touch to your site, consider including team member profiles. Displaying pictures of key personnel along with a short bio puts a face to your company or group, and is a creative way to appeal to visitors. What’s more, these profiles can also serve a functional purpose by including contact information and social media links.
In this article, we’ll discuss team member profiles and explain why you might want to add them to your site. Then we’ll show you an easy way to do so in Uncode, using the Media Gallery module. Let’s get started!
Why You Should Consider Adding Team Member Profiles to Your Site

Many company websites offer lists of names and contact information for key personnel, which is functional but hardly welcoming. However, you can easily address this issue by taking things a step further and including team member profiles on your site.
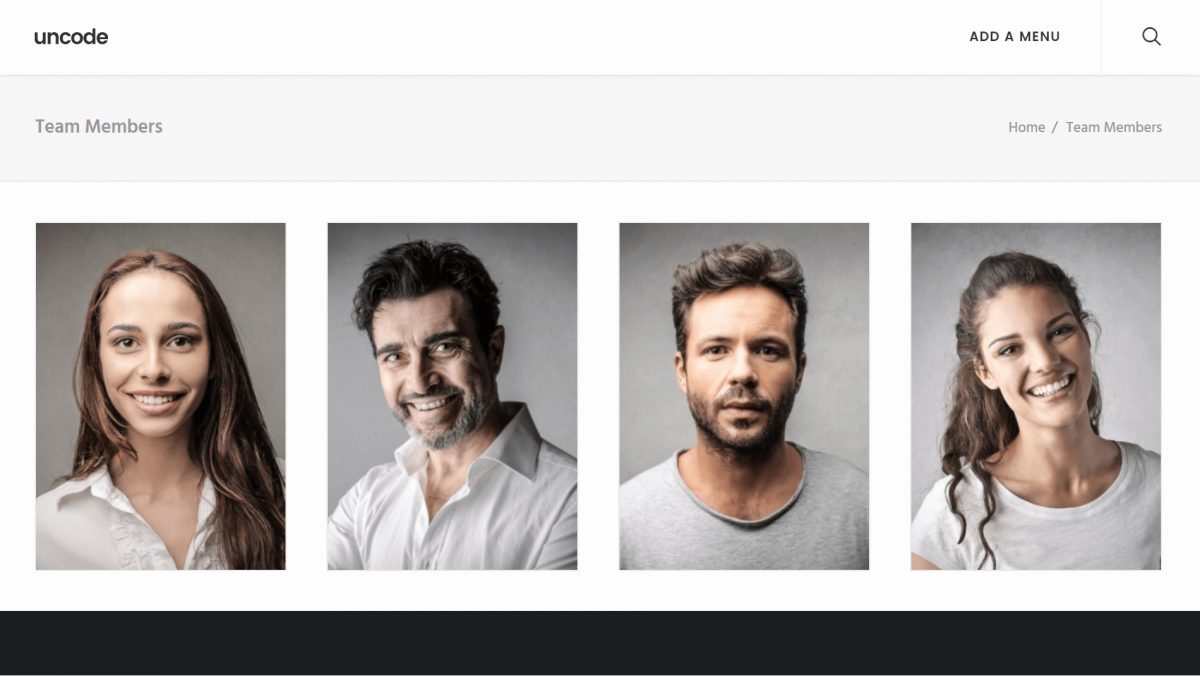
Team member profiles add a personal touch to your site, and usually consist of a headshot of each individual, along with some key information such as their name, position, and email address. Businesses, schools, non-profit organizations, and similar groups can all benefit from giving their audiences a clearer picture of who’s behind the curtain.
There are plenty of other reasons to add team member profiles to your site:
- It encourages trust by providing your organization with a human face.
- Visitors can find and contact the specific individuals who can help them with their issues or requests.
- Team members are able to express themselves by adding a creative bio and links to their social media accounts.
Of course, too much of a good thing can be overwhelming, so if you run a large company you may want to carefully select who to include rather than creating a profile for every employee. Try featuring one or two key people from each position or department instead. The goal is to showcase your organization as a collection of dynamic, approachable individuals, rather than a faceless entity.
How to Add Team Member Profiles to Your Website With Uncode (in 2 Easy Steps)
Before we get started, you’ll need to make sure some key plugins are installed in your version of Uncode. From your WordPress dashboard, navigate to the Plugins tab and make sure that the Uncode Core, Uncode Visual Composer, and Visual Composer Clipboard plugins are all installed and activated.
If any of these plugins don’t appear on the list, go to Uncode > Install Plugins to enable them. Then move on to the first step!
Step 1: Create a Media Gallery and Add Team Member Photos
Start out by adding a new page and giving it a title. Make sure you’re in the Visual Composer editing mode – if not, click on the Backend Editor button so that it changes to Classic Mode:
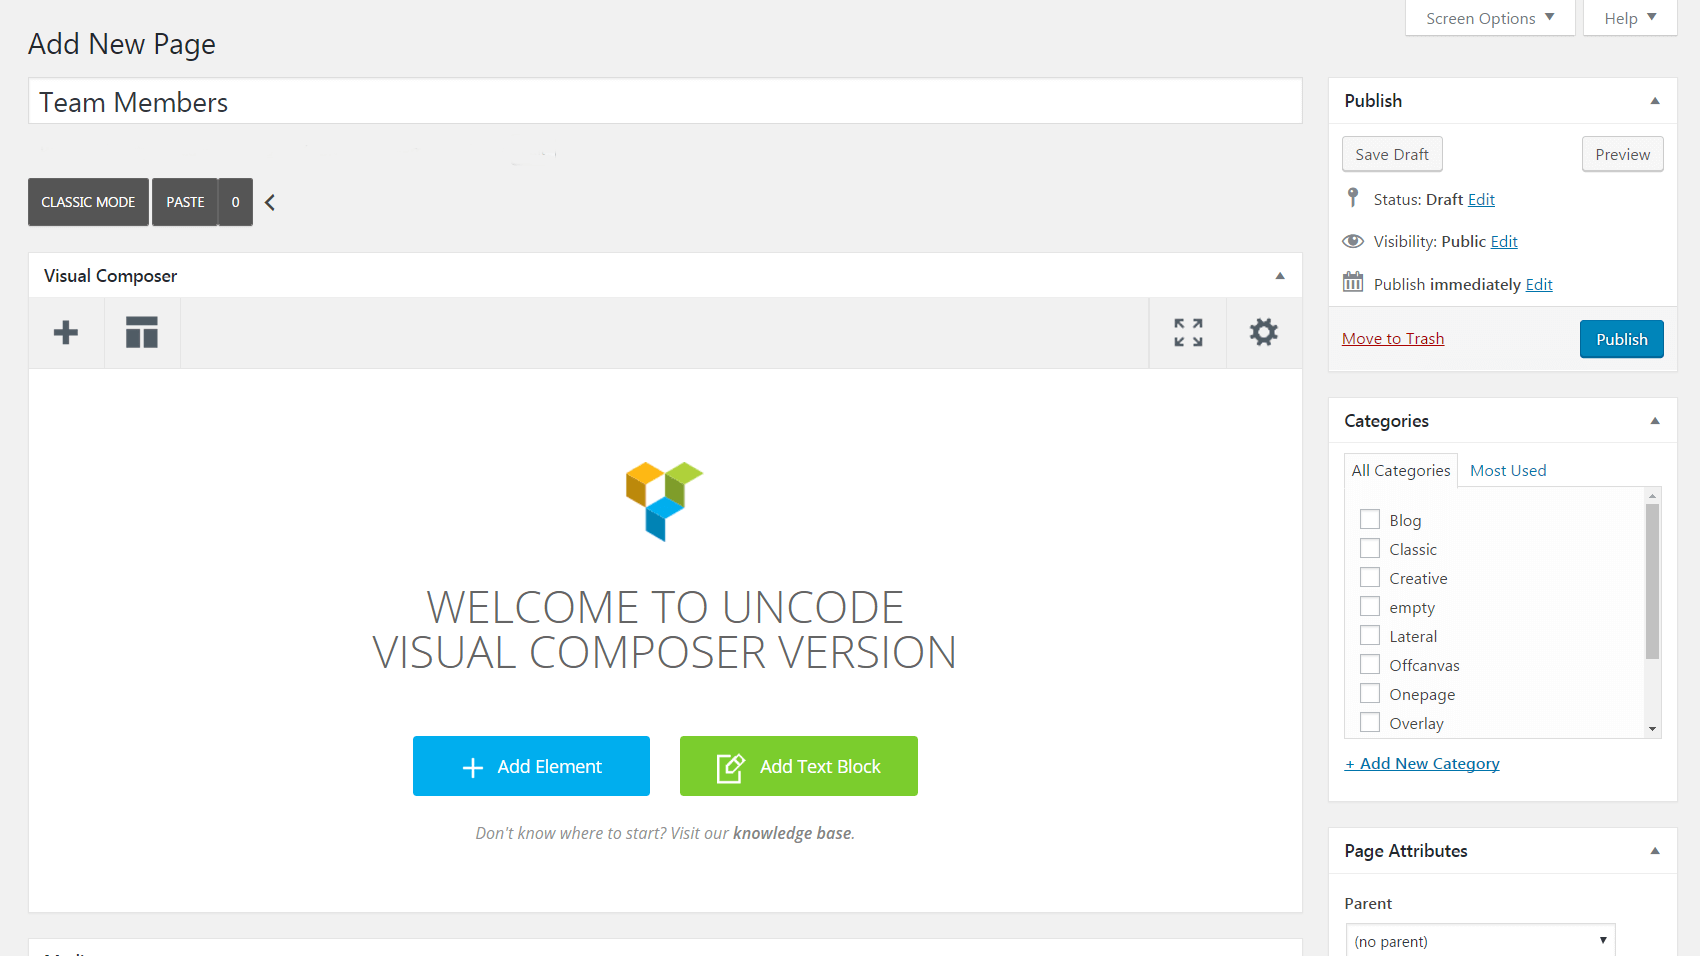
Next, choose Add Element and insert a Media Gallery module into the page. This is a handy element that enables you to organize media files into a gallery and customize its design in almost any way you’d like. When you add the module, you’ll be shown the Media Gallery Settings:

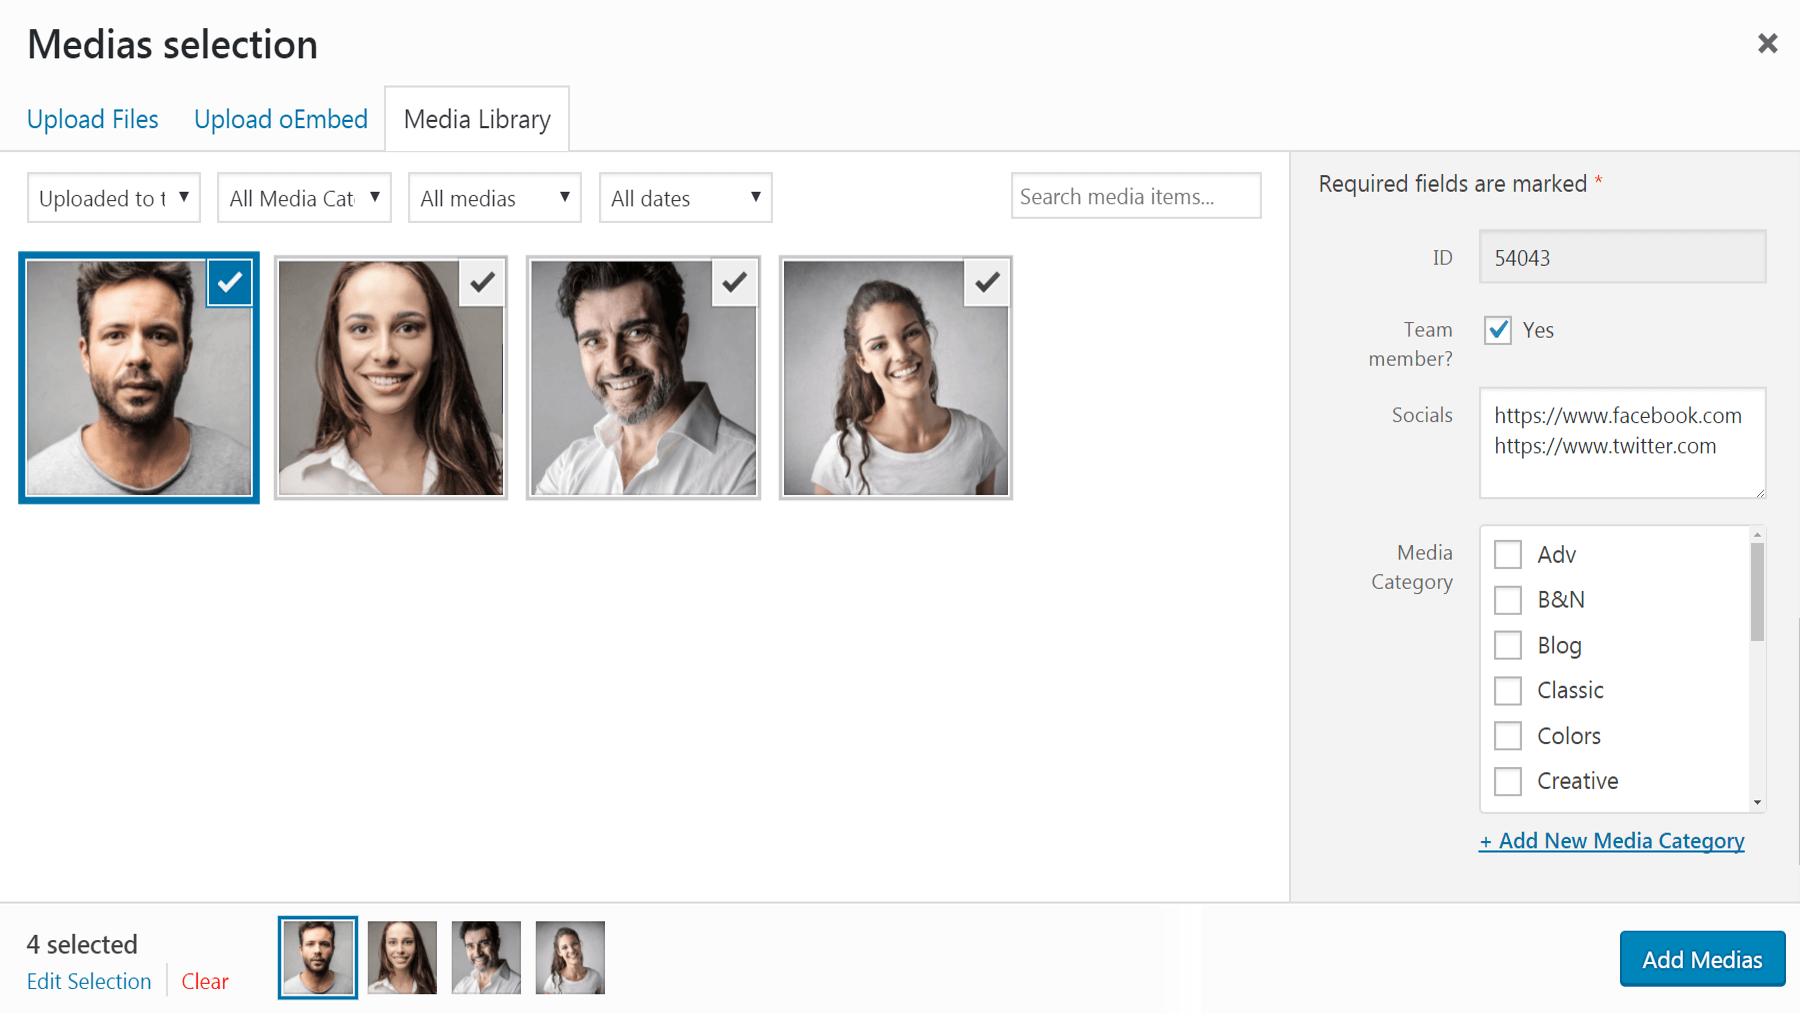
Click on the plus sign under Medias, which will take you to your media library. Here, you can select the team member photos to include in your gallery (or upload them if you haven’t already). For each picture, scroll to the bottom of the Attachment Details section on the right side of the screen, and check the Team member? box.
This will enable a new field called Socials. If you enter links to the team member’s social media accounts here, they’ll appear as icons under the final profile. Make sure to enter the full URL, including the http:// or https:// (for example, https://www.facebook.com/team-member):
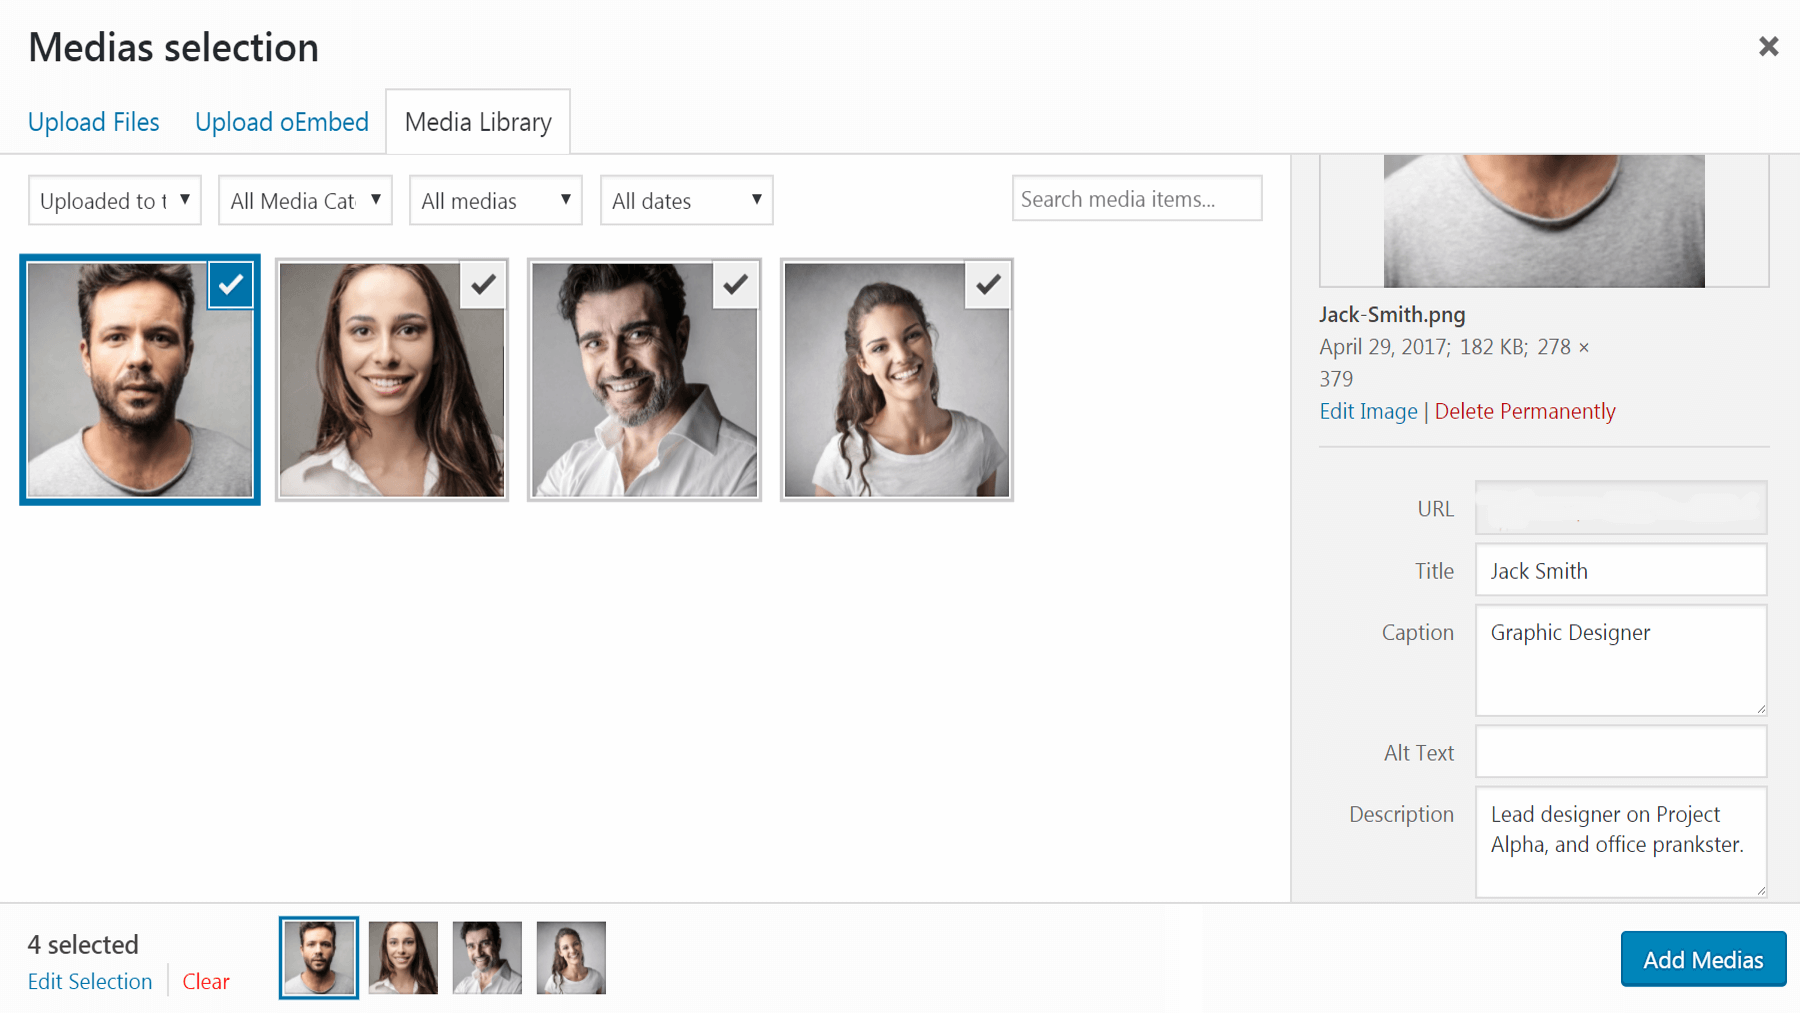
You can also use the standard fields under Attachment Details to enter the rest of the information for each team member. We recommend entering their name under Title, their position under Caption, and their bio under Description:
When you’ve customized the pertinent information for all of your team member photos, select Add Medias to include them in your gallery. If you want to add or remove a team member later (or if you want to edit any of the details), simply click on the plus icon to reopen the Medias selection screen.
Now that your gallery is in place, it’s time to tweak its appearance.
Step 2: Customize Your Media Gallery Settings
This step is your opportunity to design your team member profiles to look just right. Your approach and choices here will of course depend on your personal preferences, but we’ll walk you through some of the key settings you may want to check out. Let’s go through the Media Gallery Settings tab by tab.
General
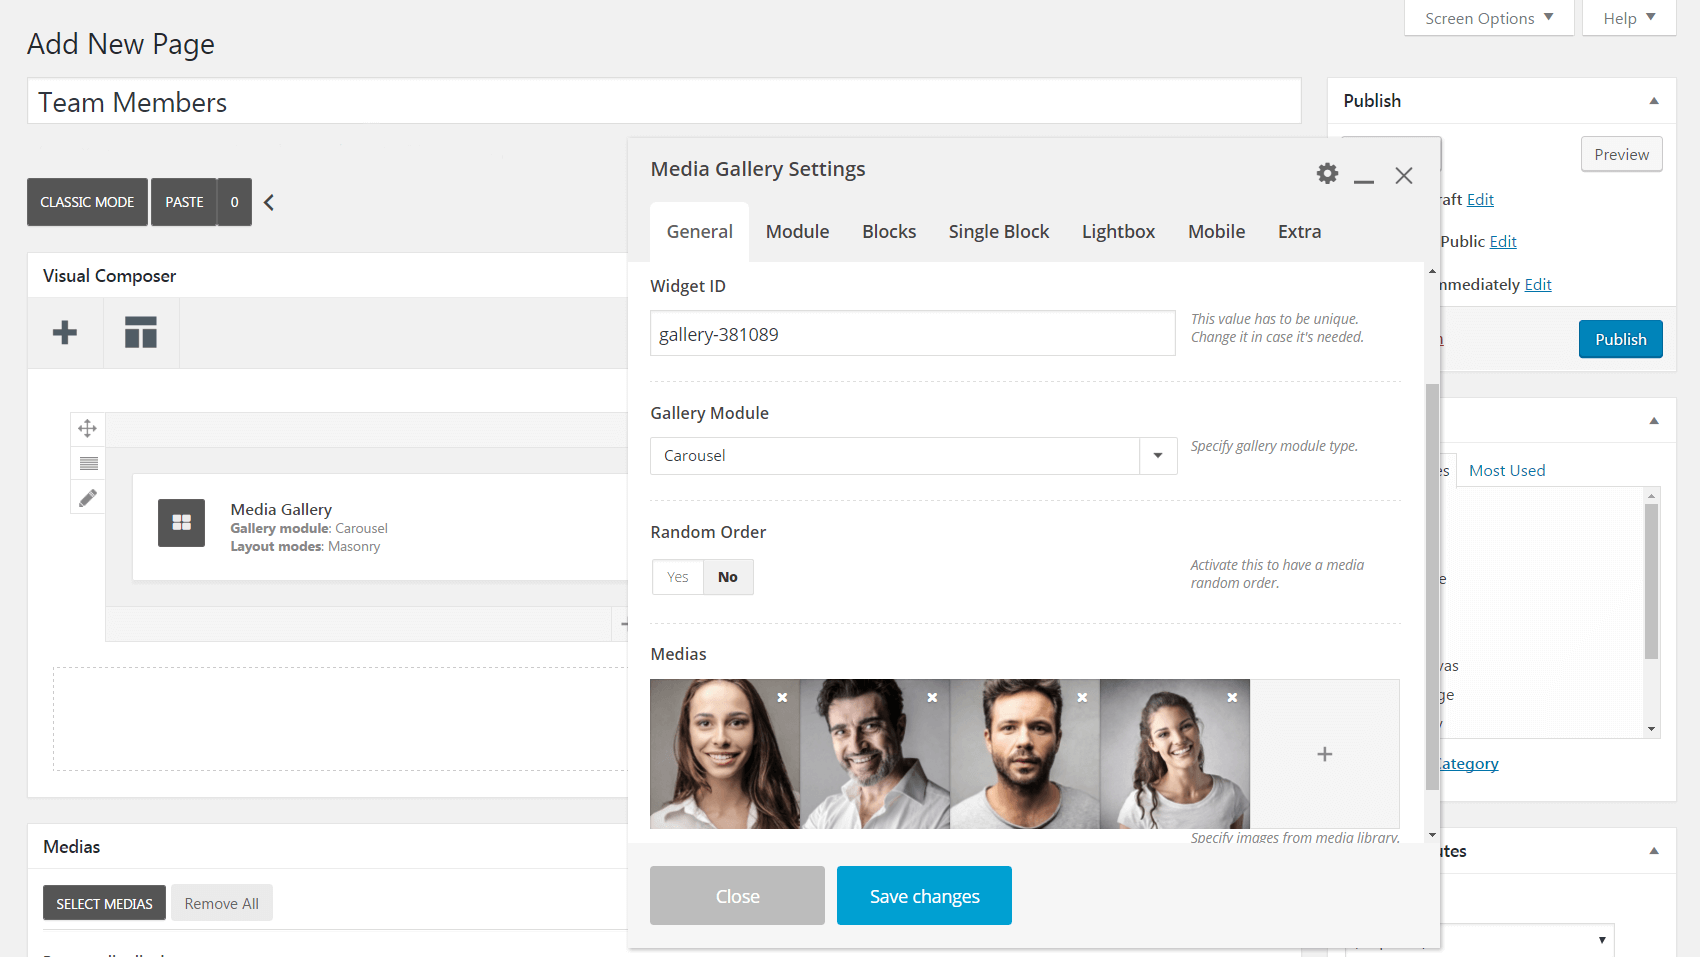
First up is the General tab, which you’ve already used to add your team member photos. You can now drag the thumbnails around to re-order them, or you can choose the Random Order option instead. Also, you can change Gallery Module to Carousel if you want the profiles to rotate across the page:
If you decide to stick with a static gallery instead, you can change the layout of your profiles using the Layout Modes field (use the corresponding tool to see what effect each choice will have).
Module
Next up is the Module tab. Here you can add a background color that will appear behind your profiles, and you can also add padding around elements and between the gallery and the rest of the page. In the Style field, selecting Masonry will display your photos in their original sizes and shapes, and choosing Metro will scale them all to the same size:
If you continue scrolling, you’ll find the Media section, which lets you decide what elements to include in your profile. For example, you can click on Title, Caption, Description, and Team socials to display the information you entered for each photo in step one:
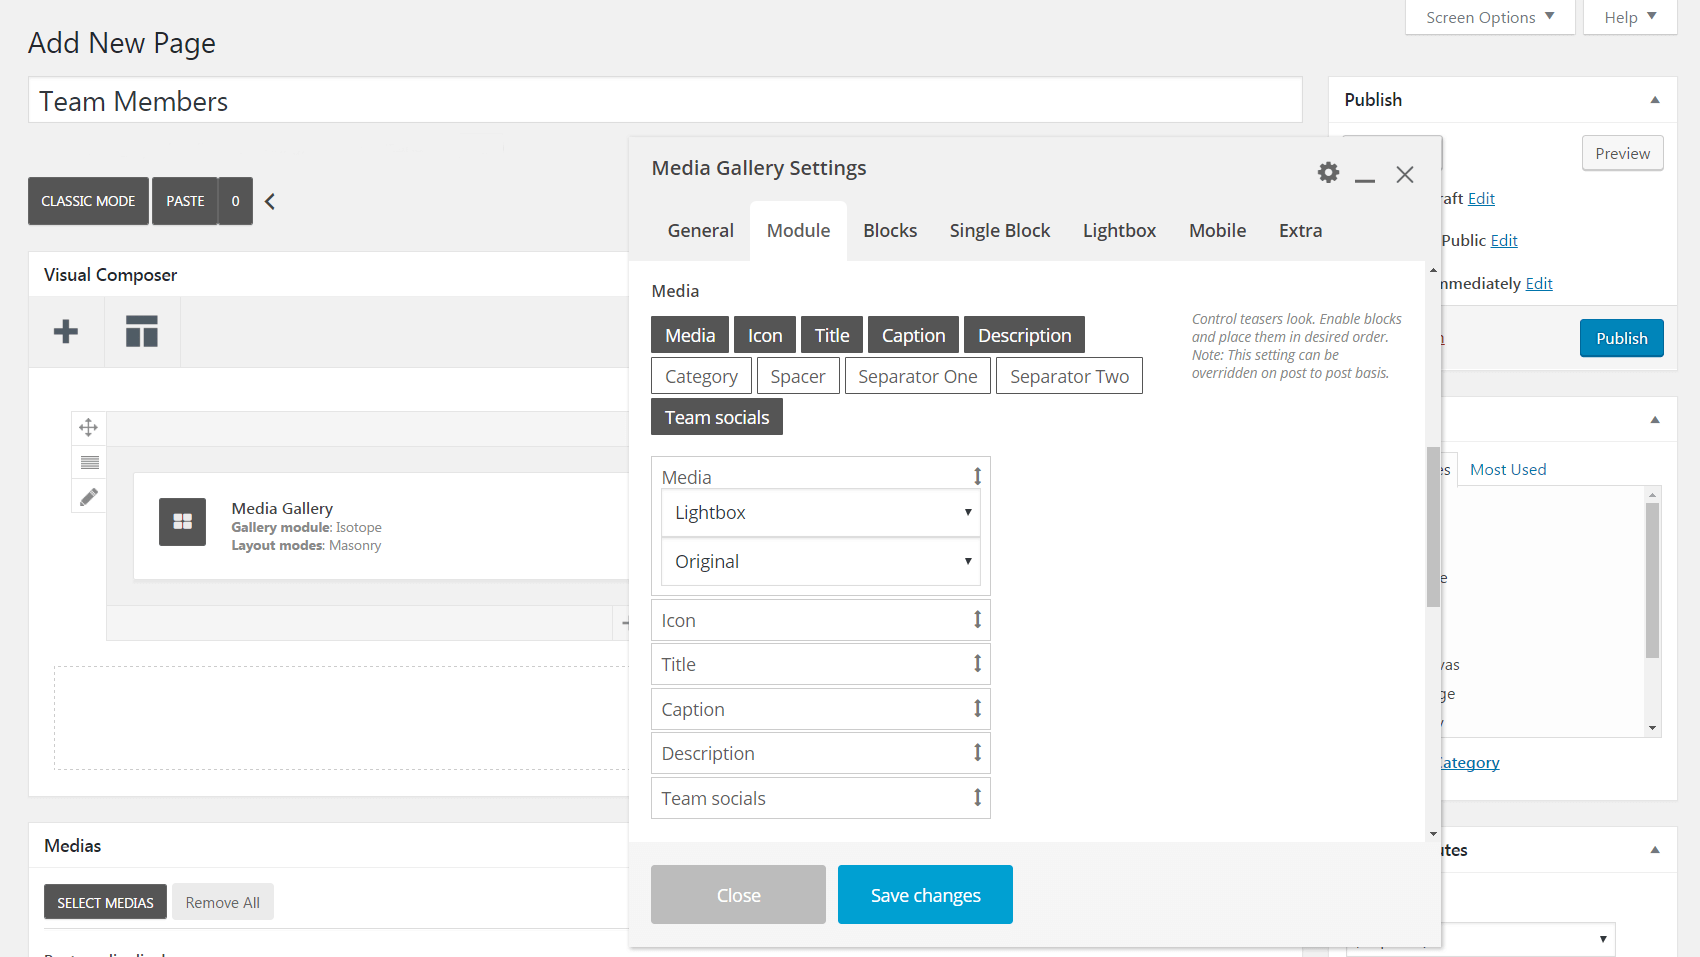
You can also add a space or separator between each line of text. Once you’ve added all the elements you want, you can drag them up and down to customize their order.
Blocks
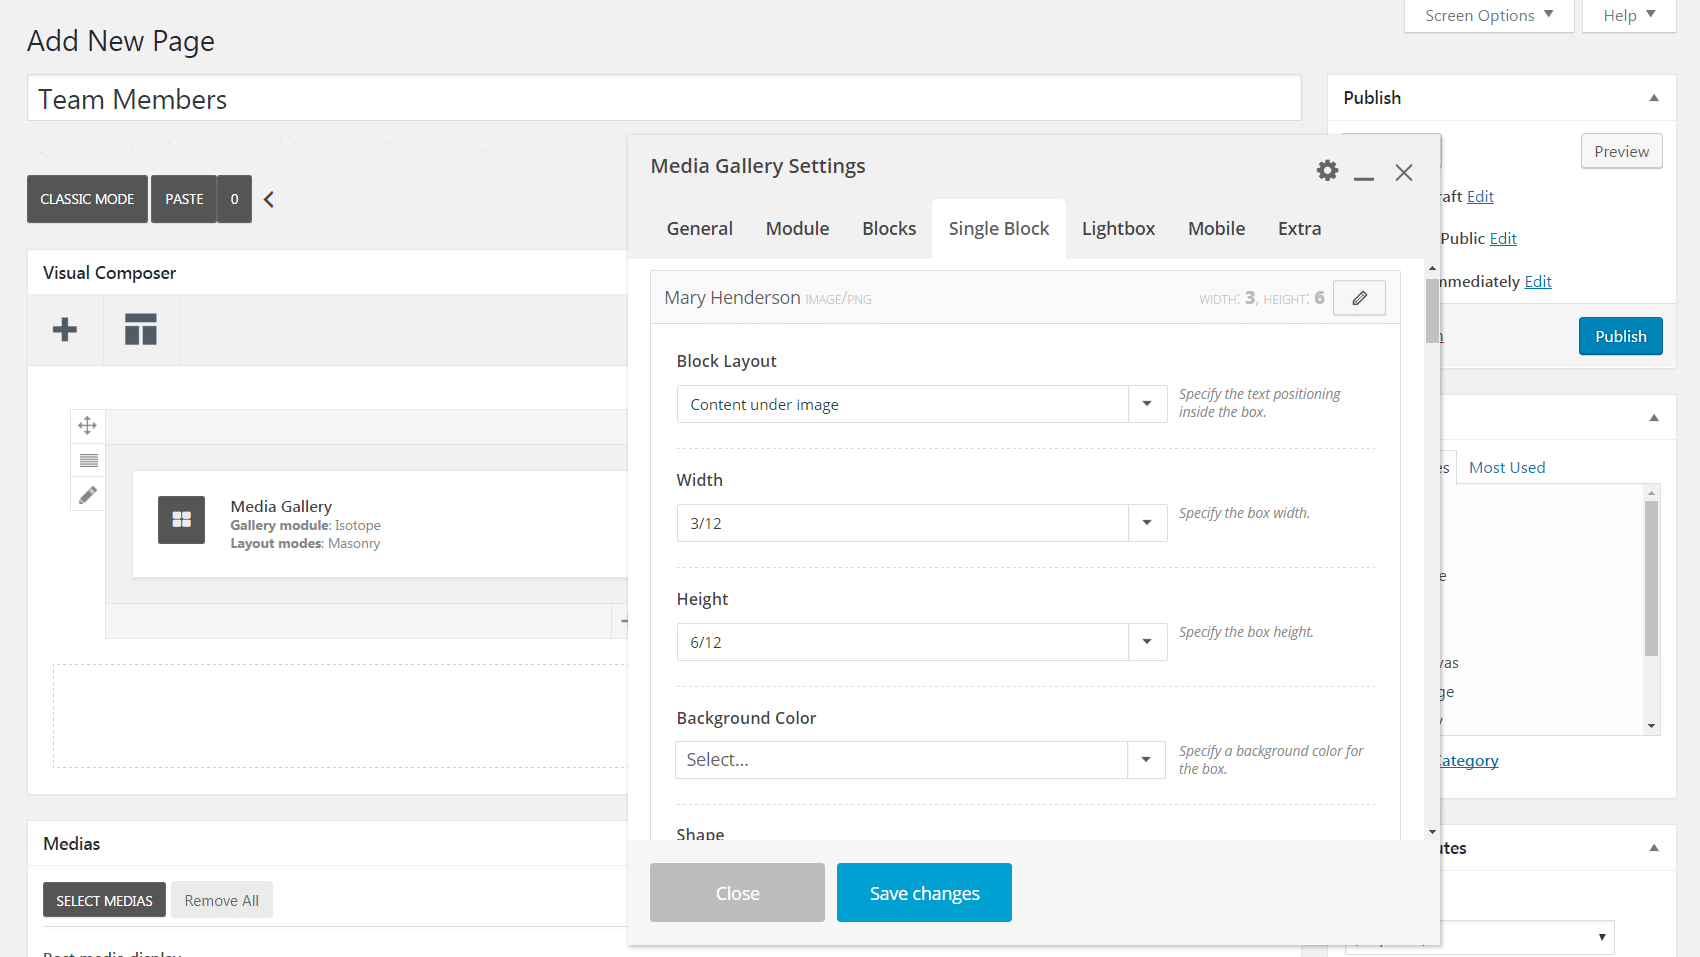
Let’s move on and check out the Blocks tab. The first field, Block Layout, is particularly important – this determines where you want your team members’ information to be displayed. Content under image, for example, does exactly what the name suggests:

On the other hand, the Content overlay option makes your text appear on top of the images. If you select this feature, scroll down and check out the Overlay Text Visibility field. You can select Hidden to reveal the text only on a mouseover, or Visible to make it appear by default.
There are plenty of other options in this tab to customize your overlay’s color, animation, opacity, and more. Plus, in the Width field you can determine how many profiles will appear in each row (smaller fractions result in tinier thumbnails, and more profiles per row). Finally, if you scroll down further you’ll find various ways to personalize your profiles’ text.
Single Block and Lightbox
So far, you’ve been making changes to all of your profiles at once. However, if you want to customize each profile individually, you can do that in the Single Block tab. Simply click on the pencil icon next to one of your profiles, and you’ll be able to customize the same set of options from the Blocks tab, but only for that specific team member:
Finally, if you preview the page that includes your team member gallery, you might notice that clicking on a thumbnail displays a zoomed-in version of the photo (along with navigation arrows):
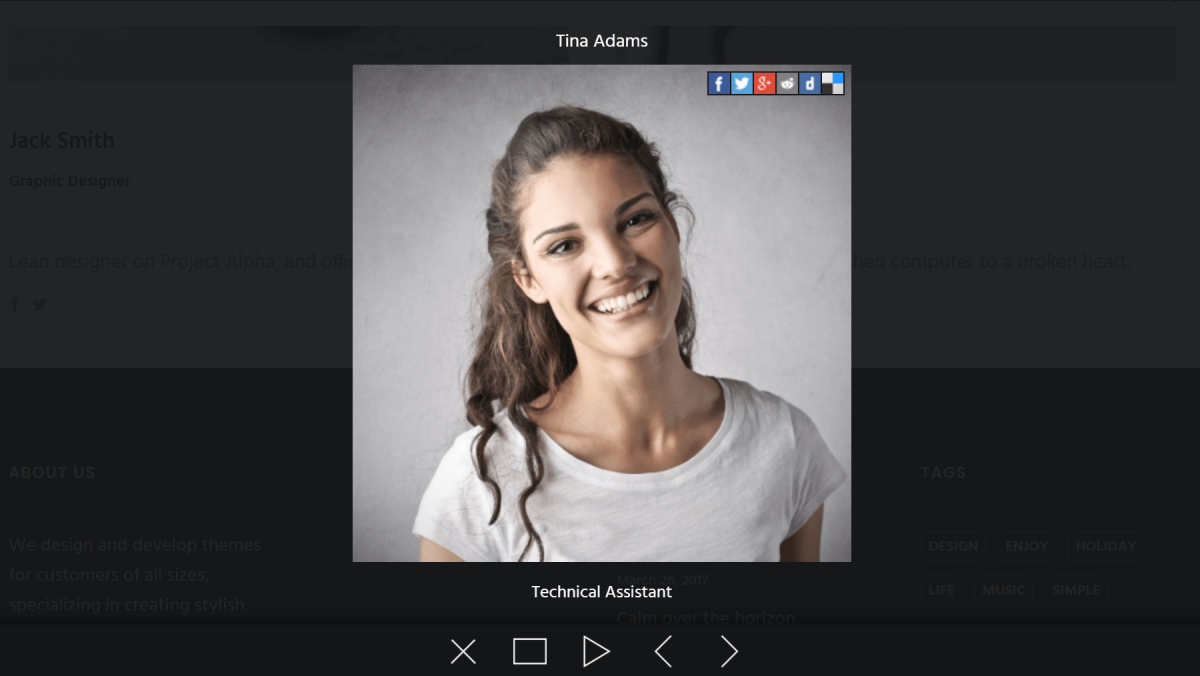
This is called the Lightbox feature, and you can make changes to it in the corresponding tab. You can decide what information to display in lightbox mode, the scrolling direction, the background color, and more.
That’s it! Of course, there are more settings in this menu that we haven’t specifically mentioned, so feel free to spend some time experimenting with and tweaking them until your team member gallery looks just right. For more inspiration, check out some examples of the designs and layouts you can achieve with the Media Gallery. When you’re happy with what you’ve built, don’t forget to hit Publish to create your new page!
Conclusion
Every organization is made up of individuals, but it can be easy to forget that online. Humanizing your website by showing off the people who make your company tick is the perfect way to stand out from the competition. Fortunately, Uncode makes it easy to add team member photos and contact information to your site.
To create a gallery of team member profiles, simply follow these two steps:
- Create a media gallery and add team member photos.
- Customize your media gallery’s settings.
Do you have any questions about how to display your team member profiles in Uncode? Let us know in the comments section below!