Adding multiple audio files or videos to a single web page can be tricky. Media players often take up a lot of space, and can result in pages that are complicated to navigate. Plus, embedding videos from external sources often doesn’t work smoothly.
With Uncode, you can organize your audio and video files using galleries, just as you can with images. That’s something WordPress doesn’t enable you to do out of the box. Plus, our theme can also help you customize the way your galleries look, so they’ll fit in with your site’s style.
In this article, we’re going to talk about when it makes sense to use video and audio galleries on your website. Then we’ll teach you how to create them in just two steps. Let’s get to it!
Why You Might Want to Create Video and Audio Galleries
Galleries all work much the same, regardless of what elements they’re made of. Most galleries are composed of images, of course, since it’s generally easiest to add them to your website. Images tend to weigh less than video or audio files, and you can easily adapt them to any resolution you want.
However, these days there are no longer any technical difficulties stopping you from adding multiple videos or audio files to any page you want. Embedding them in WordPress is simple, and you can even use third-party services to host the files, so they don’t take up space on your server.
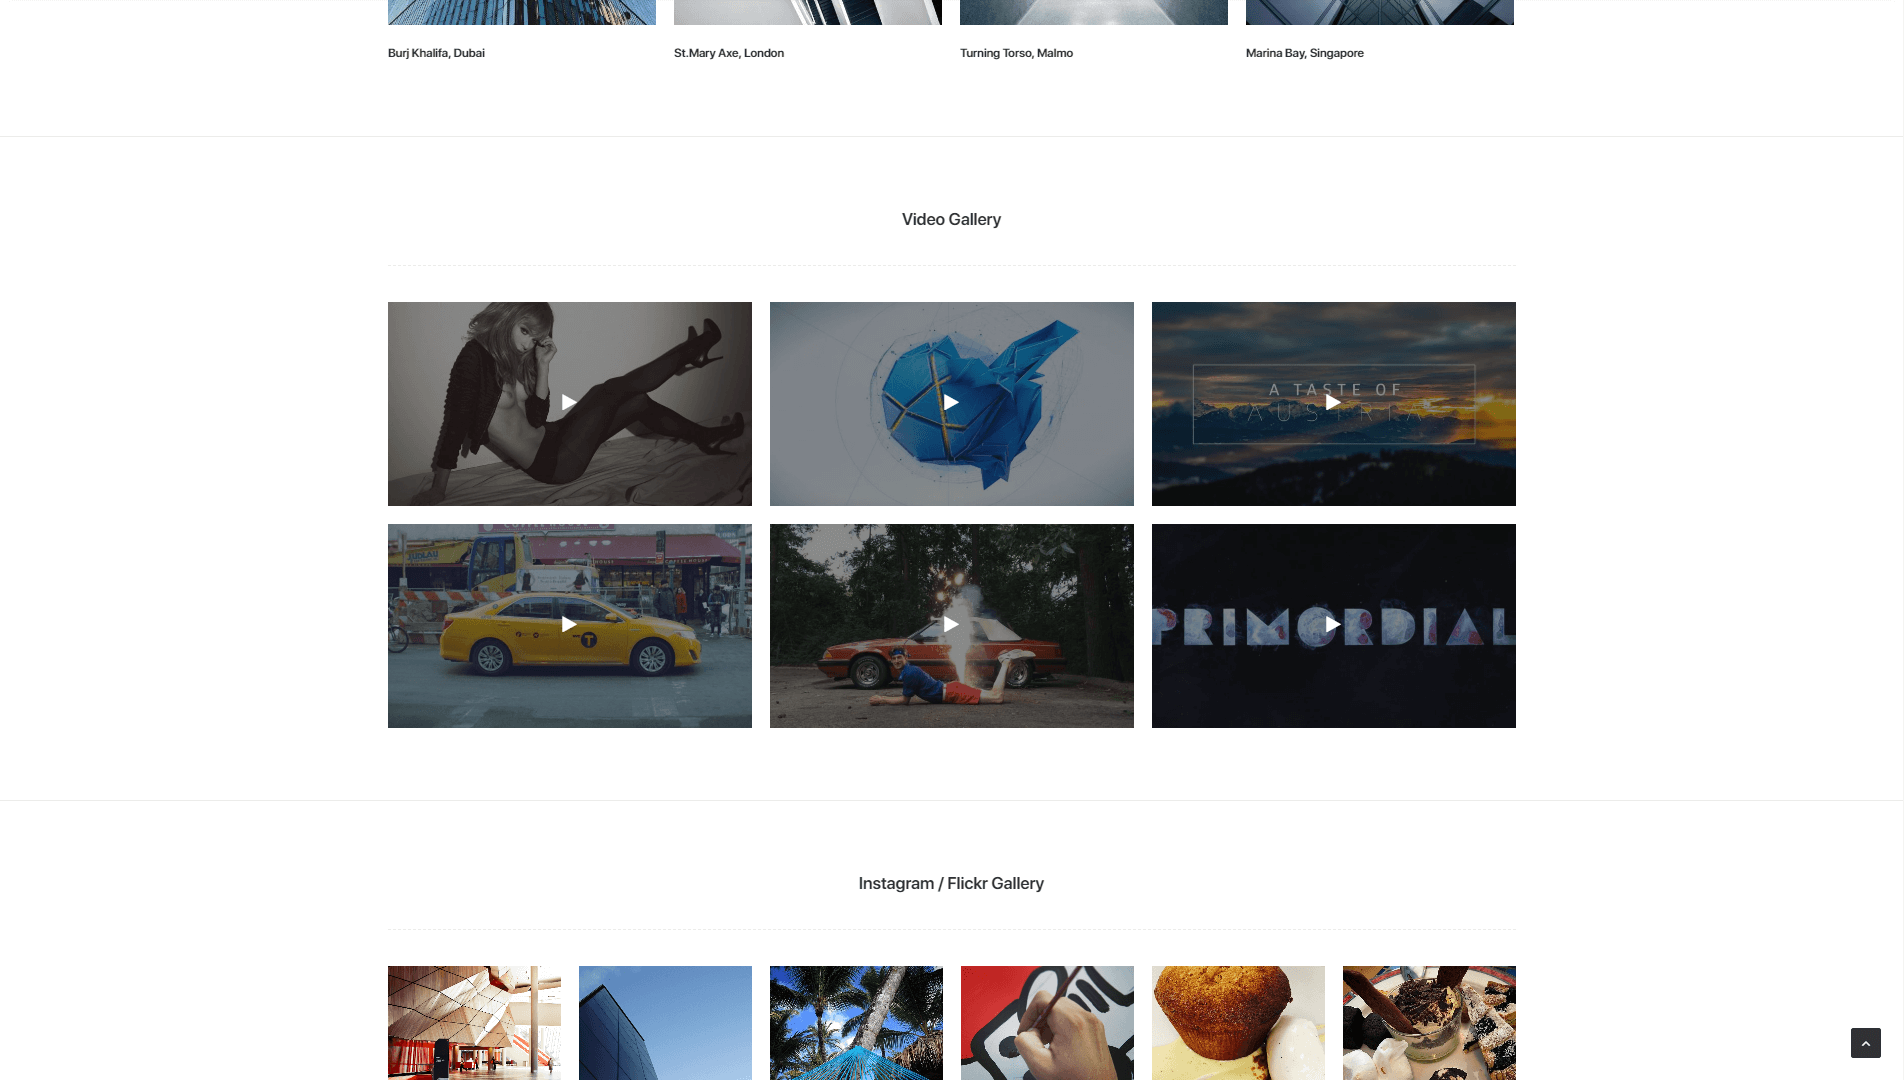
Plus, if you’re using the Uncode theme, you can organize all those audio and video files into galleries. Adding a gallery to your site takes up a lot less space than placing multiple files side by side. In fact, Uncode galleries automatically resize your videos so you can display them one after another in neat rows.
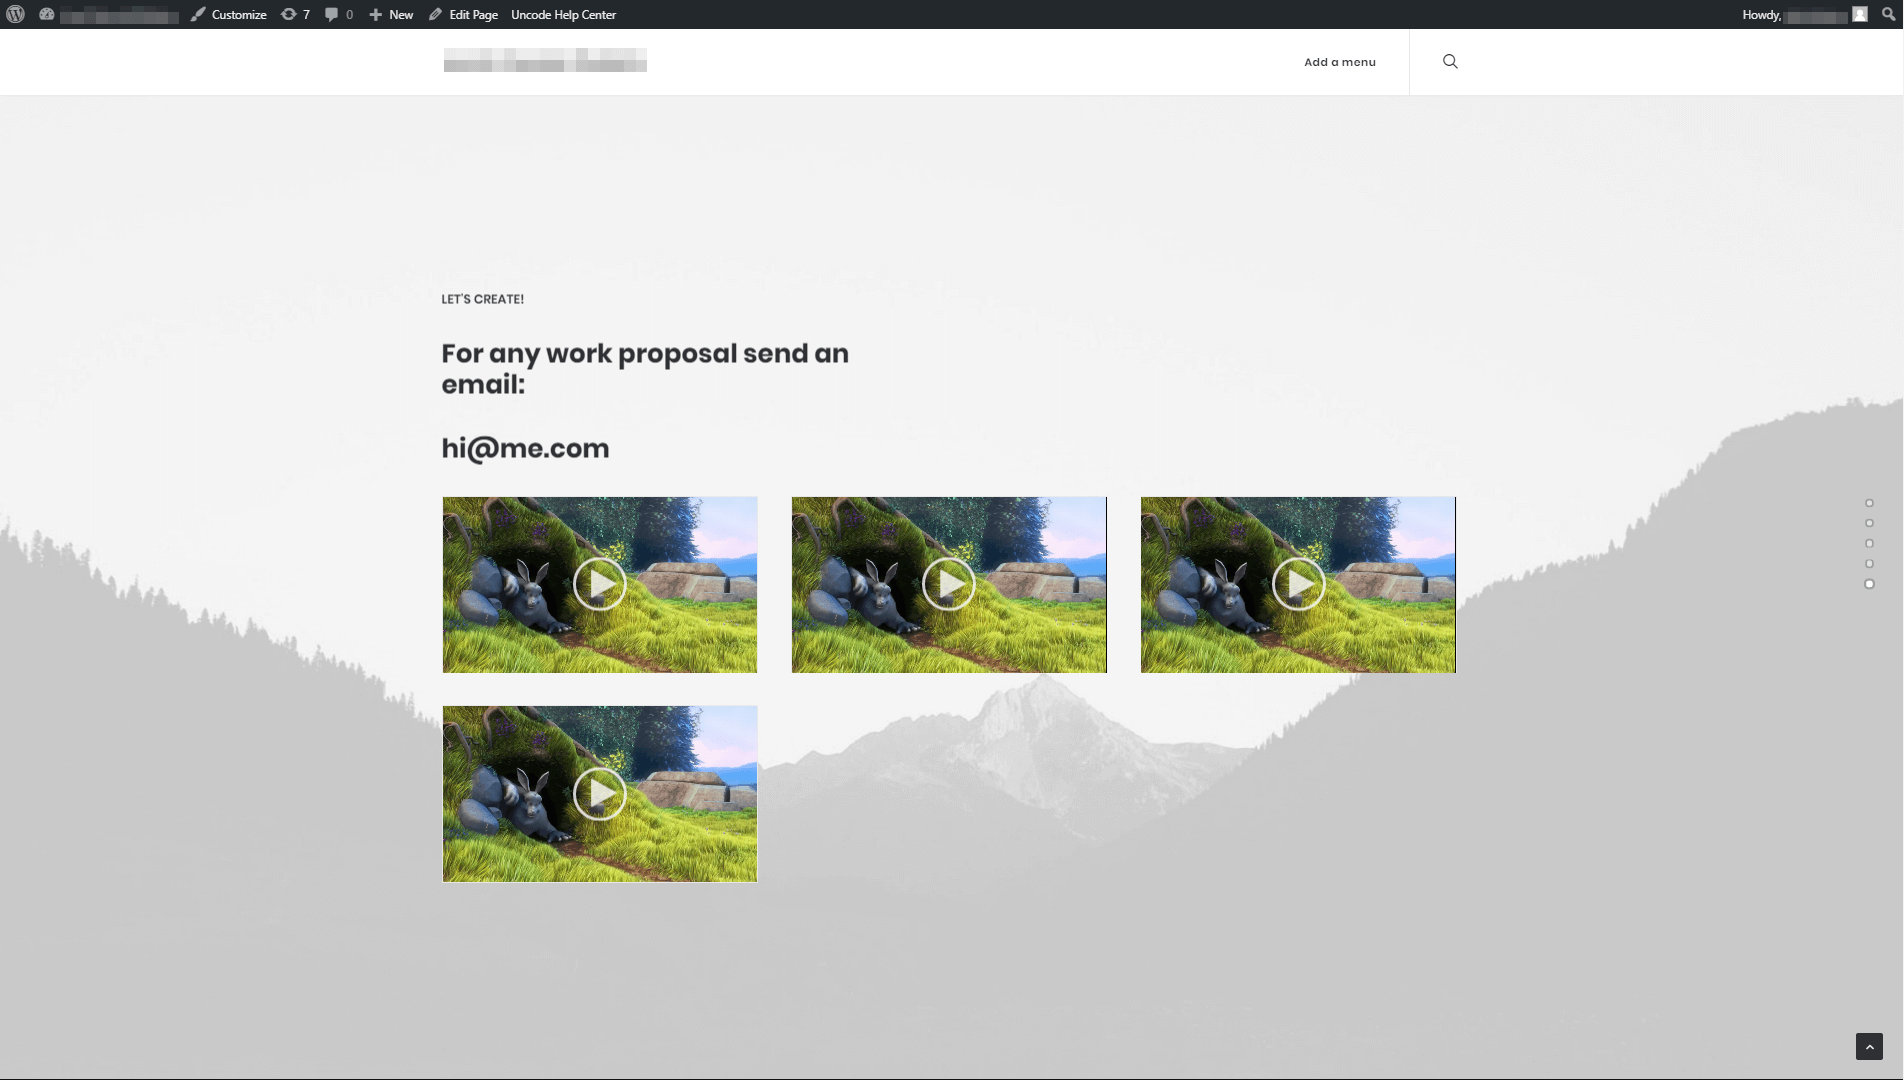
Moreover, you can make it so that when visitors click on a video, the player will open in a lightbox, as seen below:

This way, videos won’t take up as much space on your pages, but users will still be able to watch them in all their full-sized glory. What’s more, many external video players look unpleasant if you just embed them as-is. With Uncode, your videos show up as clean images with a Play icon overlay.
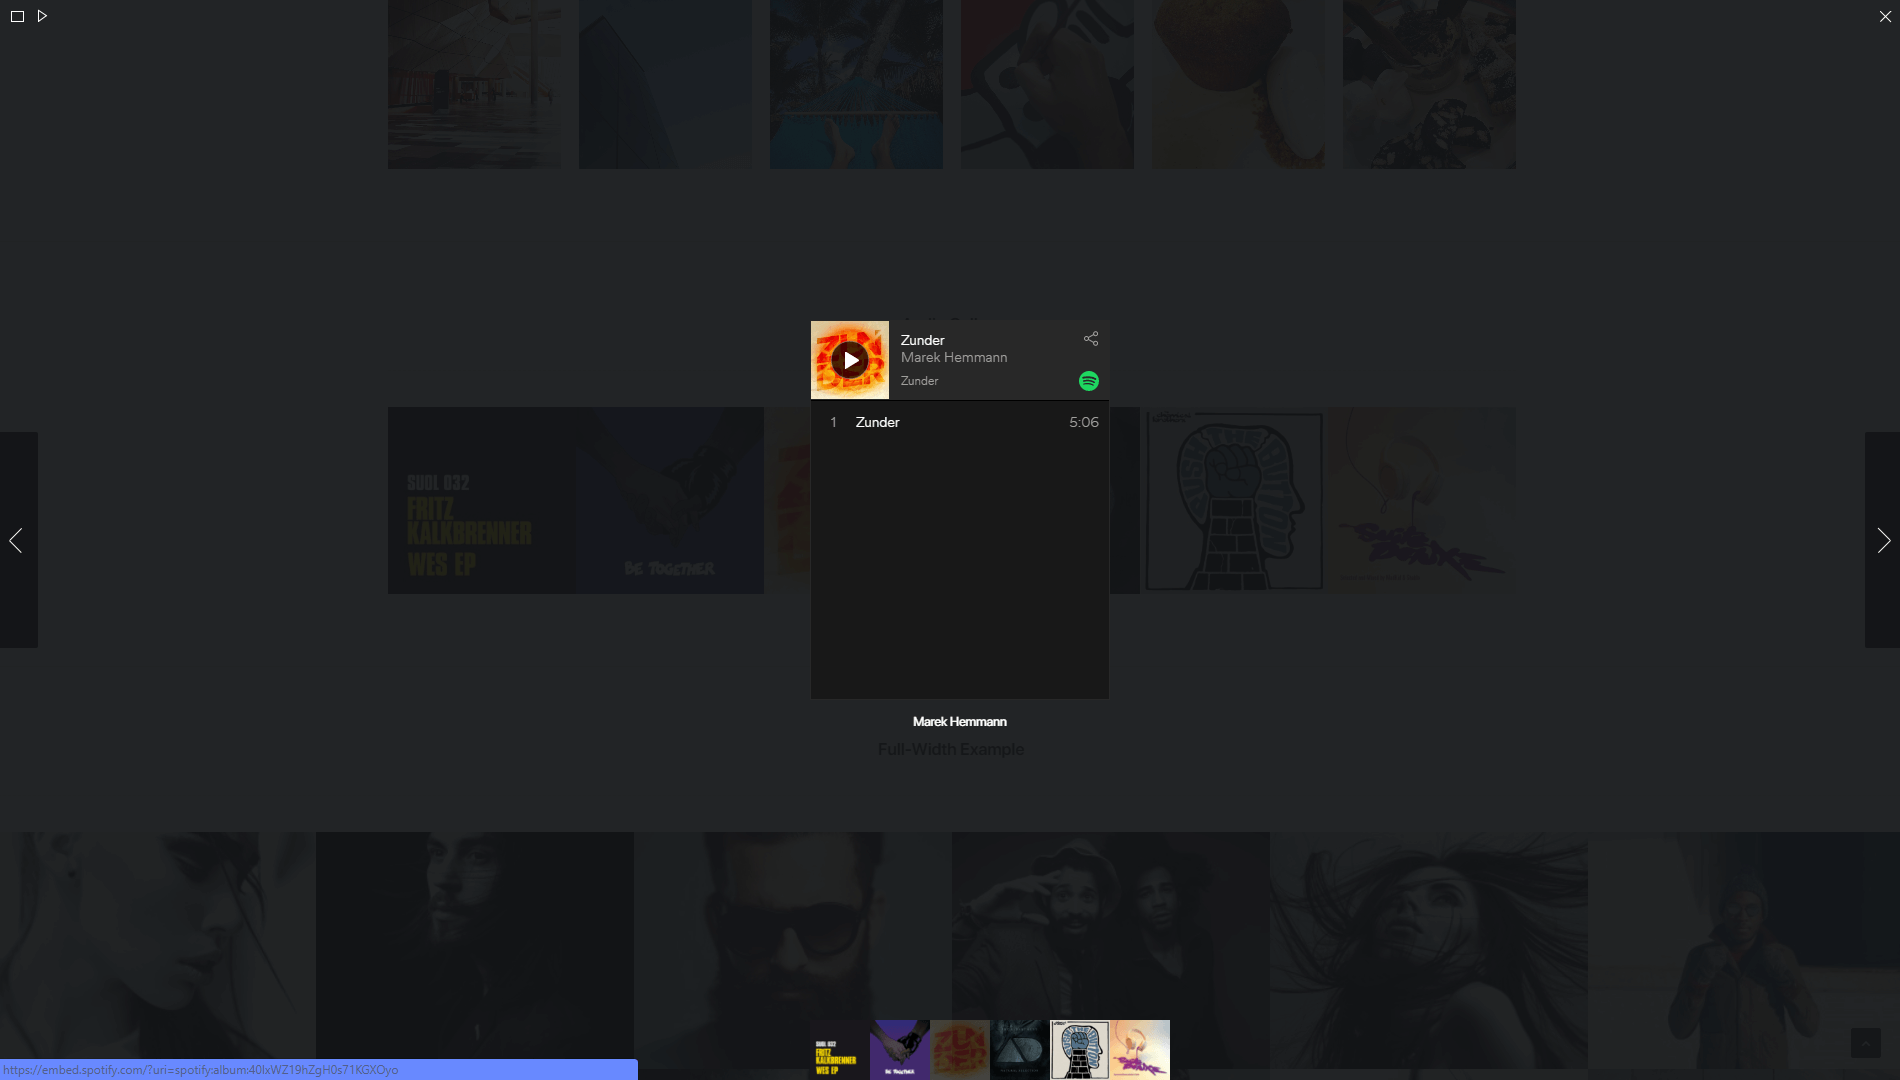
When it comes to audio, you can showcase external playlists using album covers, like this:
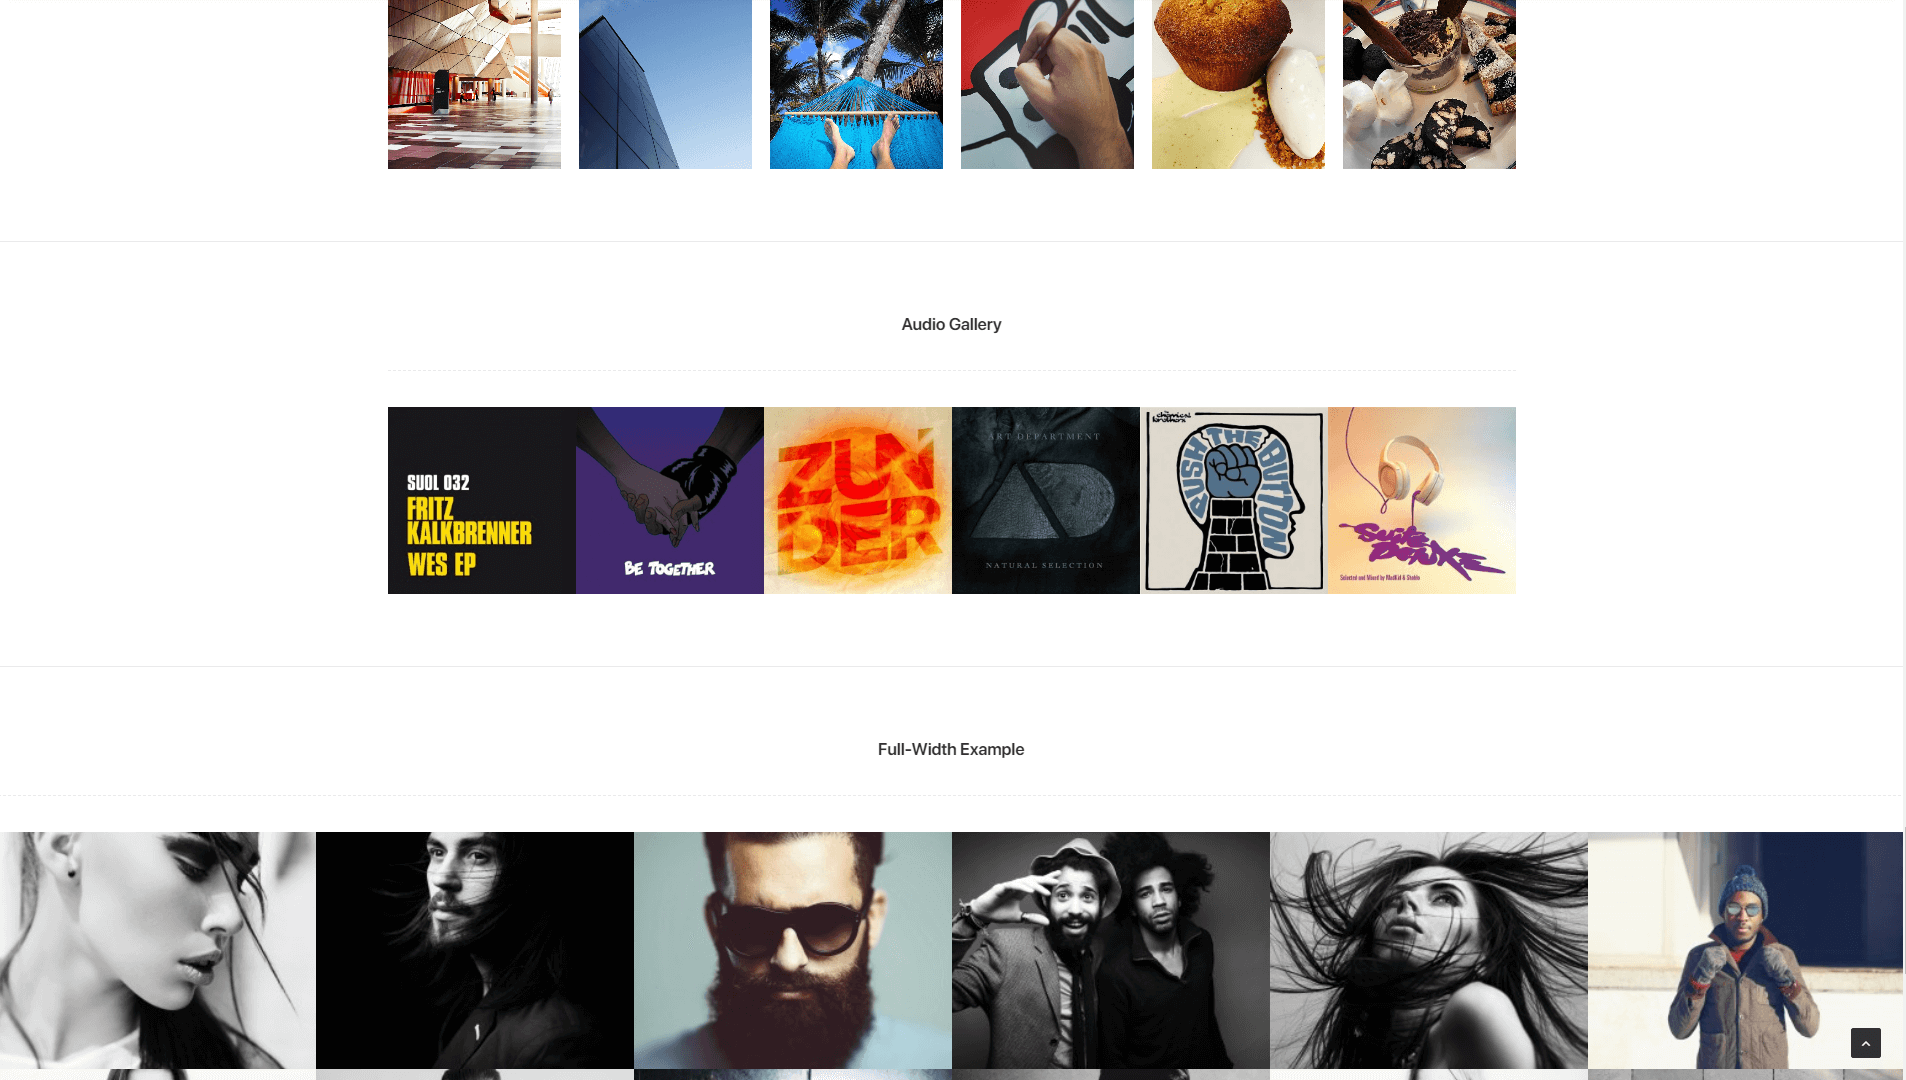
Uncode galleries support Spotify playlists, SoundCloud files, and more. Just as with videos, clicking on an audio file in a gallery will open up a lightbox. Visitors can then listen to the file without leaving your site:
There are a lot of situations where this kind of functionality can come in handy. For example, if you’re a musician, you can build stylish audio galleries for your portfolio. The same goes if you work with video. Even business sites can benefit from video galleries, since you can use them to display promotional materials such as product feature videos. Best of all, creating these galleries is surprisingly simple.
How to Add Video and Audio Galleries to Your Uncode Website (In 2 Steps)
In this section, we’re going to teach you how to set up video and audio galleries on your website. Keep in mind that you’ll need to install Uncode and all its associated plugins first. Then, you can move on to the first step.
Step 1: Add a Gallery to a Page or Post
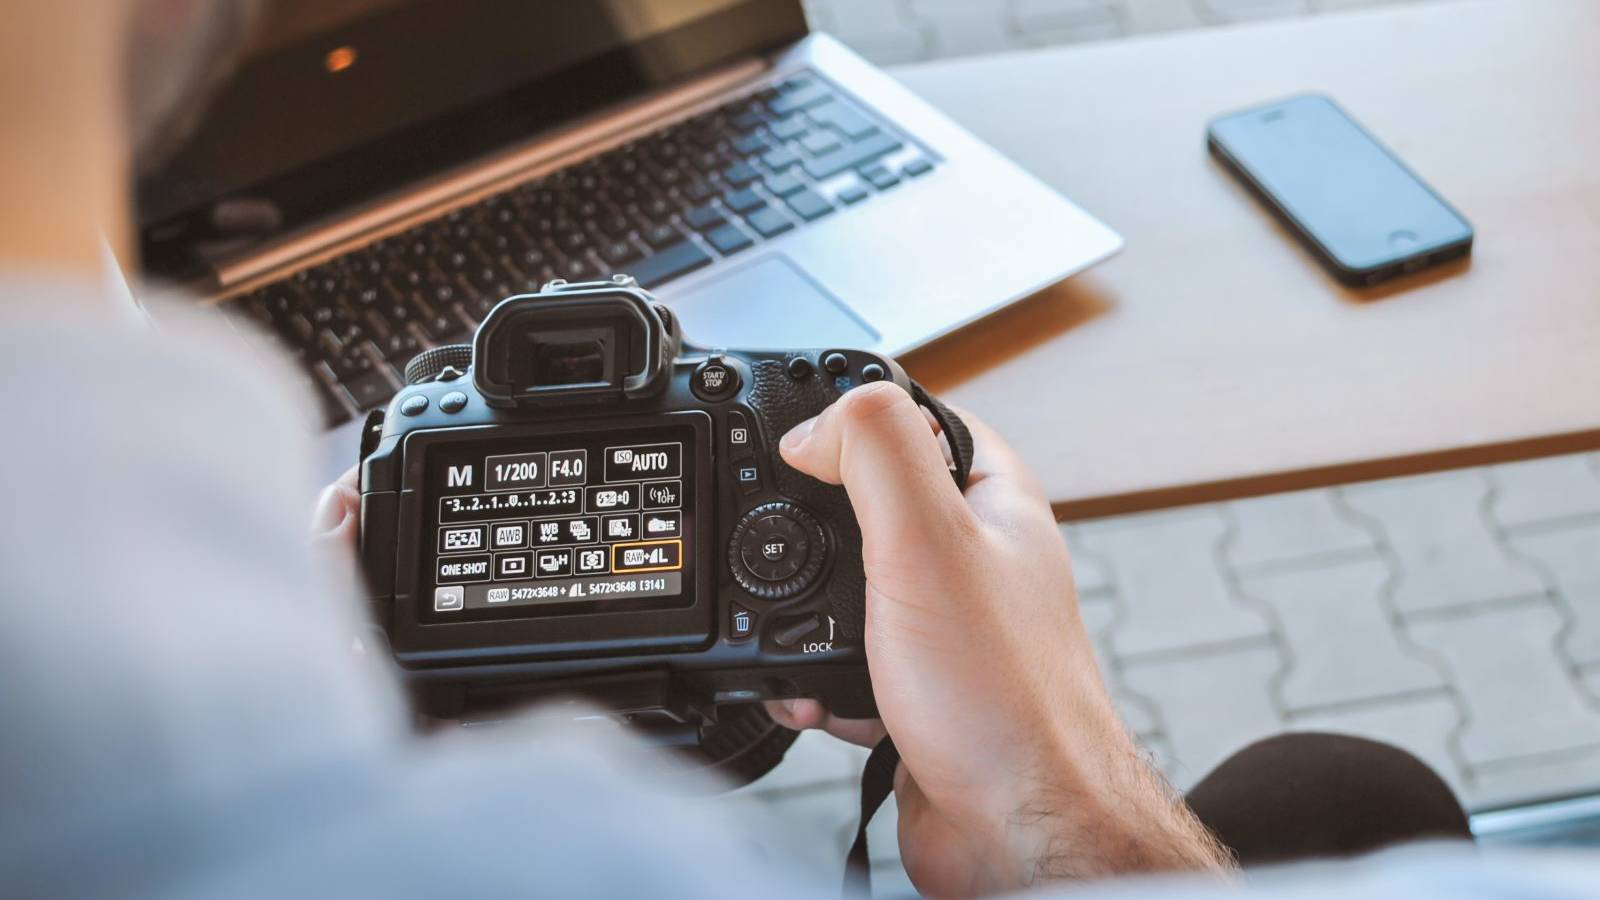
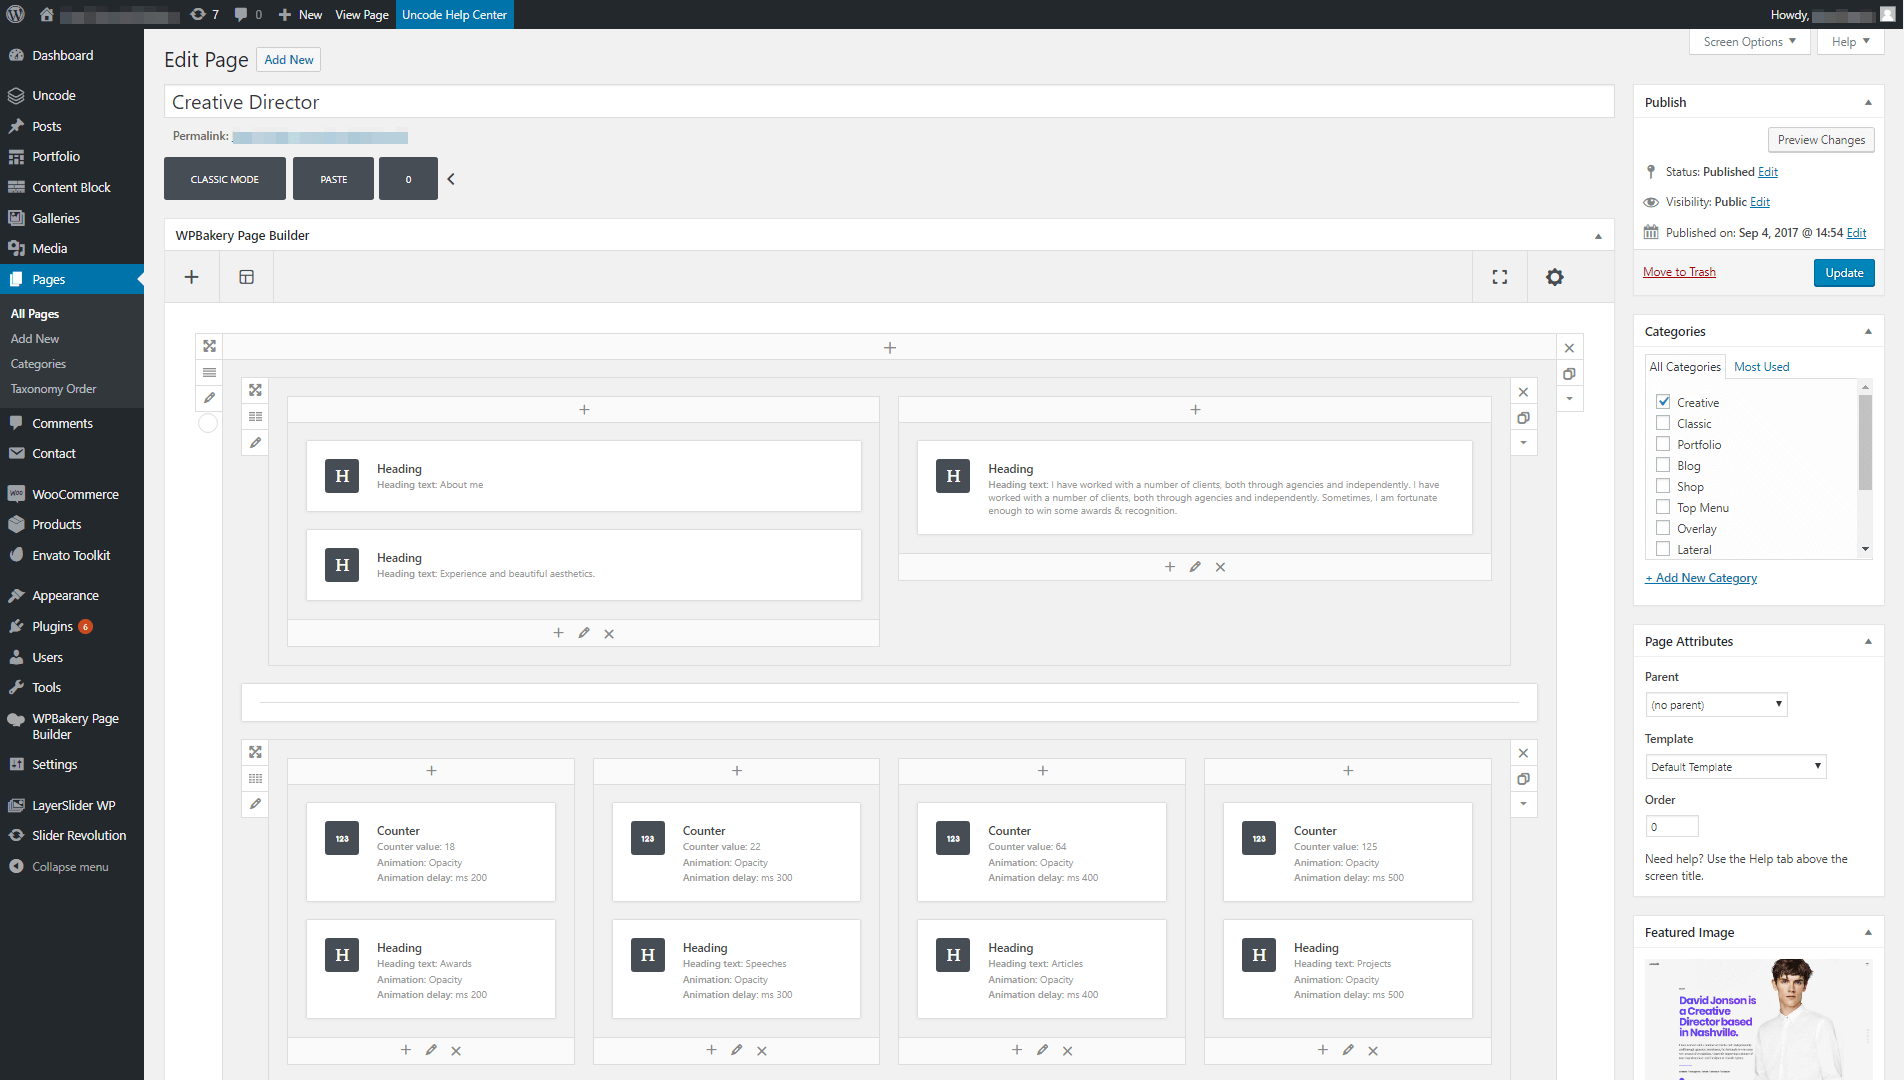
Creating galleries in Uncode is simple, whether they’re made up of images, videos, or audio files. To get started, open the page or post where you want to add a new gallery in your WordPress dashboard. If you’ve set up Uncode correctly, you should see the WPBakery Page Builder editor instead of WordPress’ default settings:
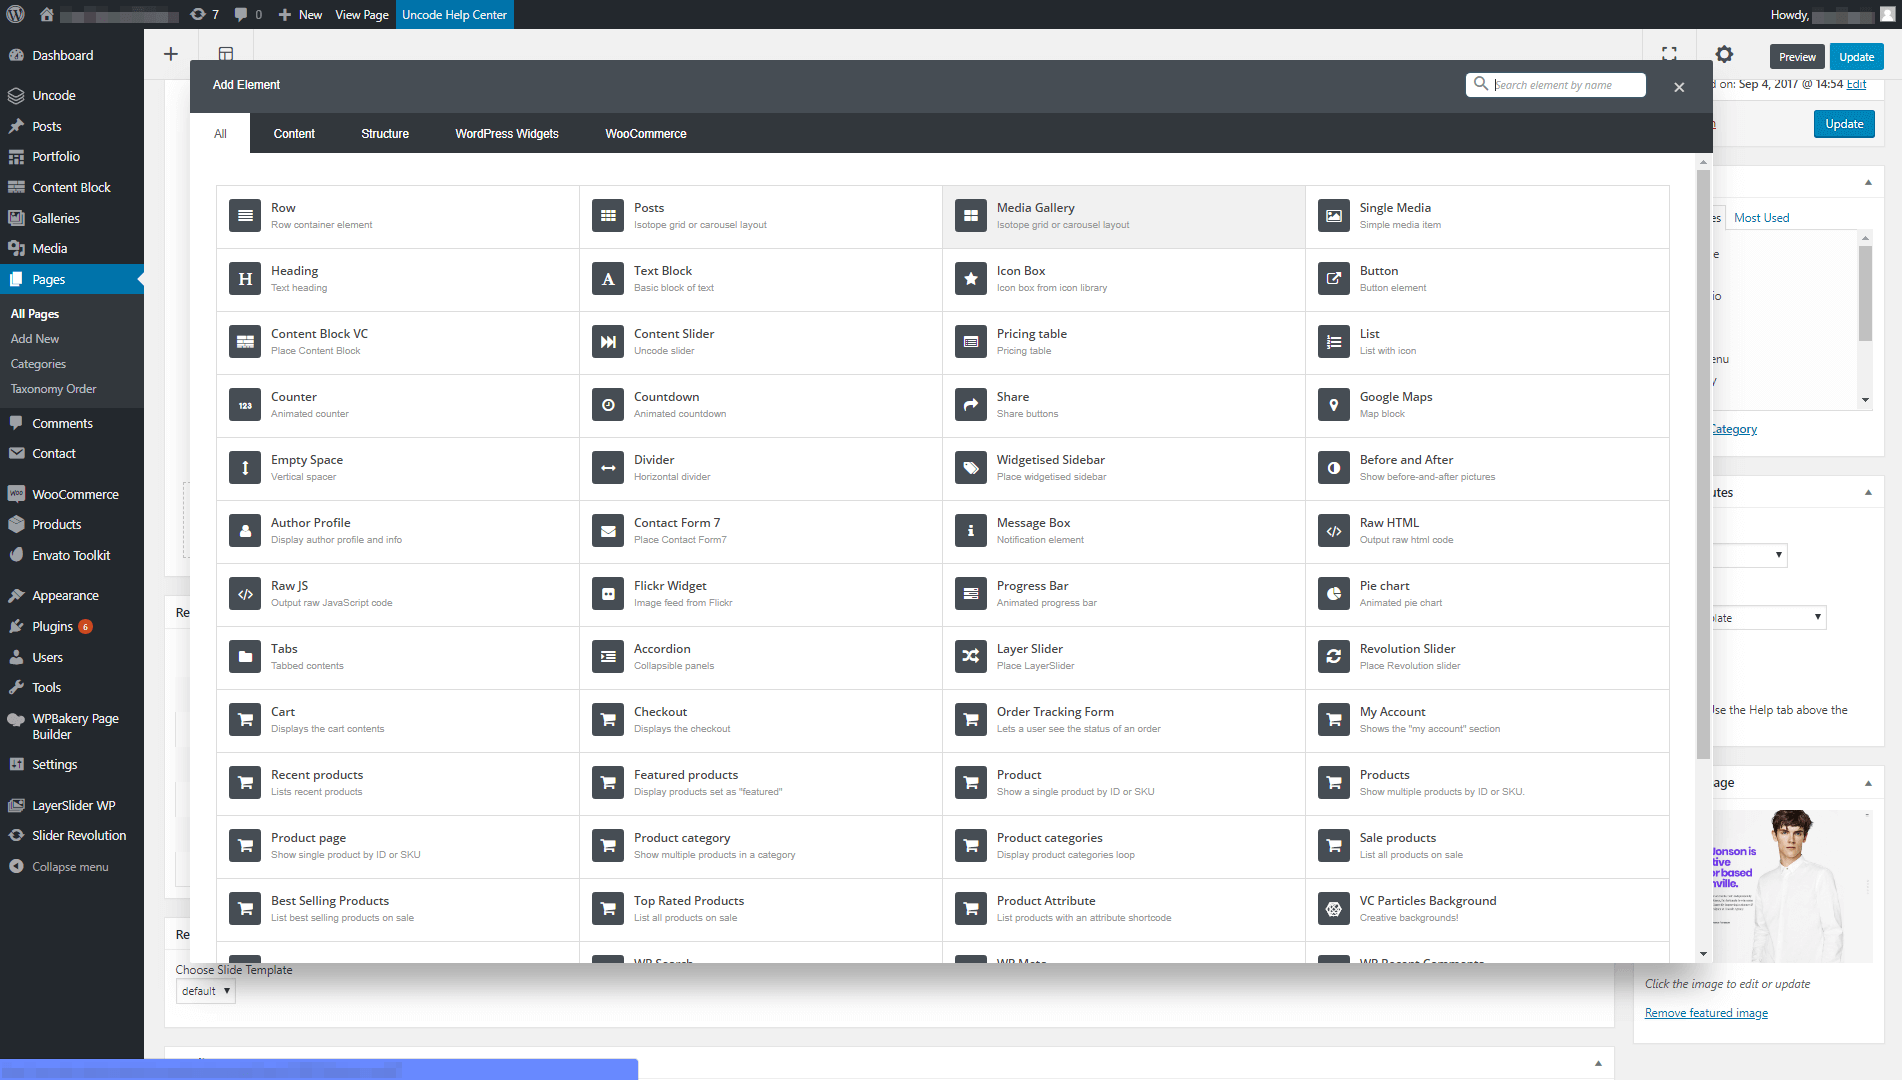
If you need a primer on how to use the visual builder, check out this guide. Then, go ahead and add a new module wherever you want your gallery to go. The builder will ask you what type of module you want to create, and you’ll need to choose the Media Gallery option:
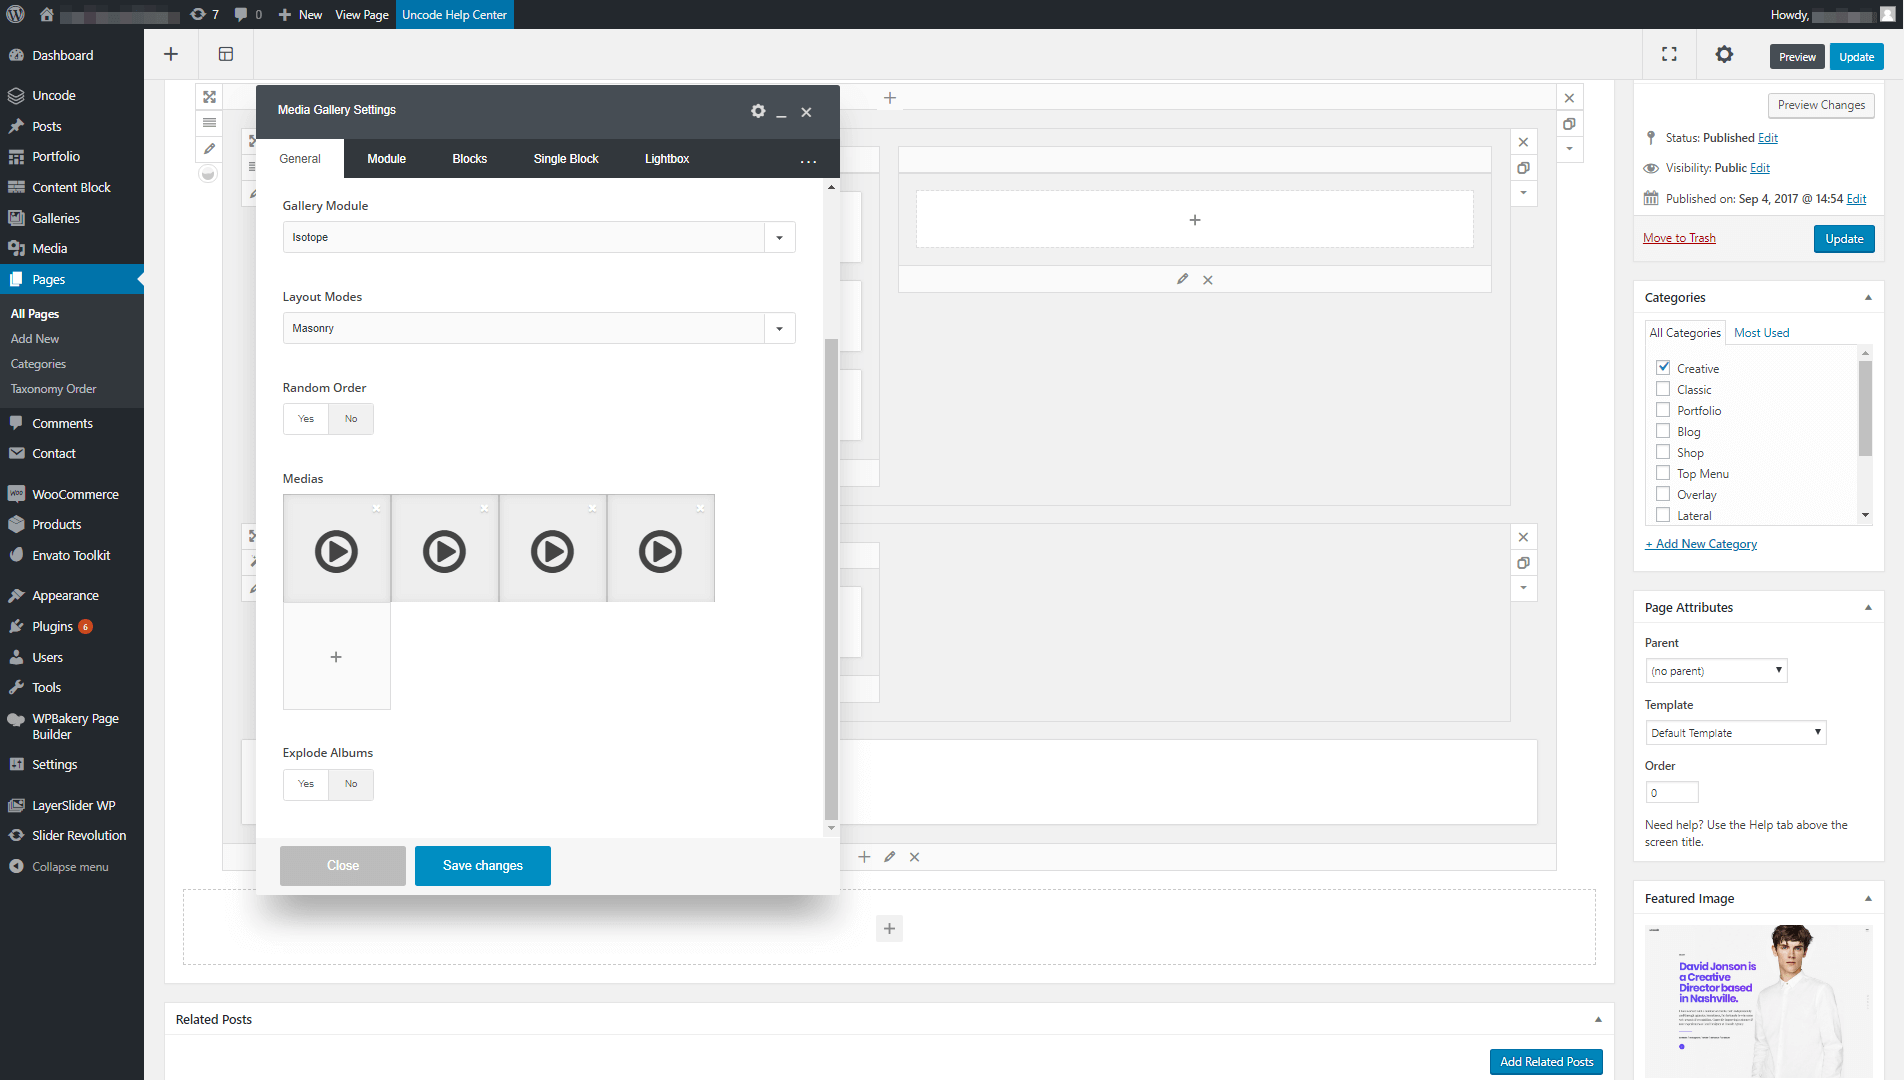
Once you select the module, its Settings window will open automatically. If you scroll down a bit, you’ll see a section called Medias. You’ll need to click on the plus sign right below that heading, in order to start adding audio or video files to your gallery:
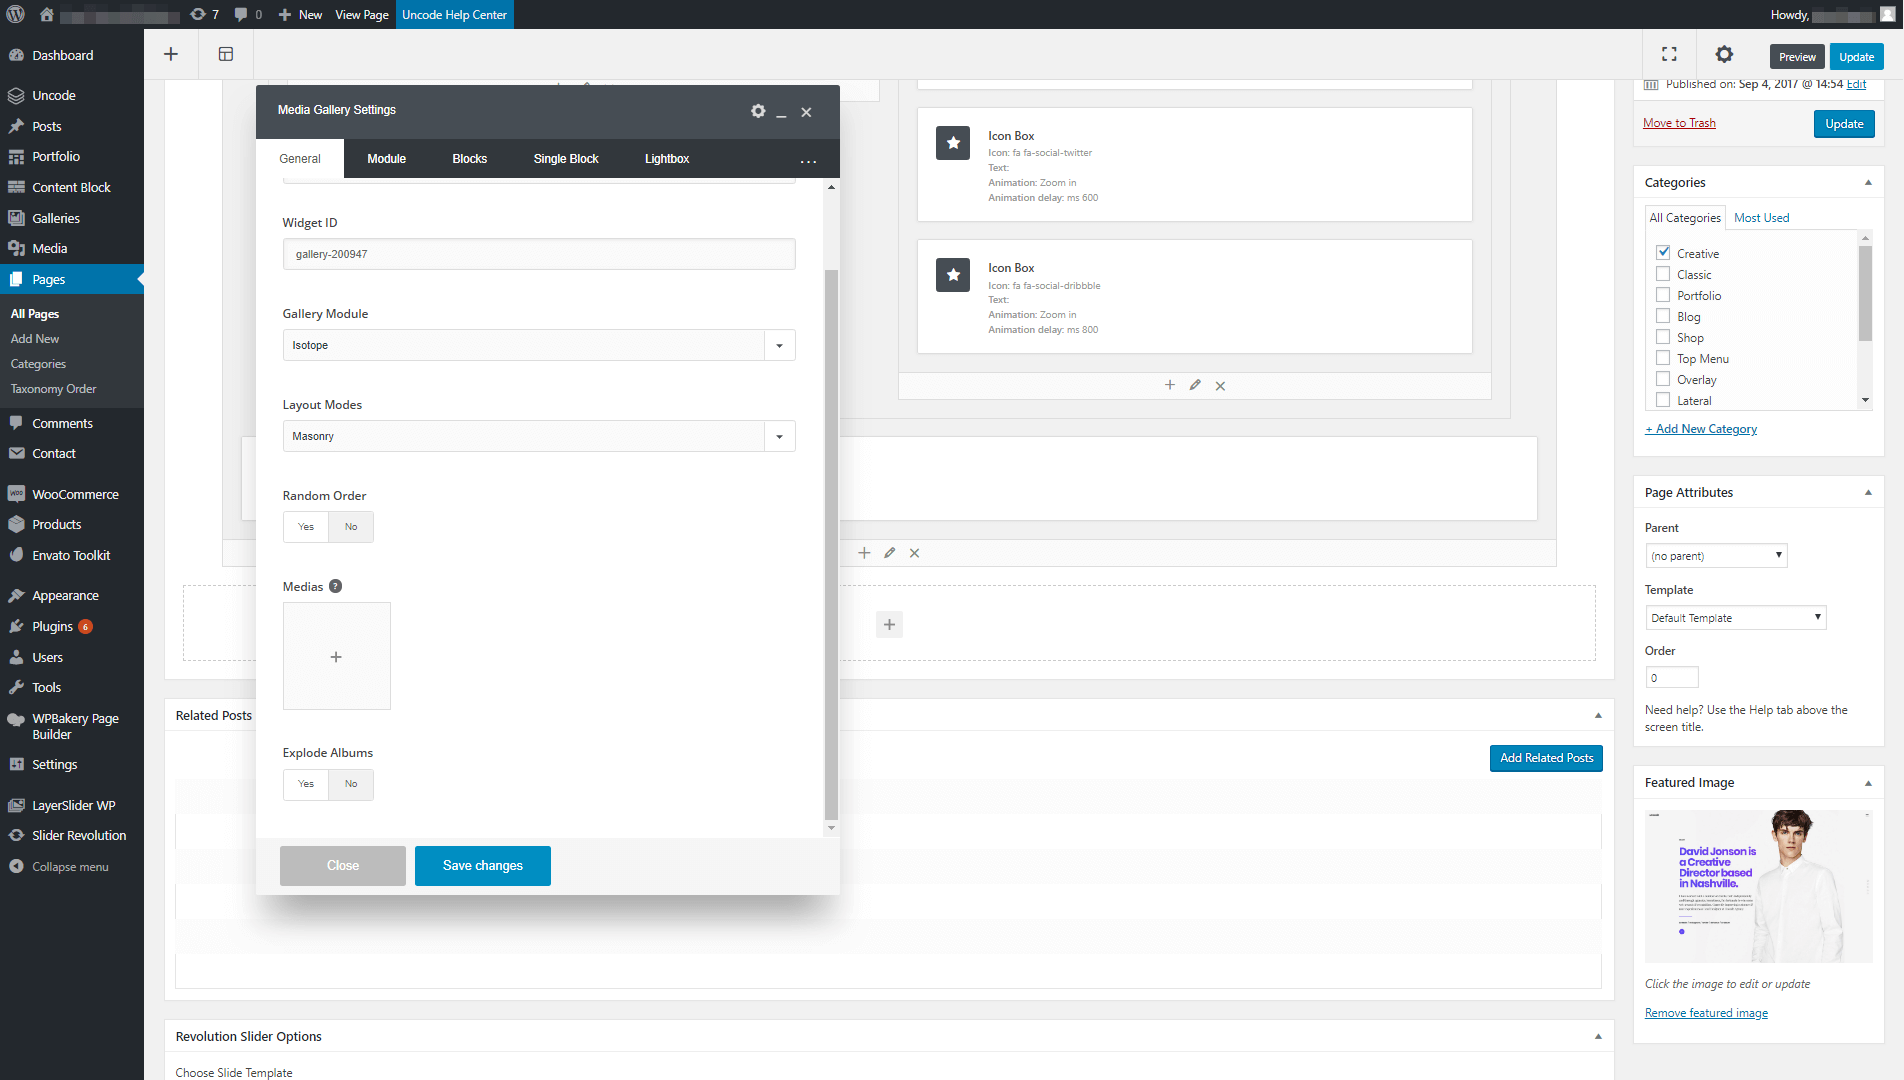
This process works just the same regardless of what type of files you want to add. However, we do recommend sticking to either video or audio files for each gallery. With that in mind, go ahead and use the Medias selection feature to add the files you want to your gallery:
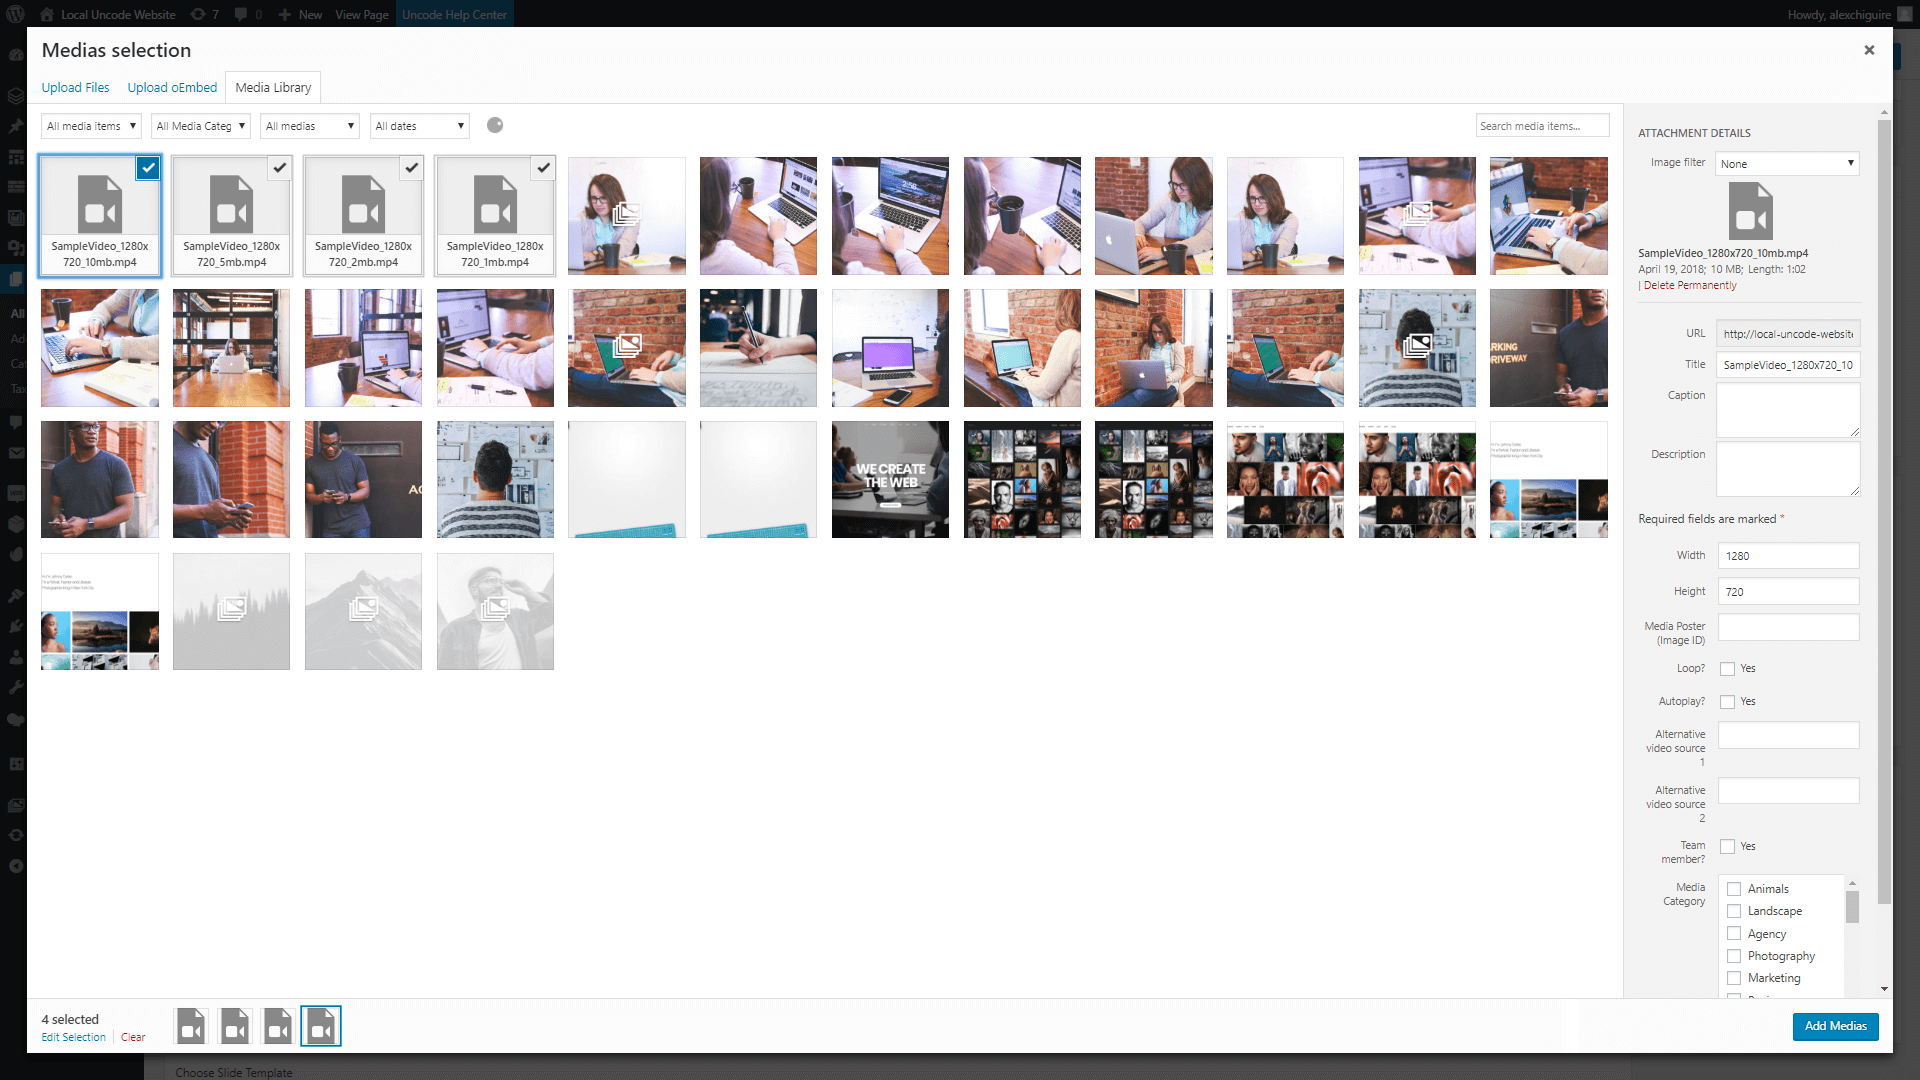
Keep in mind that you won’t see previews of your video or audio files here, unlike with images. Here’s what your gallery items will look like once they’re added:
When you’ve made all your selections, go ahead and click on the Save changes button. Now you can check out your gallery in action using WordPress’ Preview feature:
This process works exactly the same with audio files. However, you’ll often want to embed those from external sources like SoundCloud, instead of from your local computer. If that’s the case, you can add multimedia items to your media gallery by going to your dashboard and opening the Media > Add Multimedia tab:

Here, you can add items such as Spotify playlists, SoundCloud files, and videos from sources like YouTube and Vimeo. All you have to do is paste in a URL and set a title for it. You can also enter captions and descriptions for each file.
Once you add in a URL, Uncode will pull a still image from the file and display it. You can then ‘save’ the file to your media gallery. Once you do that, you’ll be able to add it to your gallery module, following the process outlined above.
Step 2: Customize Your New Gallery
Setting up a video or audio gallery is simple. The real work comes when it’s time customize it. Uncode offers you a lot of ways to make your galleries unique.
To check out your options, return to the Media Gallery Settings window within the page or post where your gallery is located. This window opens right to the General tab, where you can choose what type of gallery layout you want to use under the Layout Modes option:
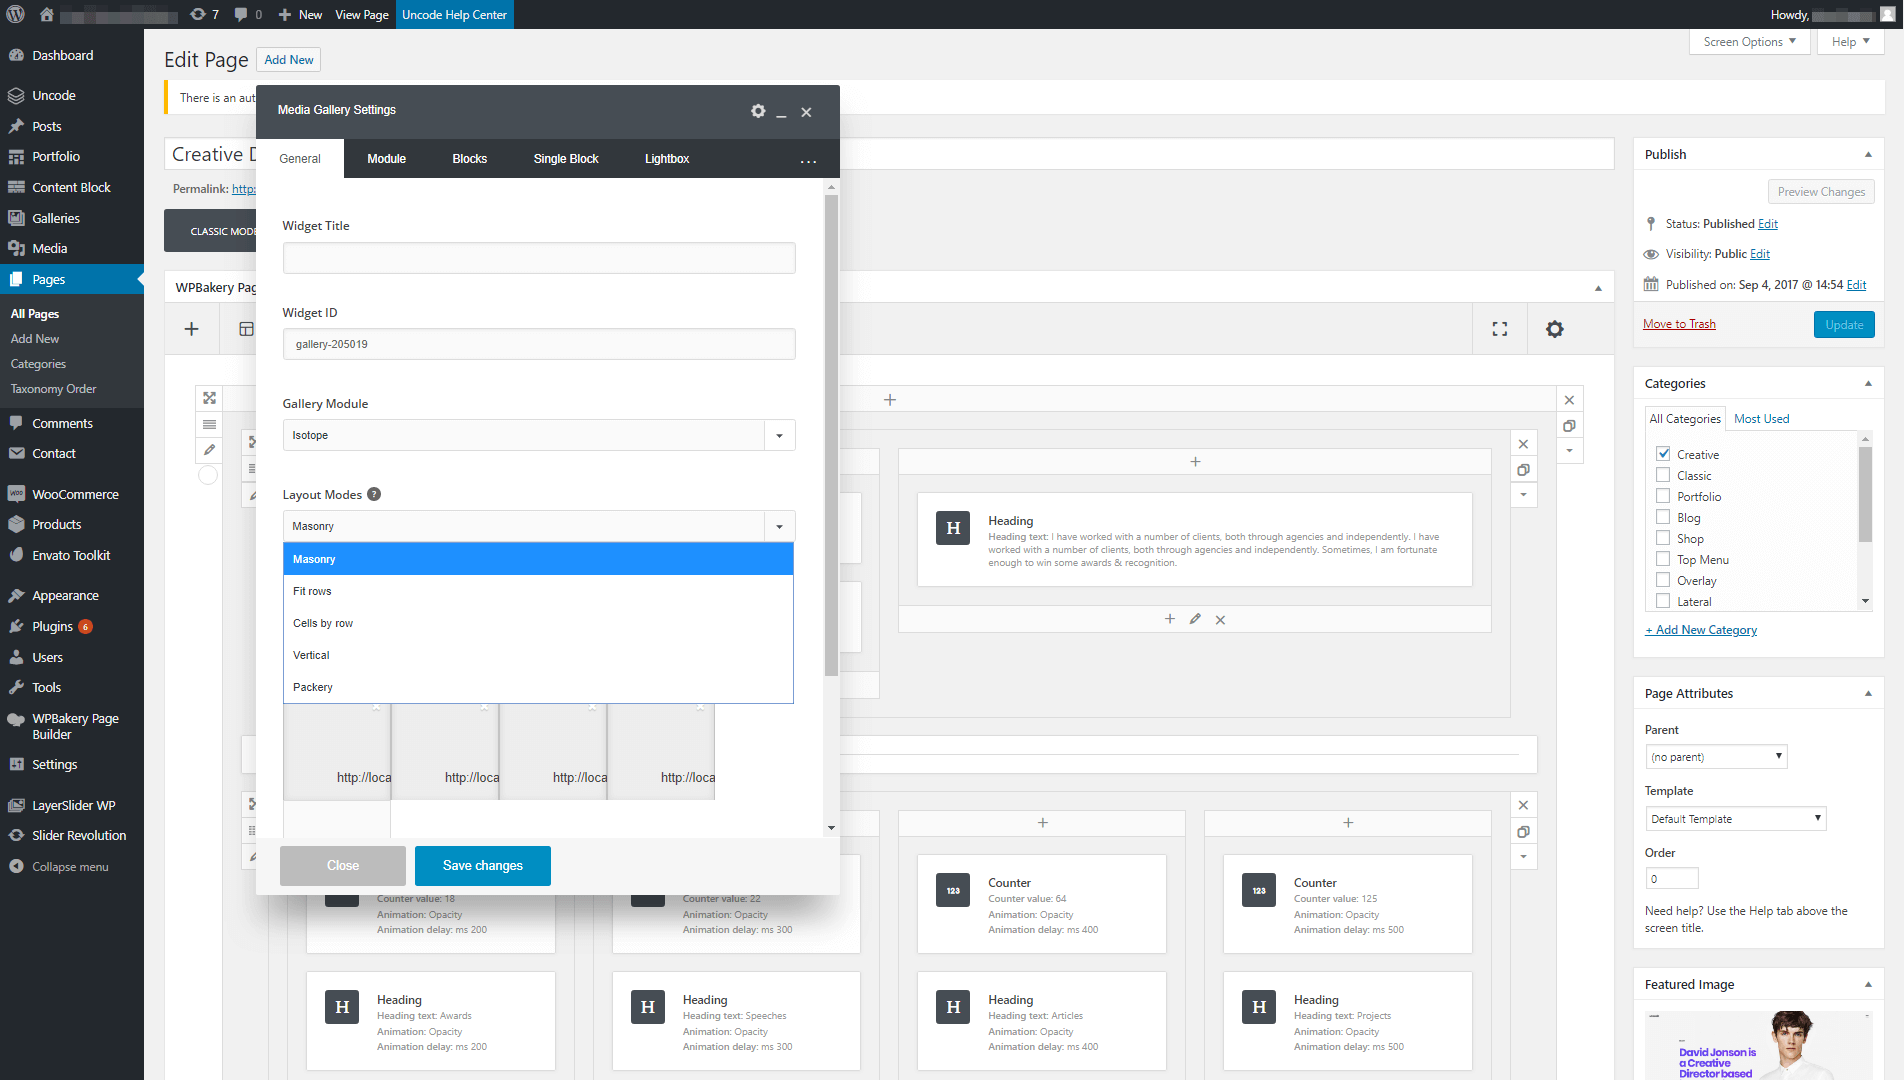
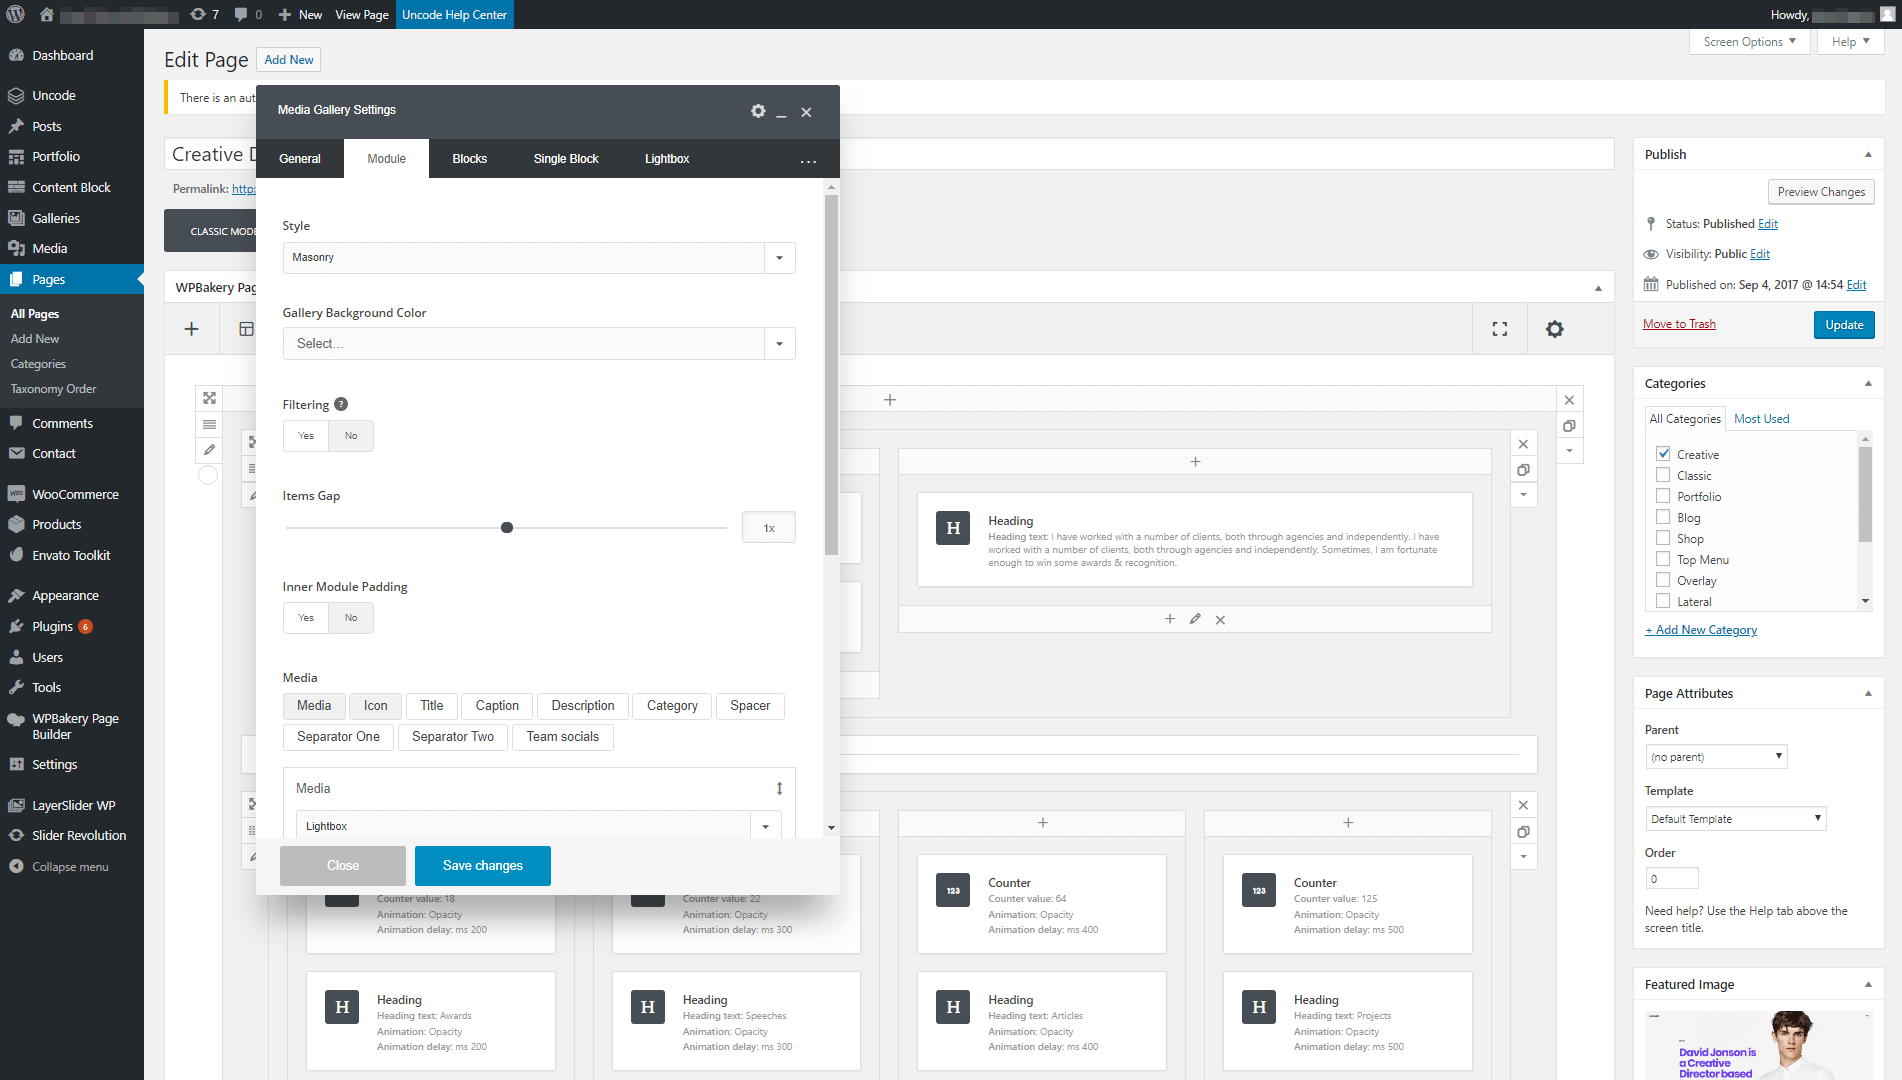
We talked about all the types of galleries Uncode offers you in a previous article, so check that one out if you’re not sure what some of these layouts do. Then, you can set a background color for your gallery and change the spacing between items by jumping over to the Module tab:
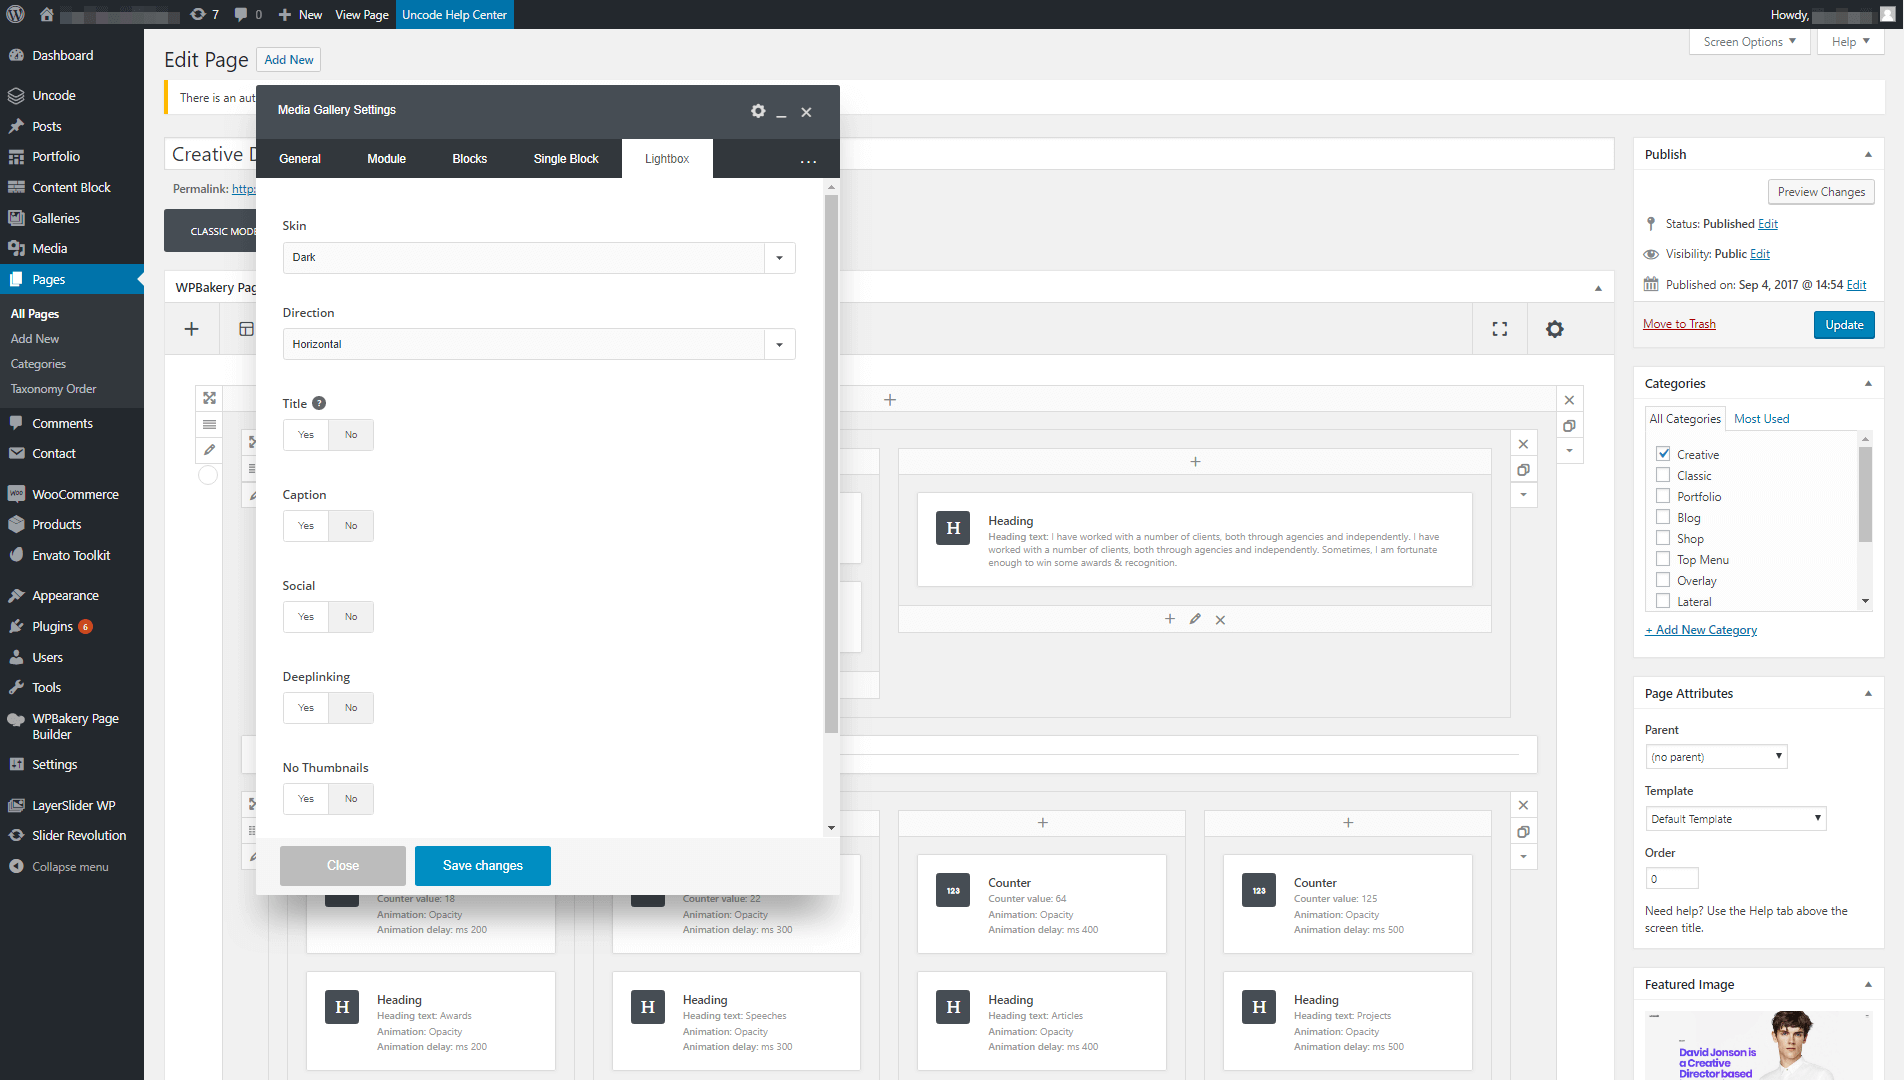
If you move on to the Lightbox tab, you’ll find options to configure your gallery’s lightbox settings. For example, you can set a white background instead of the default black. You can also choose whether to display the titles and captions for each video or audio file:
You can play around with these settings until your gallery looks just right on the front end. Don’t forget to save and publish it when it’s ready!
Conclusion
Everyone has seen image-based galleries online. However, using a gallery to showcase video and audio files is still somewhat rare. That means you can easily set your site apart and grab visitors’ attention by making smart use of this Uncode feature.
Once you have the theme up and running, all you need to do is follow these two steps to add an audio or video gallery to your WordPress site:
- Add a gallery to a page or post.
- Customize your new gallery until it looks just right.
Do you have any questions about how to create stylish video and audio galleries using Uncode? Let’s talk about them in the comments section below!