
It used to be that almost every website you visited would bombard you with popups from the second it loaded. These days popups aren’t as frequent, but they’re still a popular technique. However, it takes work to create popups that convert visitors instead of scaring them away.
Popups have always been controversial, but it’s impossible to deny their effectiveness. In a lot of cases, websites can multiply their conversions just by adding a popup here and there. With a little effort and know-how, there’s no reason you can’t replicate that success.
In this article, we’re going to talk about what popups look like today, and why you should consider using them. Then we’ll introduce you to our favorite tool to create WordPress popups, and teach you how to use it. Let’s get to work!
What Popups Are Like Today (And Why You Should Still Use Them)
The word ‘popup’ doesn’t always provoke the best response when it comes to web design. If you spend a lot of time online, chances are you use some sort of adblocker to keep popups at bay, and it’s easy to understand why. In the past, people abused popups to get every penny they could out of their websites, and users put up with it because they didn’t have a choice.
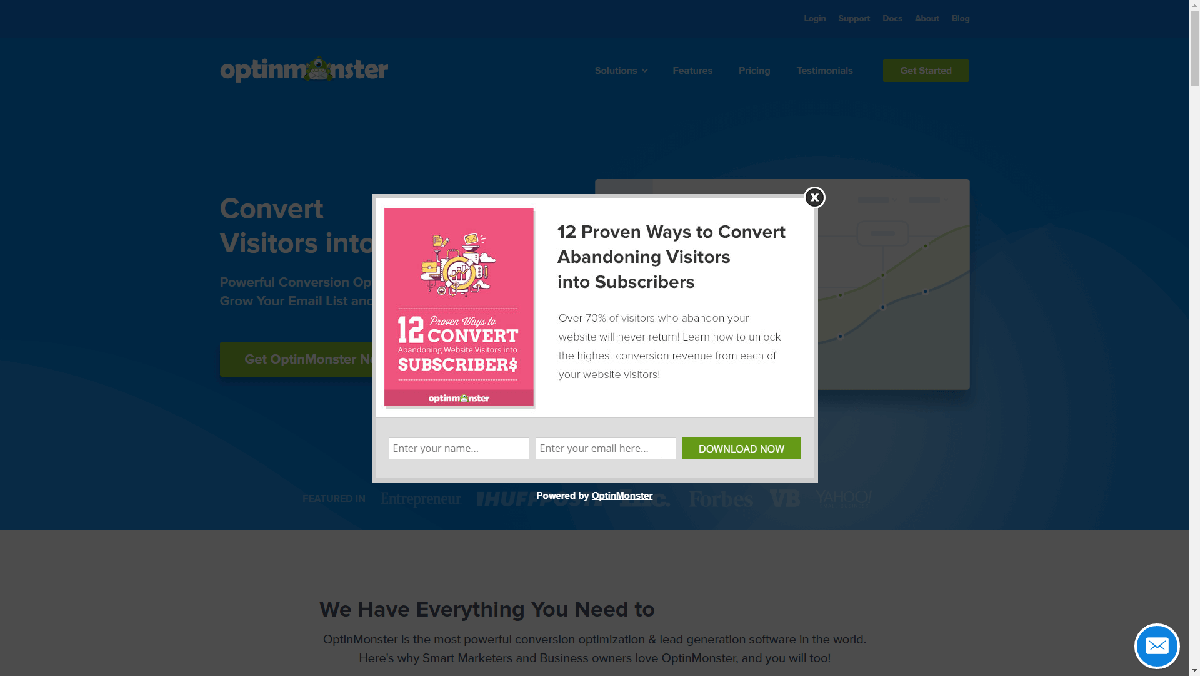
These days, popups are making a comeback, but in a new (and less annoying) way. Instead of opening new windows that auto-play ads and similar content, many websites are focusing on ‘in-page ads’ and ‘interstitial popups.’ The former are usually small windows that ask you for your email or other information when you first visit a site, such as this one:
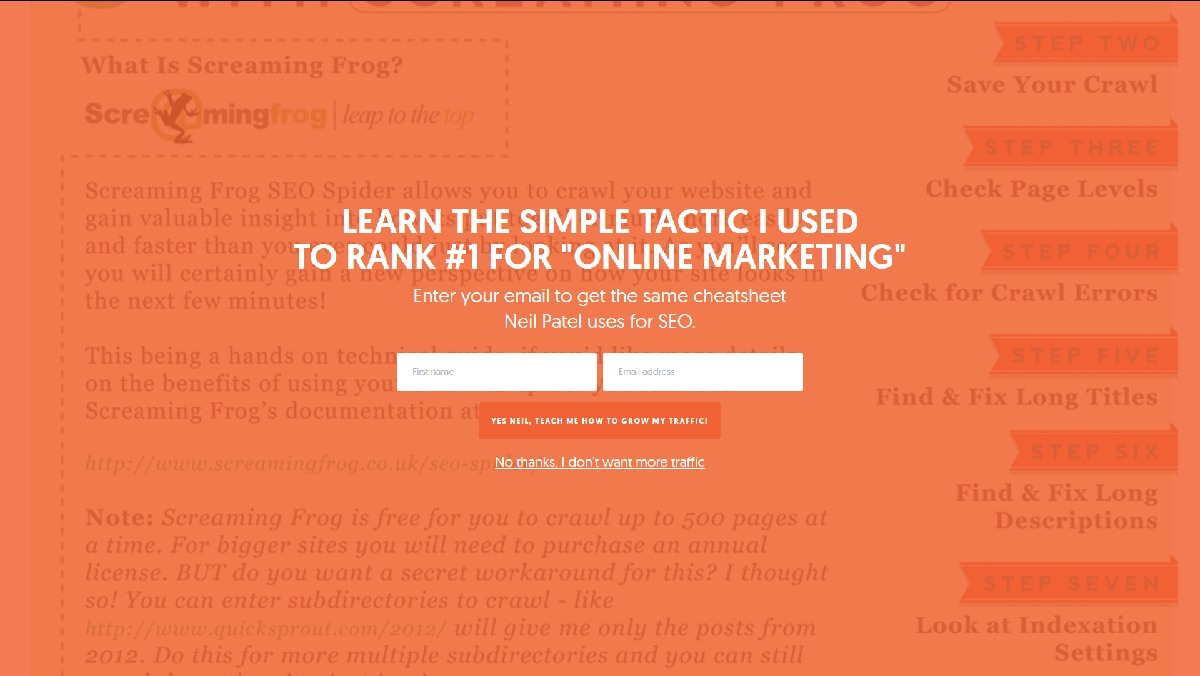
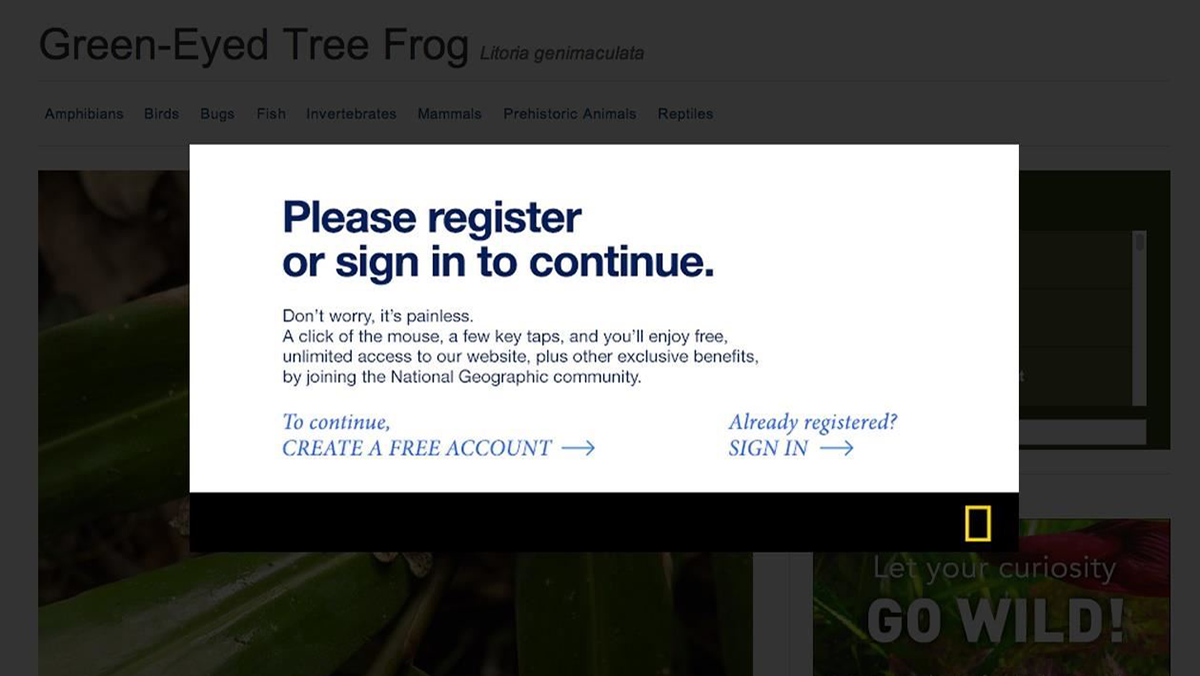
Interstitial ads, on the other hand, temporarily occupy the entire page, covering your website’s interface:
Both techniques are modern takes on the pop-up formula. They demand your attention by ‘popping up’ in the middle of your screen, but they’re less obnoxious than their forerunners, and have a more targeted and specific purpose. Plus, they can be hugely effective at improving your bottom line.
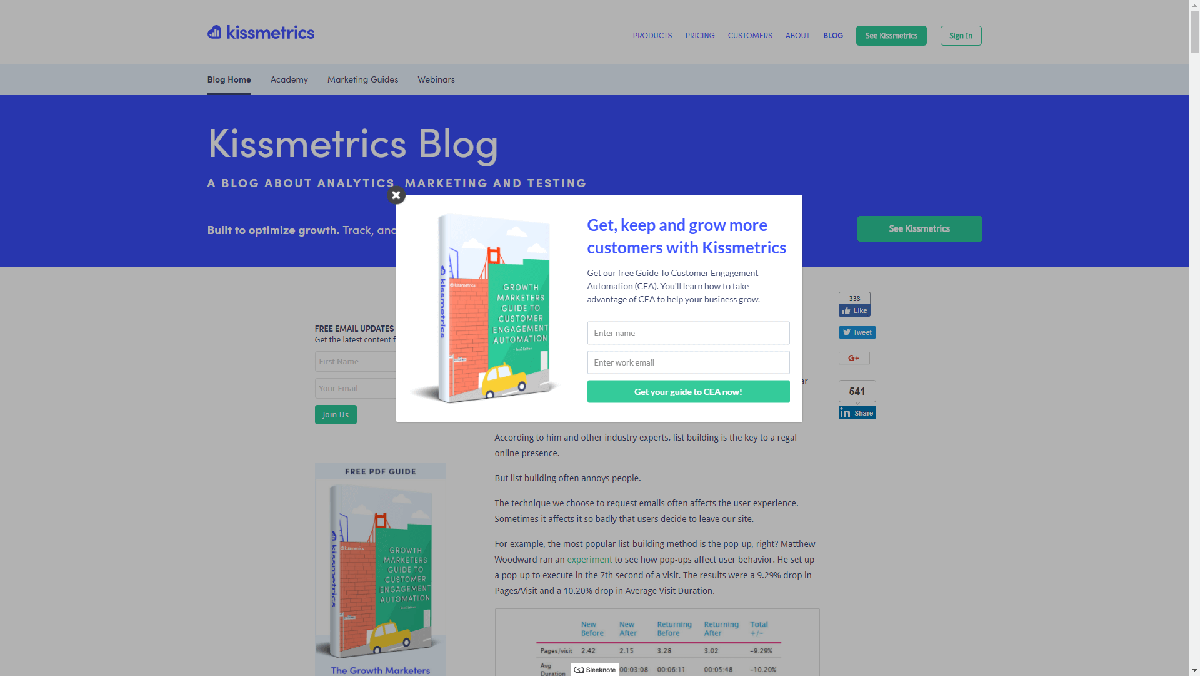
A well-designed popup can multiply your signups, increase click-through rates, and result in more overall conversions. The trick to seeing these benefits lies in creating popups that don’t negatively impact your users’ experience. Often, the best way to do this is to ensure that your in-page popups are as easy to close as possible. This way, users who aren’t interested can quickly move on without becoming frustrated. Here’s an example of a design that works well:
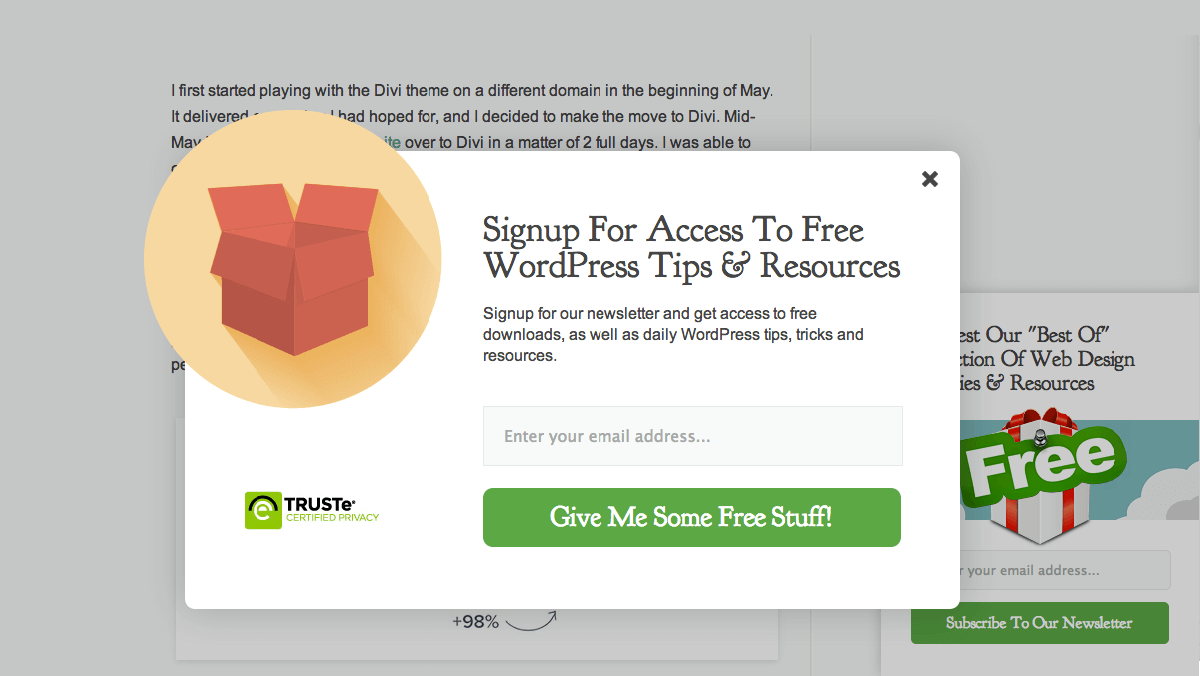
In this case, you can close the popup by using the X button at the top of the element, or by clicking anywhere outside it. On the other hand, some popups make you dig for the option you need to move on, such as by hiding the close button:
This sort of design negatively impacts your website’s usability, which is something you want to avoid.
To sum up, popups can be a potent tool if you want to increase your conversions, but you have to be careful about how you implement them. The first step towards doing that is to use the right tool when creating your popups.
Introducing the Popup Maker Plugin
When it comes to implementing complex functionality on your website, you have an edge if you’re using WordPress. That’s because there are plugins to help you add nearly every any of feature you can imagine, including stylish popups that don’t negatively impact your website’s usability.
For an excellent example, check out the Popup Maker plugin. This tool enables you to create popups using the WordPress editor you’re already familiar with. You can choose where your popups will appear, how they’ll look, and in some cases, who sees them.
To make your life easier, the plugin includes a set of pre-built themes you can use for your popups, and it integrates smoothly with list-building tools such as MailChimp and AWeber. Finally, Popup Maker works great with our Uncode theme, since it overlays its content over any page you choose without interfering with its design.
Key Features:
- Create popups, banners, floating sticky bars, notifications, video lightboxes, and more.
- Use pre-built themes to style your popups.
- Integrate your new elements with list-building and email plugins.
- Design responsive popups that will do their job without any additional input on your end.
Price: The Popup Maker plugin is 100% free. If you’re looking to get even more options, however, the developers do offer a number of useful extensions that add more functionality.
How to Create Stylish WordPress Popups Using the Popup Maker Plugin (In 3 Steps)
Now that we’ve talked about Popup Maker’s features and how it works, let’s see it in action! The following process will enable you to quickly add popups to your site, and customize them to suit your needs.
Step 1: Configure the Popup Maker Plugin
Popup Maker is remarkably simple to get started with, since it doesn’t require much configuration. After installing and activating the plugin, go to the new Popup Maker > Settings screen in your dashboard, and look under the Assets tab:
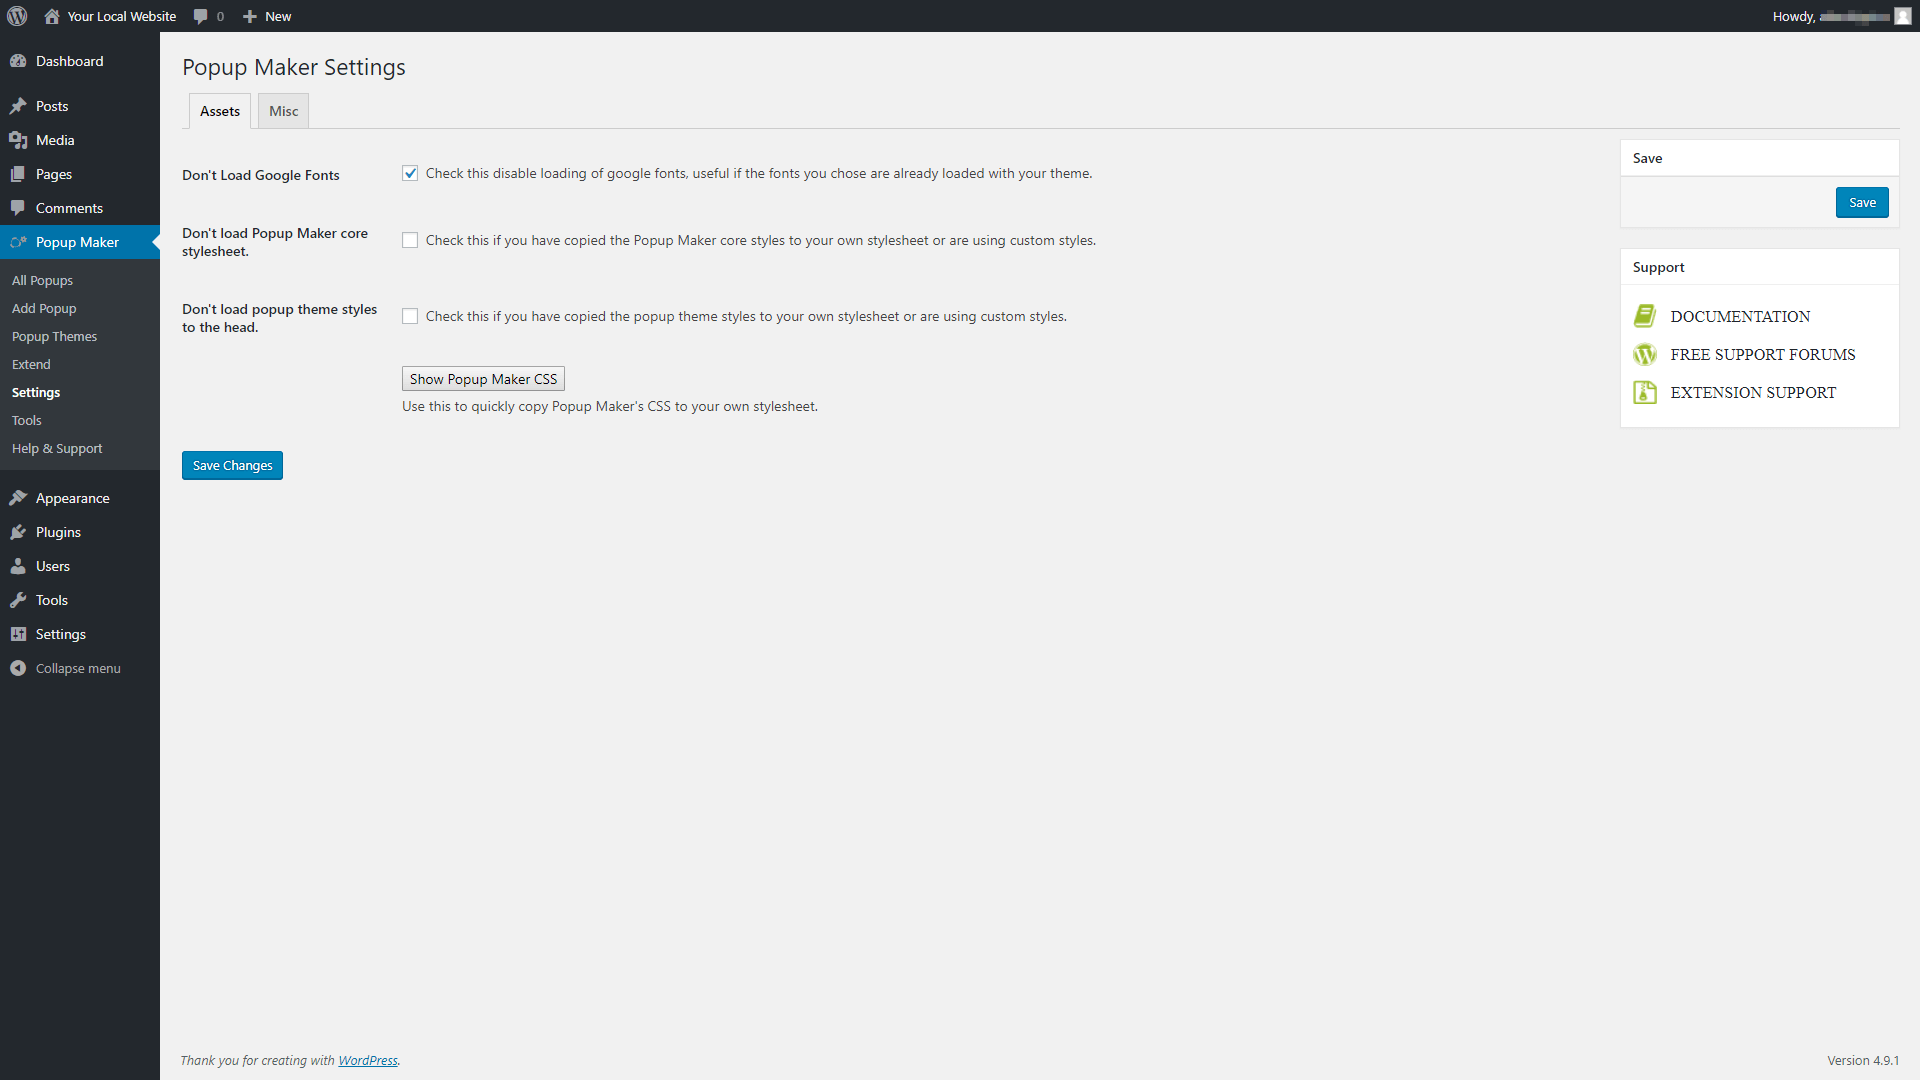
For now, the important setting in this tab has to do with Google Fonts. Some themes, such as Uncode, enable you to load Google Fonts out of the box. If you’re using a theme that already integrates with Google Fonts, you’ll want to prevent Popup Maker from doing so as well (to avoid conflicts). You can do this by simply ticking the option labeled Don’t Load Google Fonts. Then, save your changes and move on to the next step.
Step 2: Tweak Your Popup Themes
As we mentioned earlier, Popup Maker ships with several pre-built themes you can use to design your popups. Before you create your first popup, you’ll want to get acquainted with the themes and figure out which one best fits your website’s style.
To check them out, go to the Popup Maker > Popup Themes tab. Inside, you’ll find a list of six theme options. Clicking on any of them will open the plugin’s editor, which will display a preview of the theme to the right:
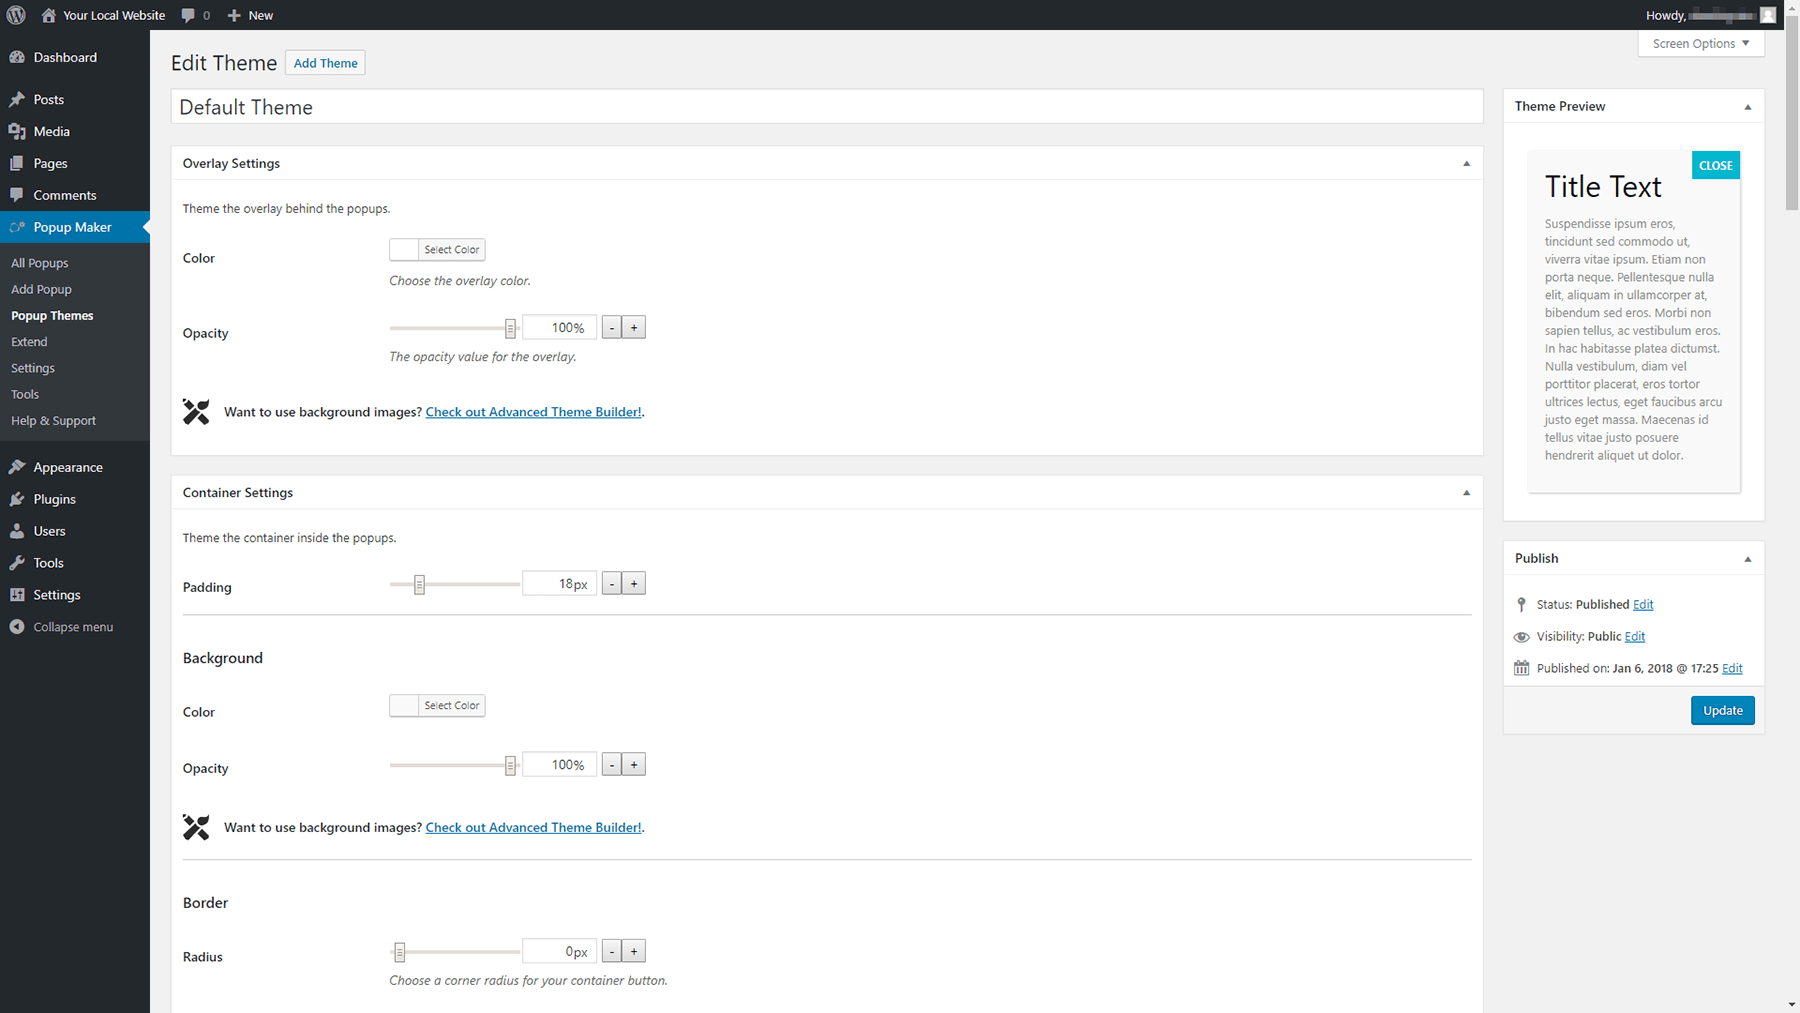
Take a moment now to familiarize yourself with all the available themes, and pick whichever one stands out. Open its editor, and look for the Overlay Settings section near the top of the page:
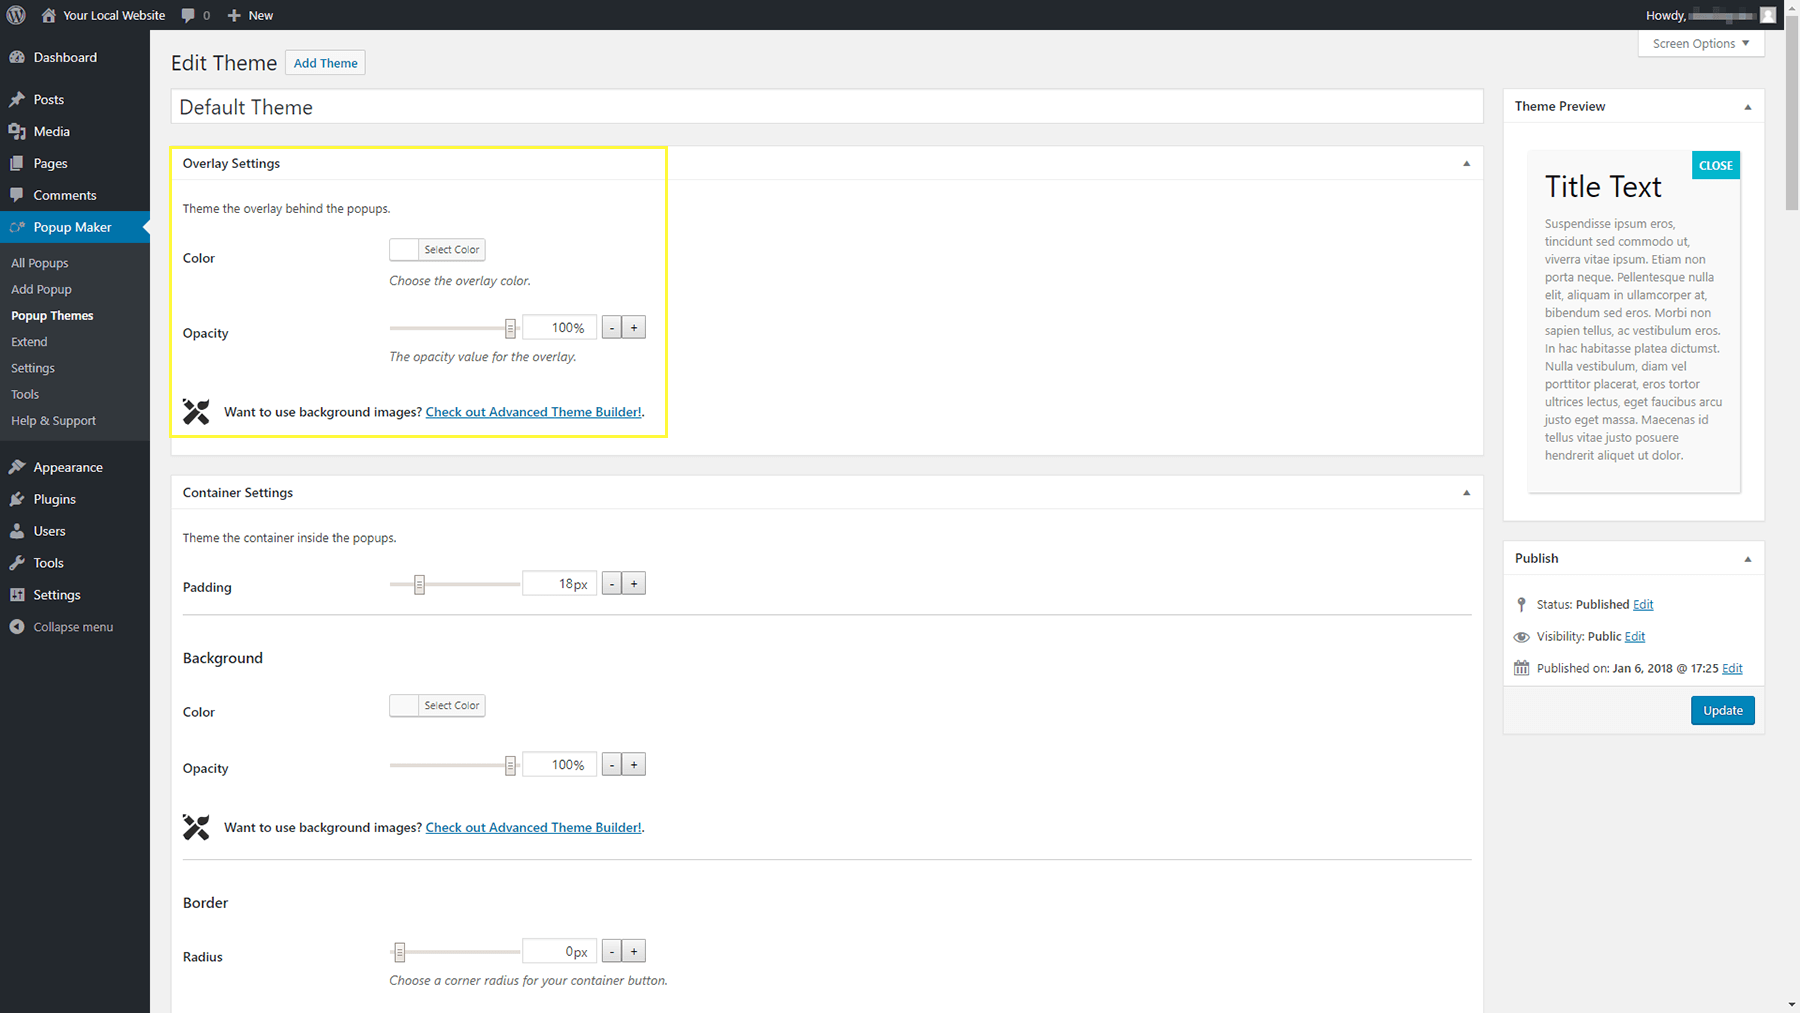
Here, you can pick the color that will surround your popup when it shows up on the screen, as well as tweak its opacity. Feel free to choose any color that goes well with your website’s look. Just remember to add enough transparency that users can still see the rest of your page!
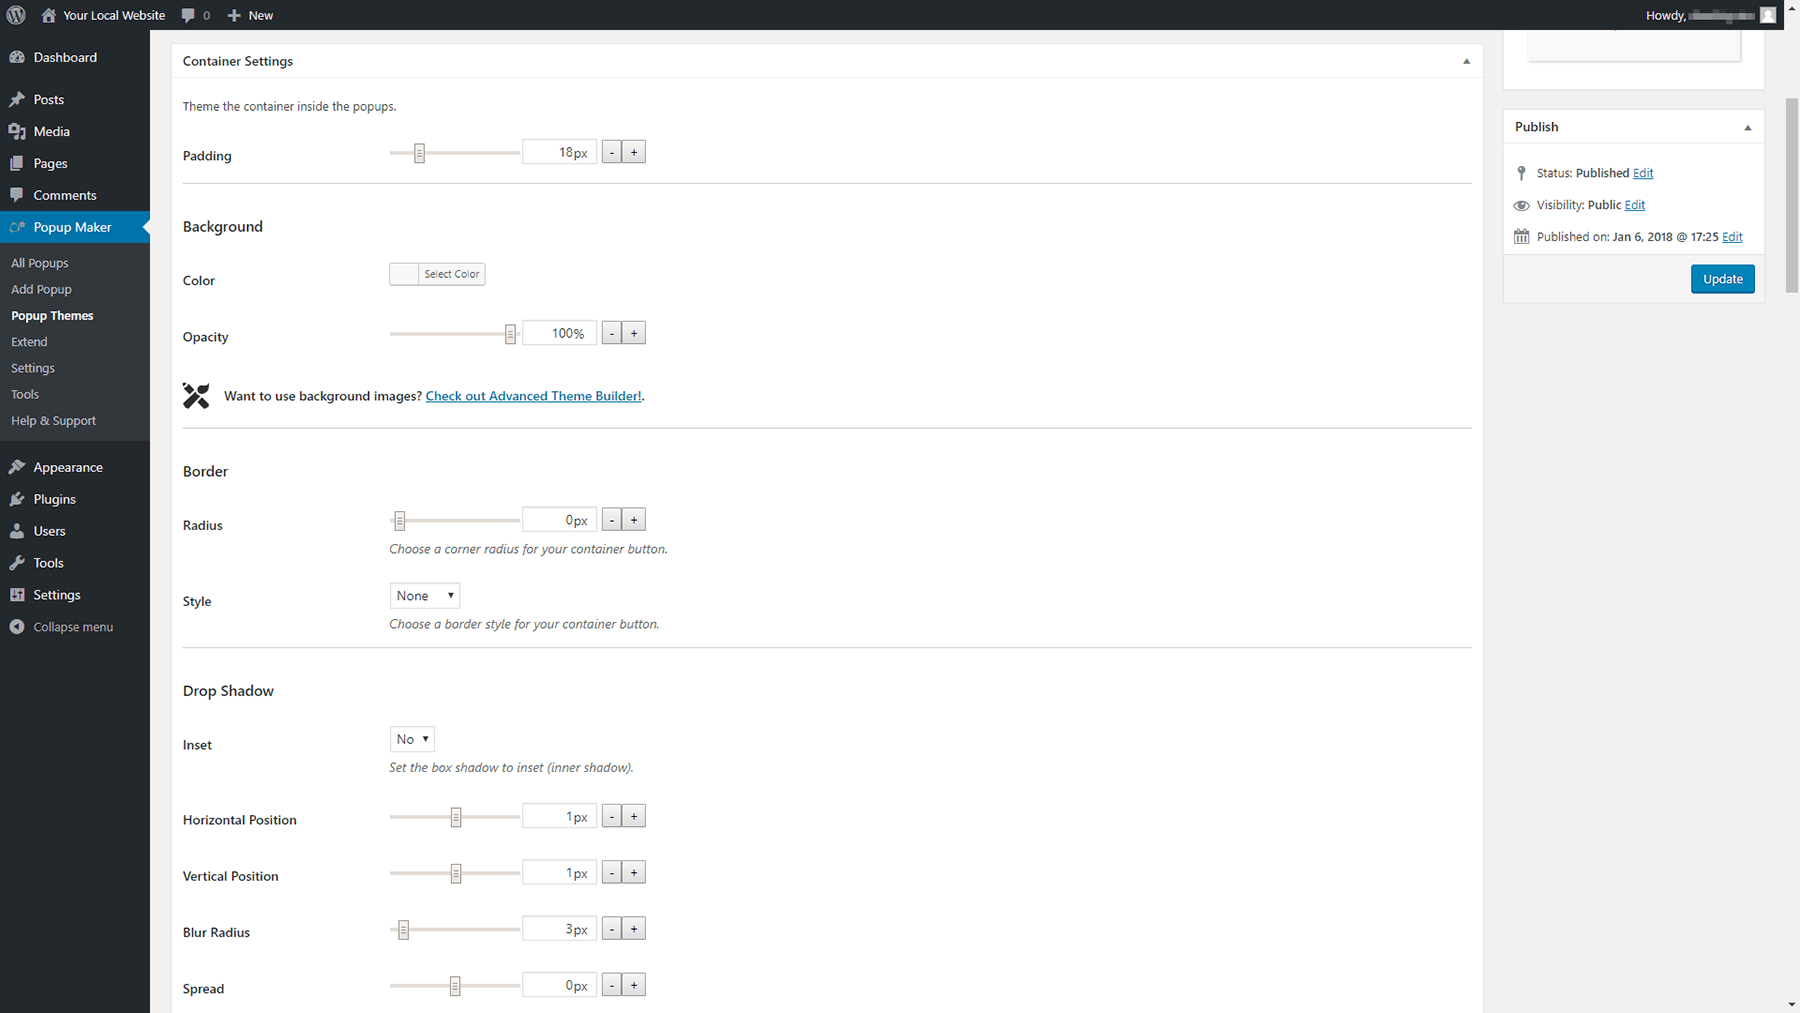
Moving on, the Container Settings section enables you to modify how your actual popup will look. For example, you can change its background color, alter the padding around the text, include a border, and even add a drop shadow:
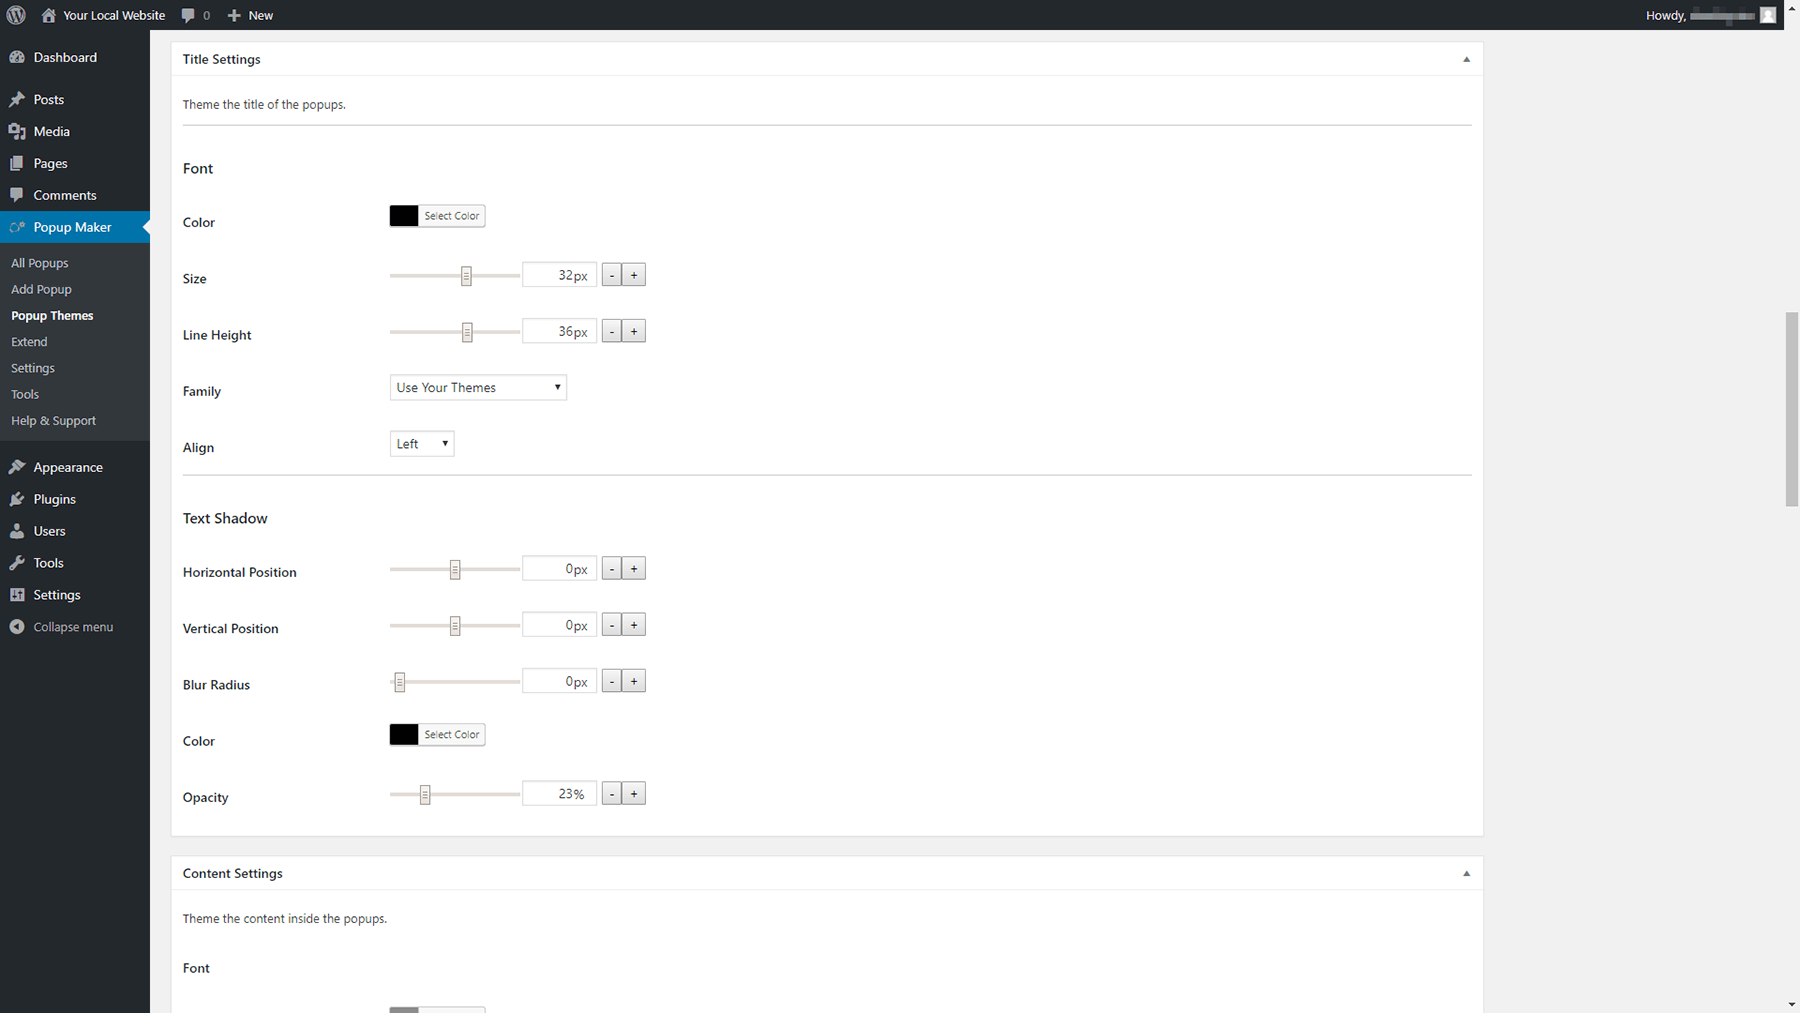
The next two sections – Title Settings and Content Settings – are particularly important, since they govern how your popup’s text appears. You’ll want to use fonts that fit in well with the rest of your content, and pick options that are easy to read:
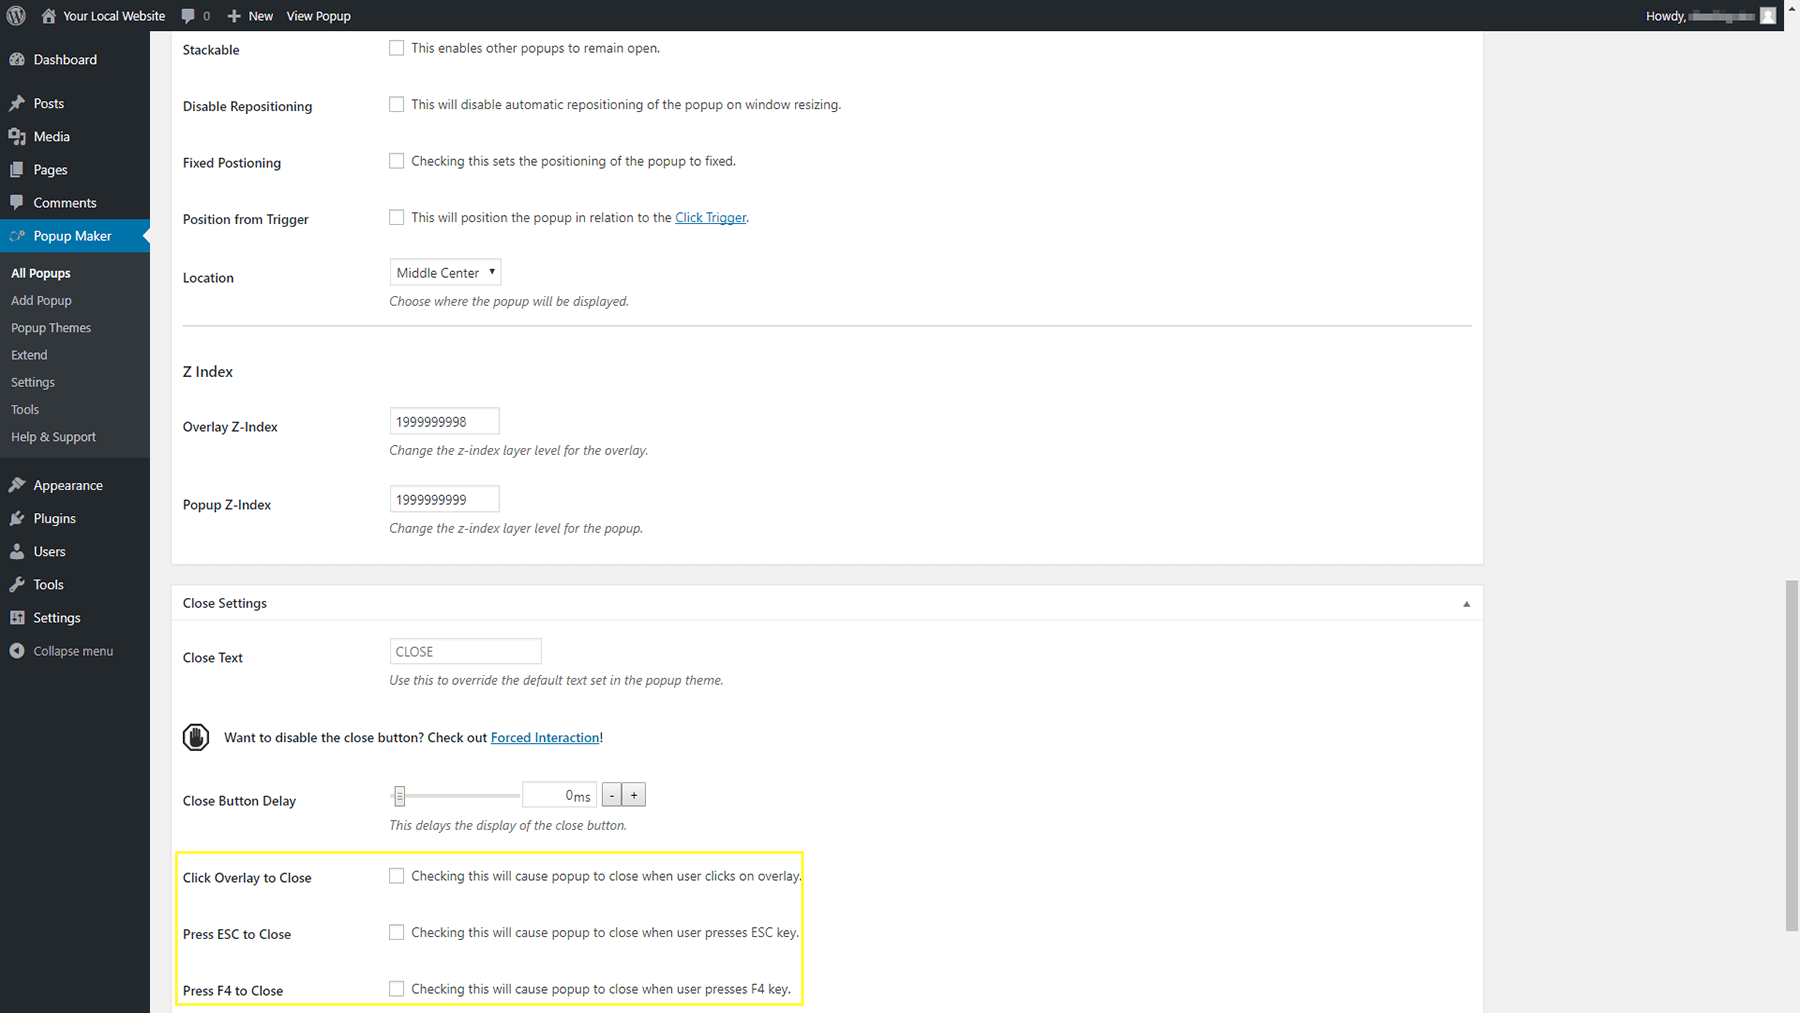
Finally, take a look at the Close Settings section. There, you can change the way your popup’s closing button looks, including its text, color, font, size, and location:
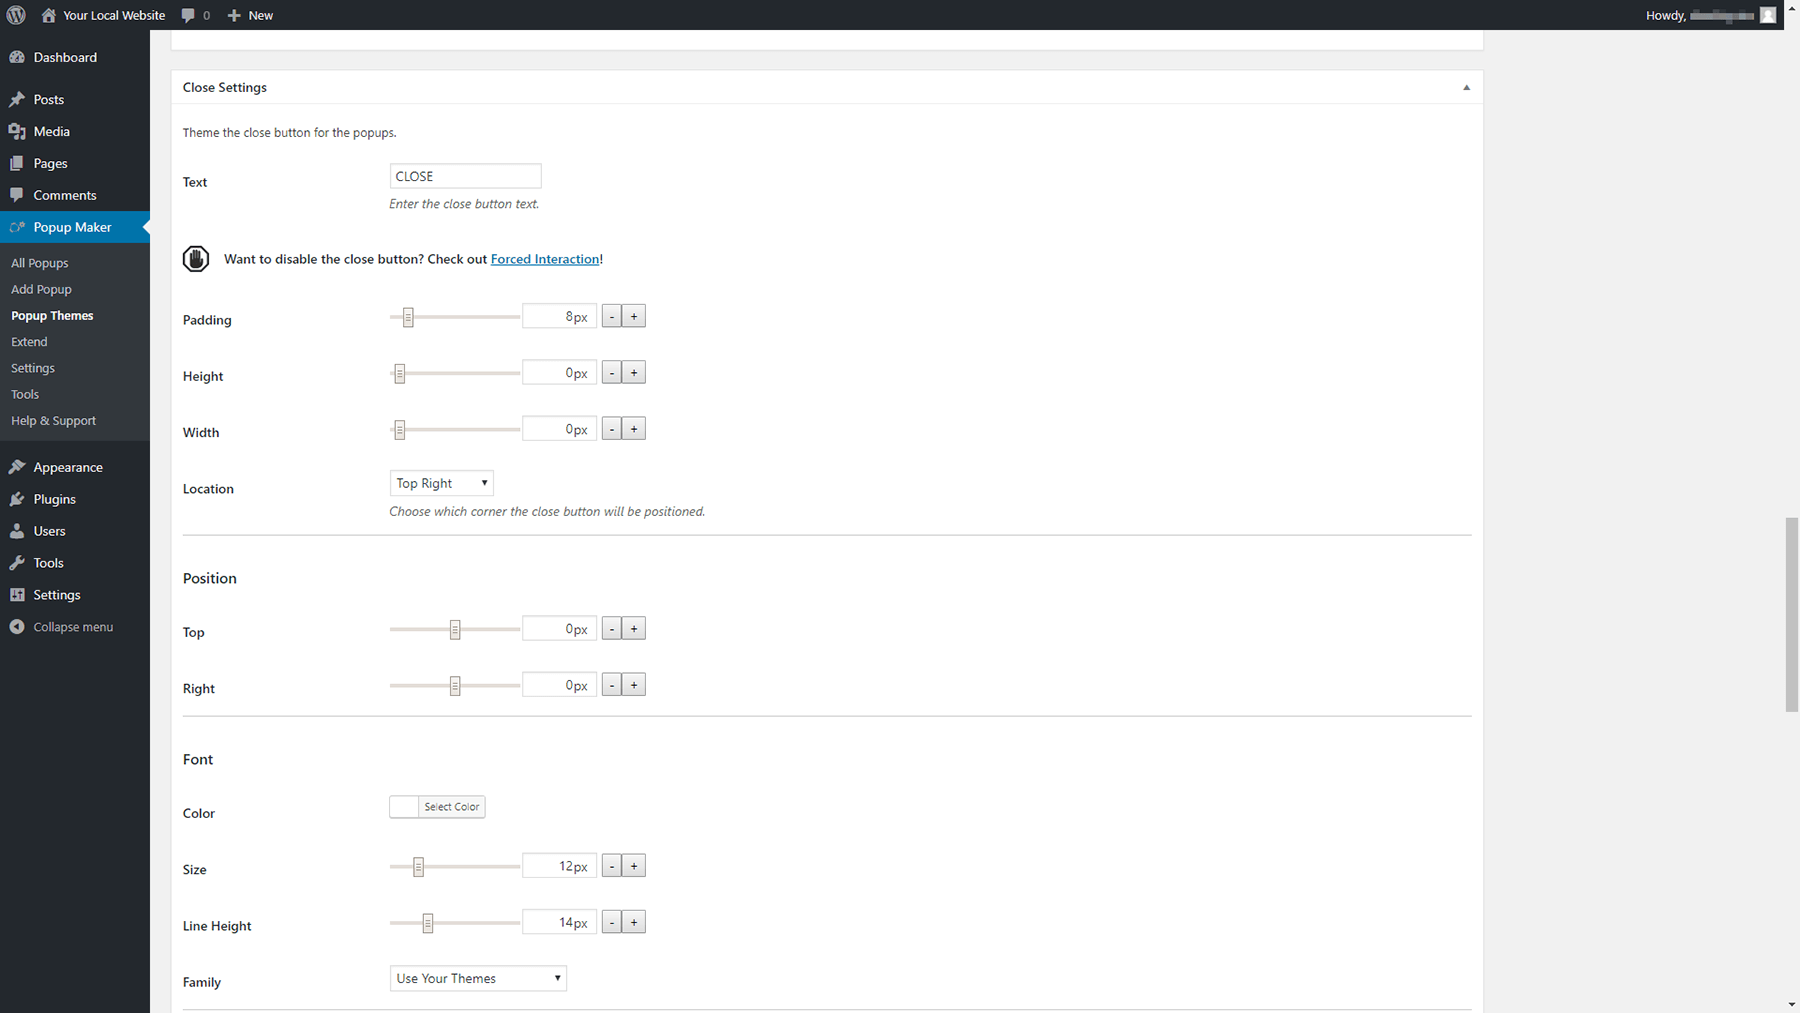
Remember, it’s important to make it as easy as possible for users to close your popup if they’re not interested. That means the close button should be easy to locate at a glance, and simple to click on.
When you’re done, save the changes you’ve made to your theme. Now, it’s time to actually create a popup!
Step 3: Add Your First Popup
Now that the prep work is all done, you can get to work on your first popup. To get started, navigate to the Popup Maker > Add Popup tab on your dashboard. You’ll see a pretty familiar editing screen:
The first things you’ll need to do are choose a name and a title for your popup. The name will show up on your list of popups within your dashboard, whereas the title will appear on the front end for visitors to see.
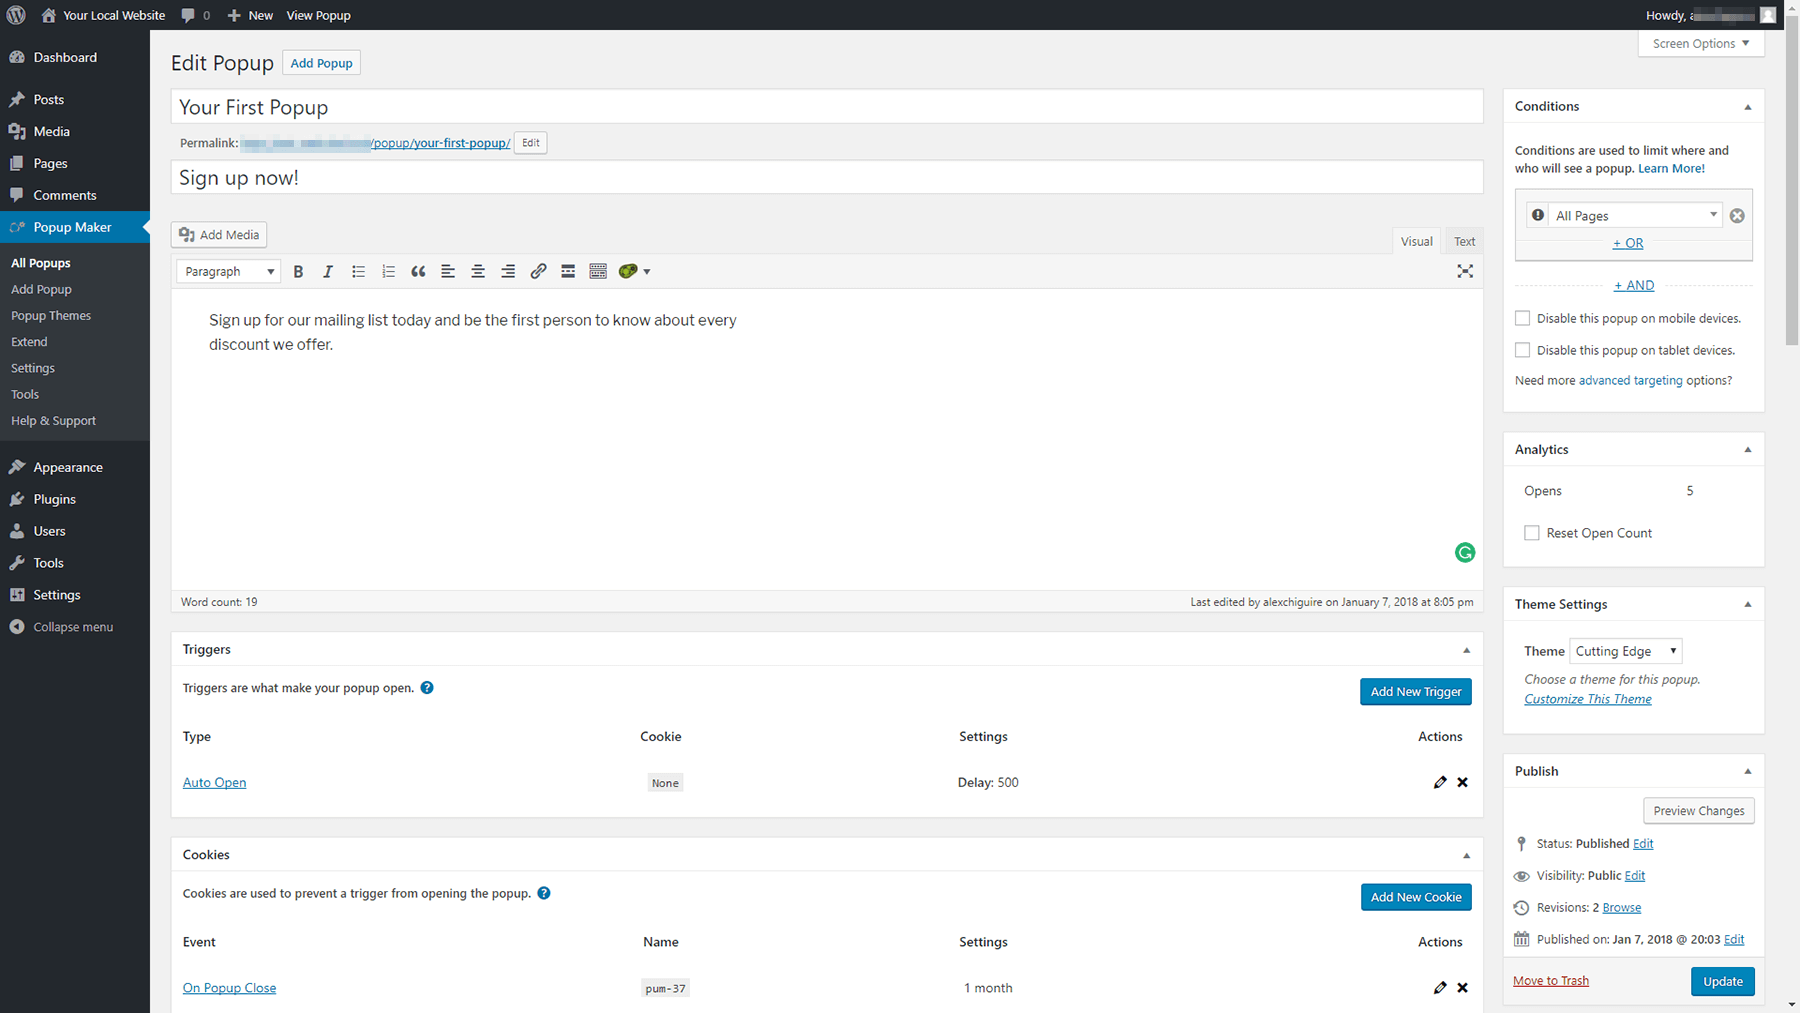
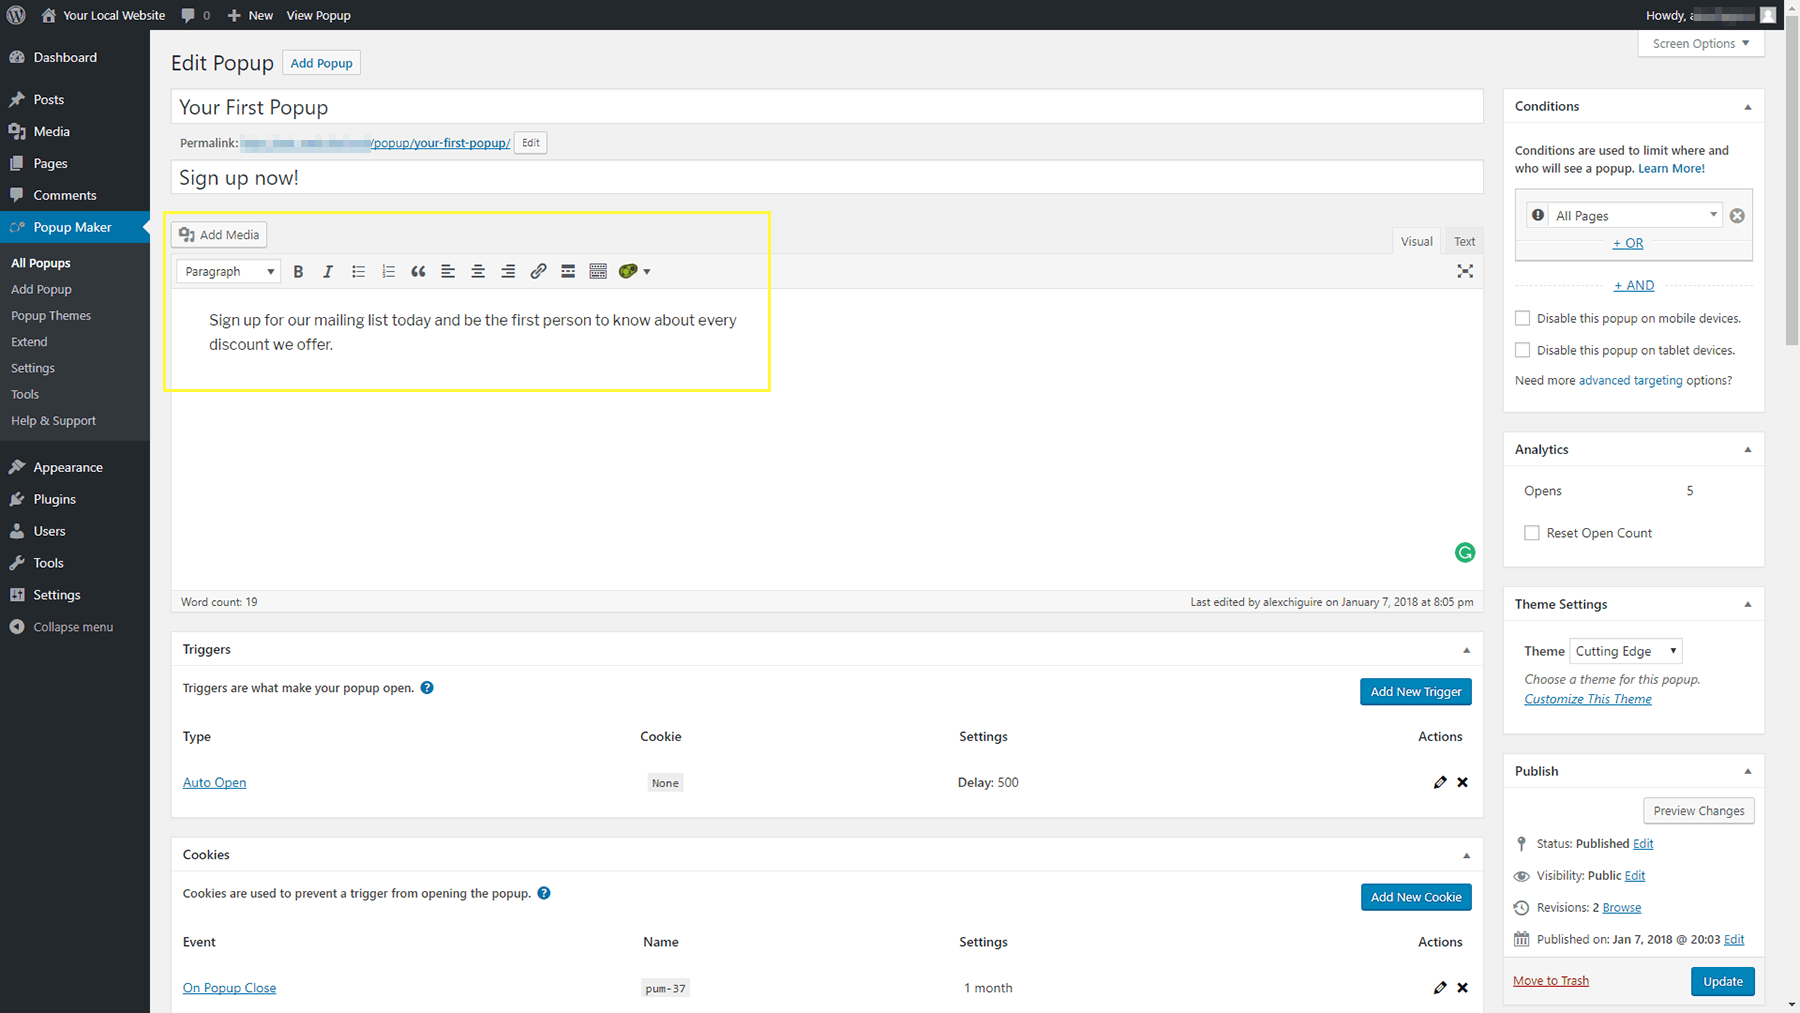
Then, you can use the WordPress editor to type out your popup’s content:
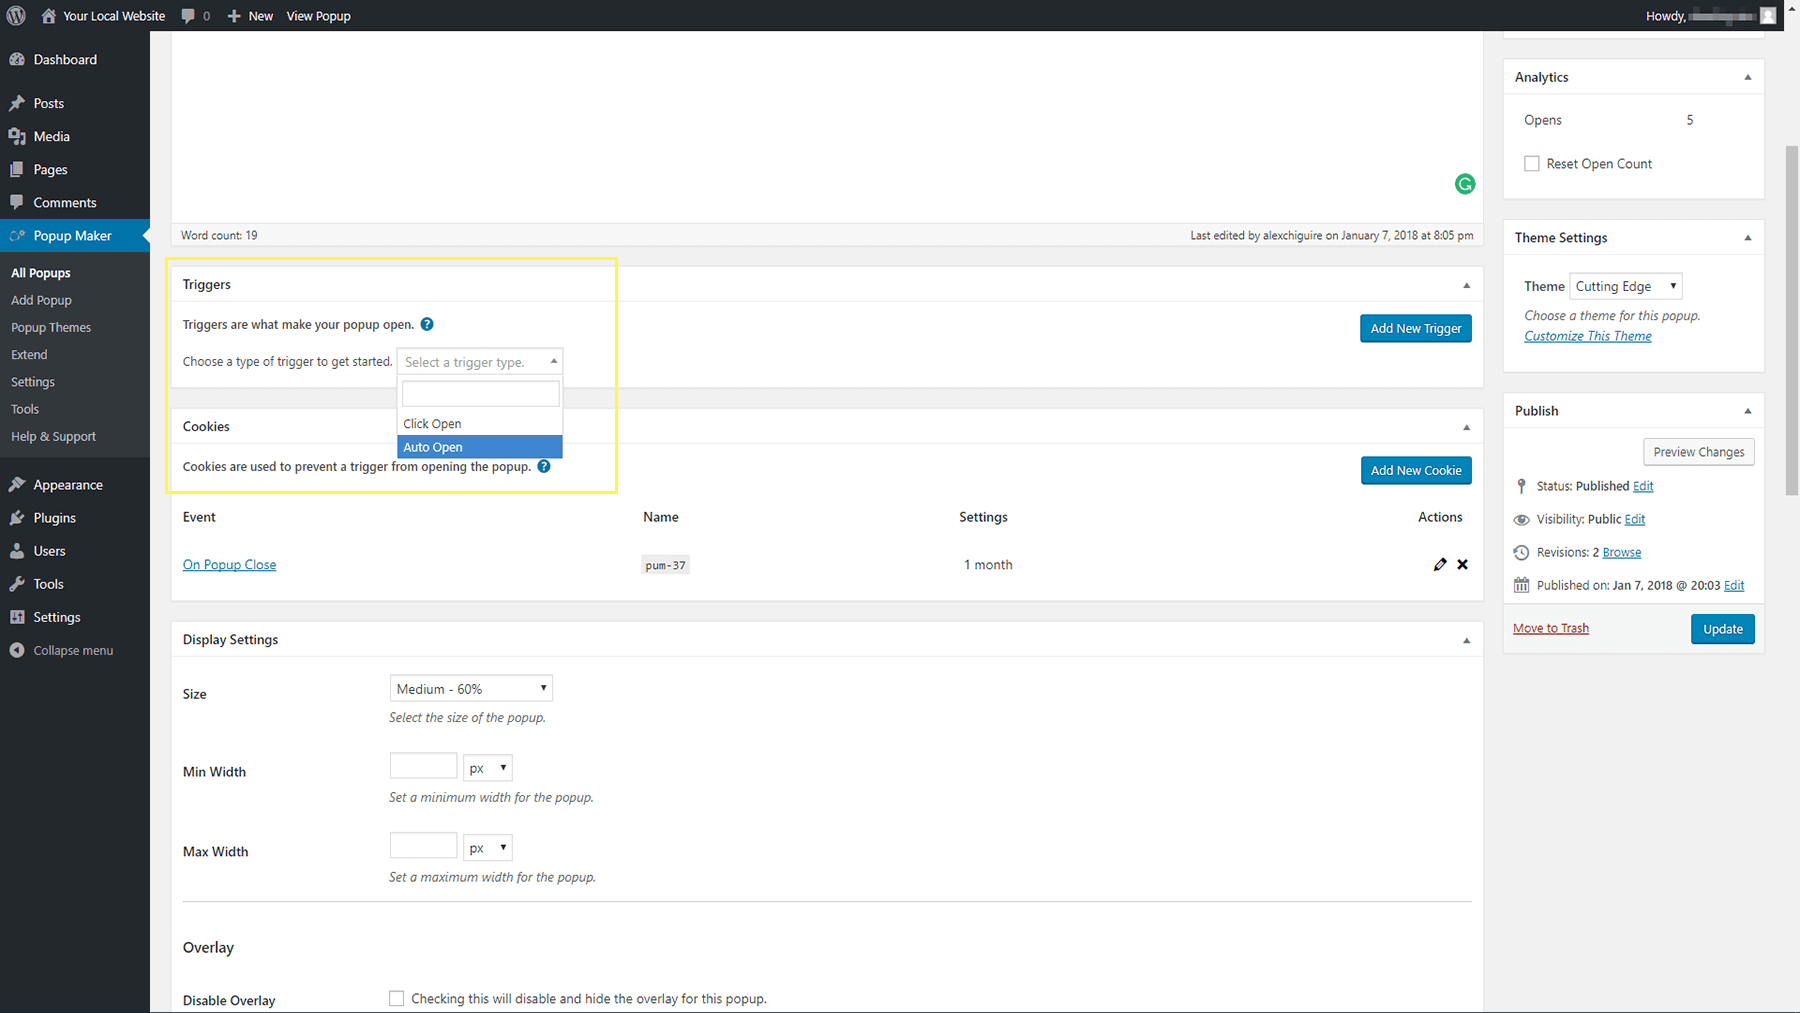
Next, scroll down further and take a look at the Triggers and Cookies sections. The first enables you to choose the action that will trigger your popup. You can have it appear when a user clicks on something, or automatically show up as soon as the page loads. We’re partial to the second option, because it feels less disruptive:
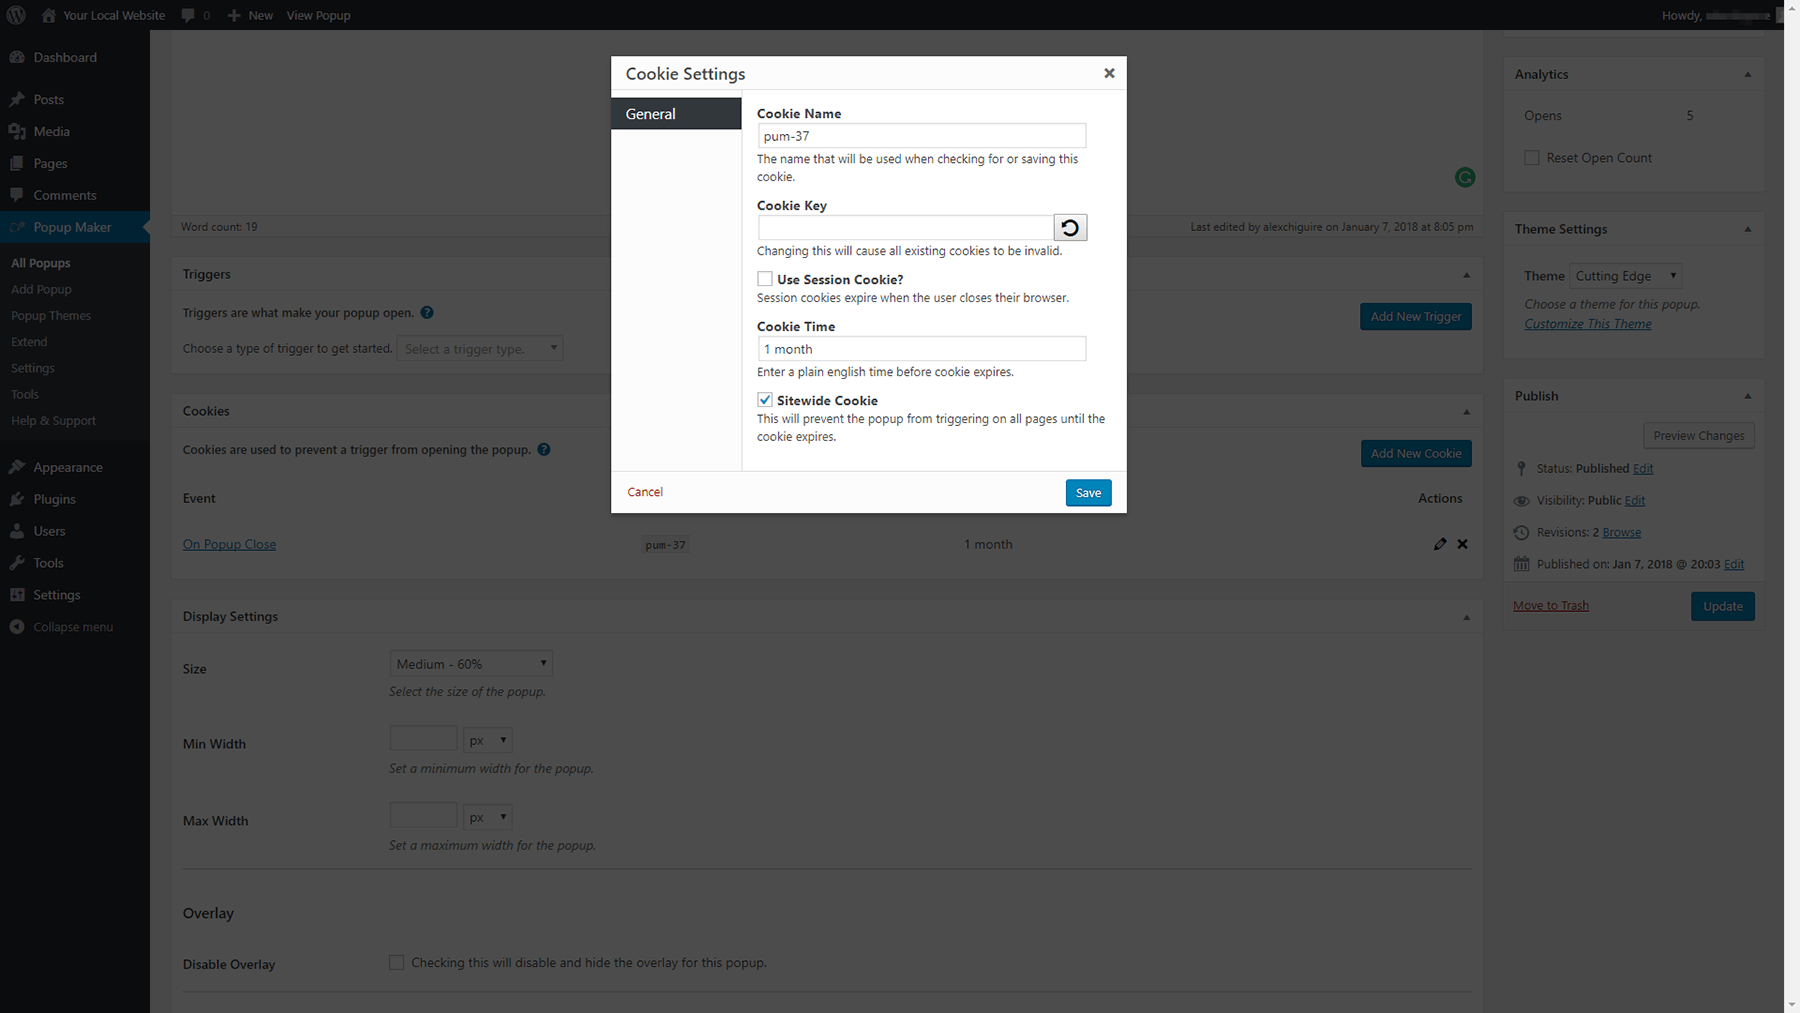
After a user sees a popup, they probably don’t want to deal with it every time they visit that same page again. That’s where the Cookies section comes in. Each new popup you create has its own cookie, and here you can choose how long it will last. By default, your visitors won’t see any of your popups again for a full month after the first time, but you can edit that length to be longer or shorter:
Moving on, you’ll find the Close Settings section near the bottom of the page. Here, you can tweak your close button’s text and behavior. By default, users need to use the button to close your popup, but you can make it so that clicking anywhere outside the element terminates it as well:
You can also enable users to close your popups using the ESC key, which is a nice touch, or via the F4 button.
Now, all that’s left is to choose where your popup will show up and what theme it will use. For both settings, return to the top of the screen and look to your right. The Conditions widget enables you to choose which pages this new popup will show up on, and you can pick multiple options if you’d like:
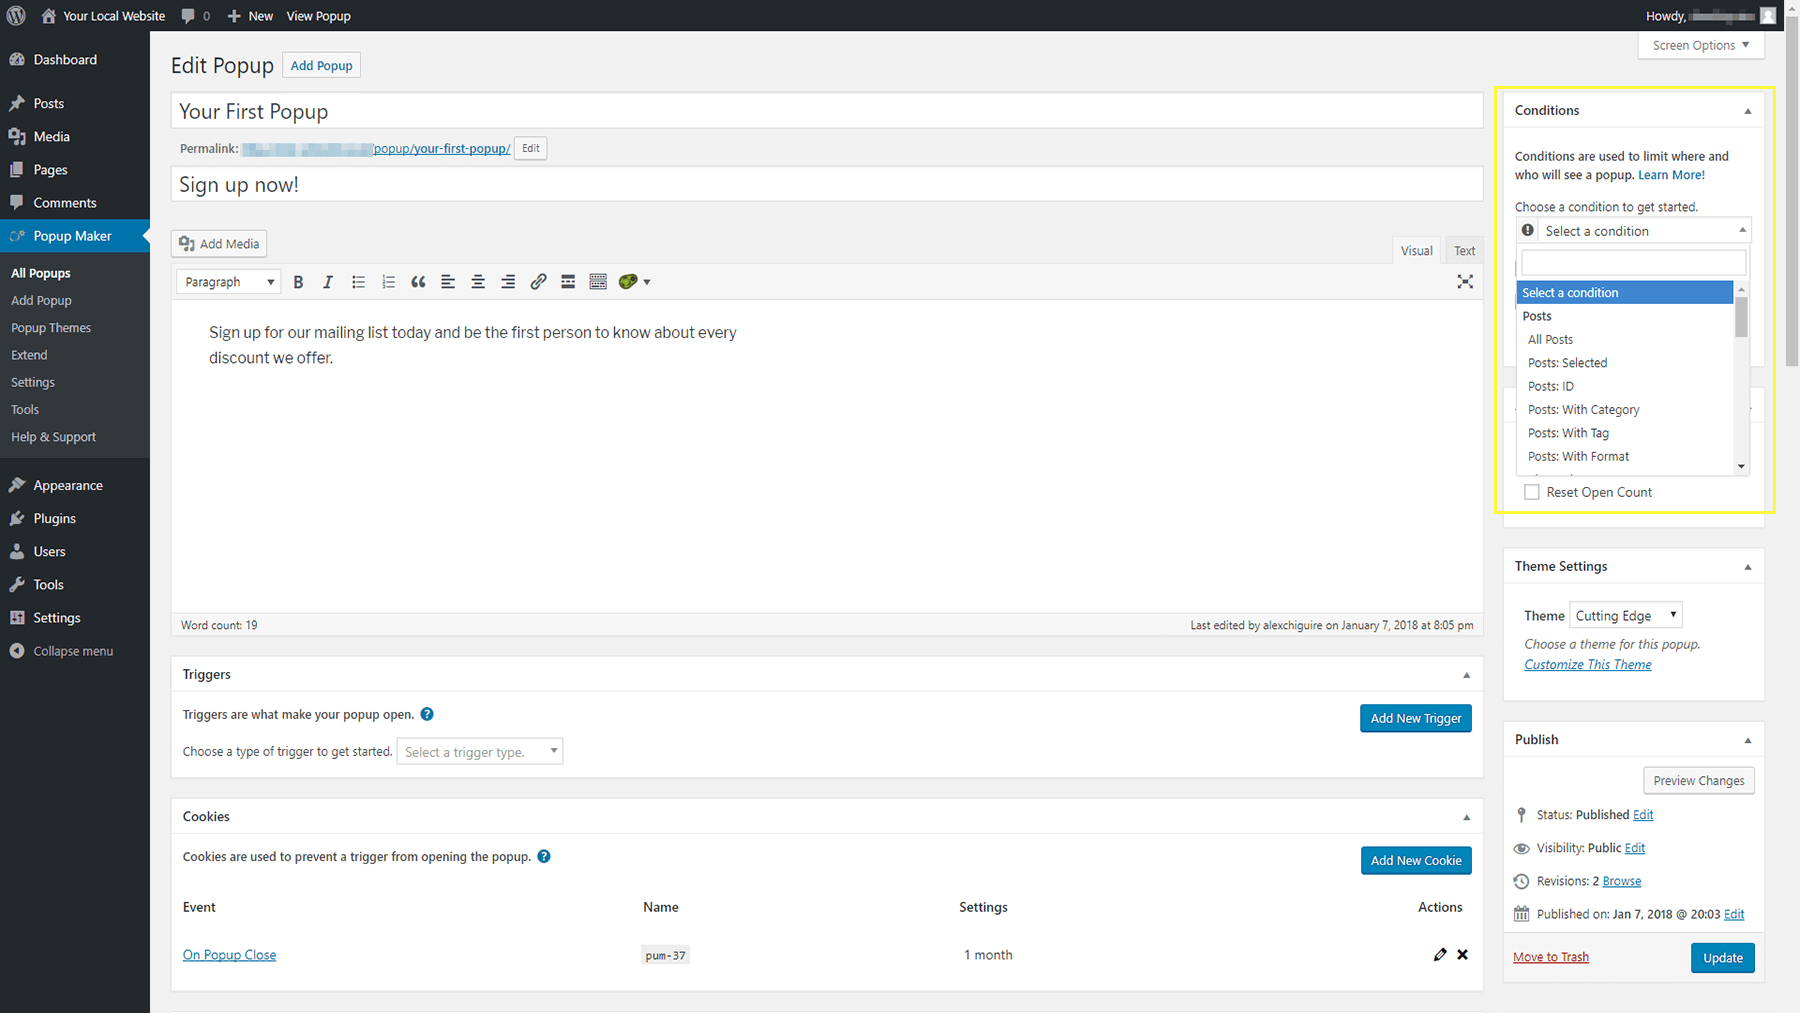
Right below that, you’ll find the option to pick which theme to use for your popup, under Theme Settings.
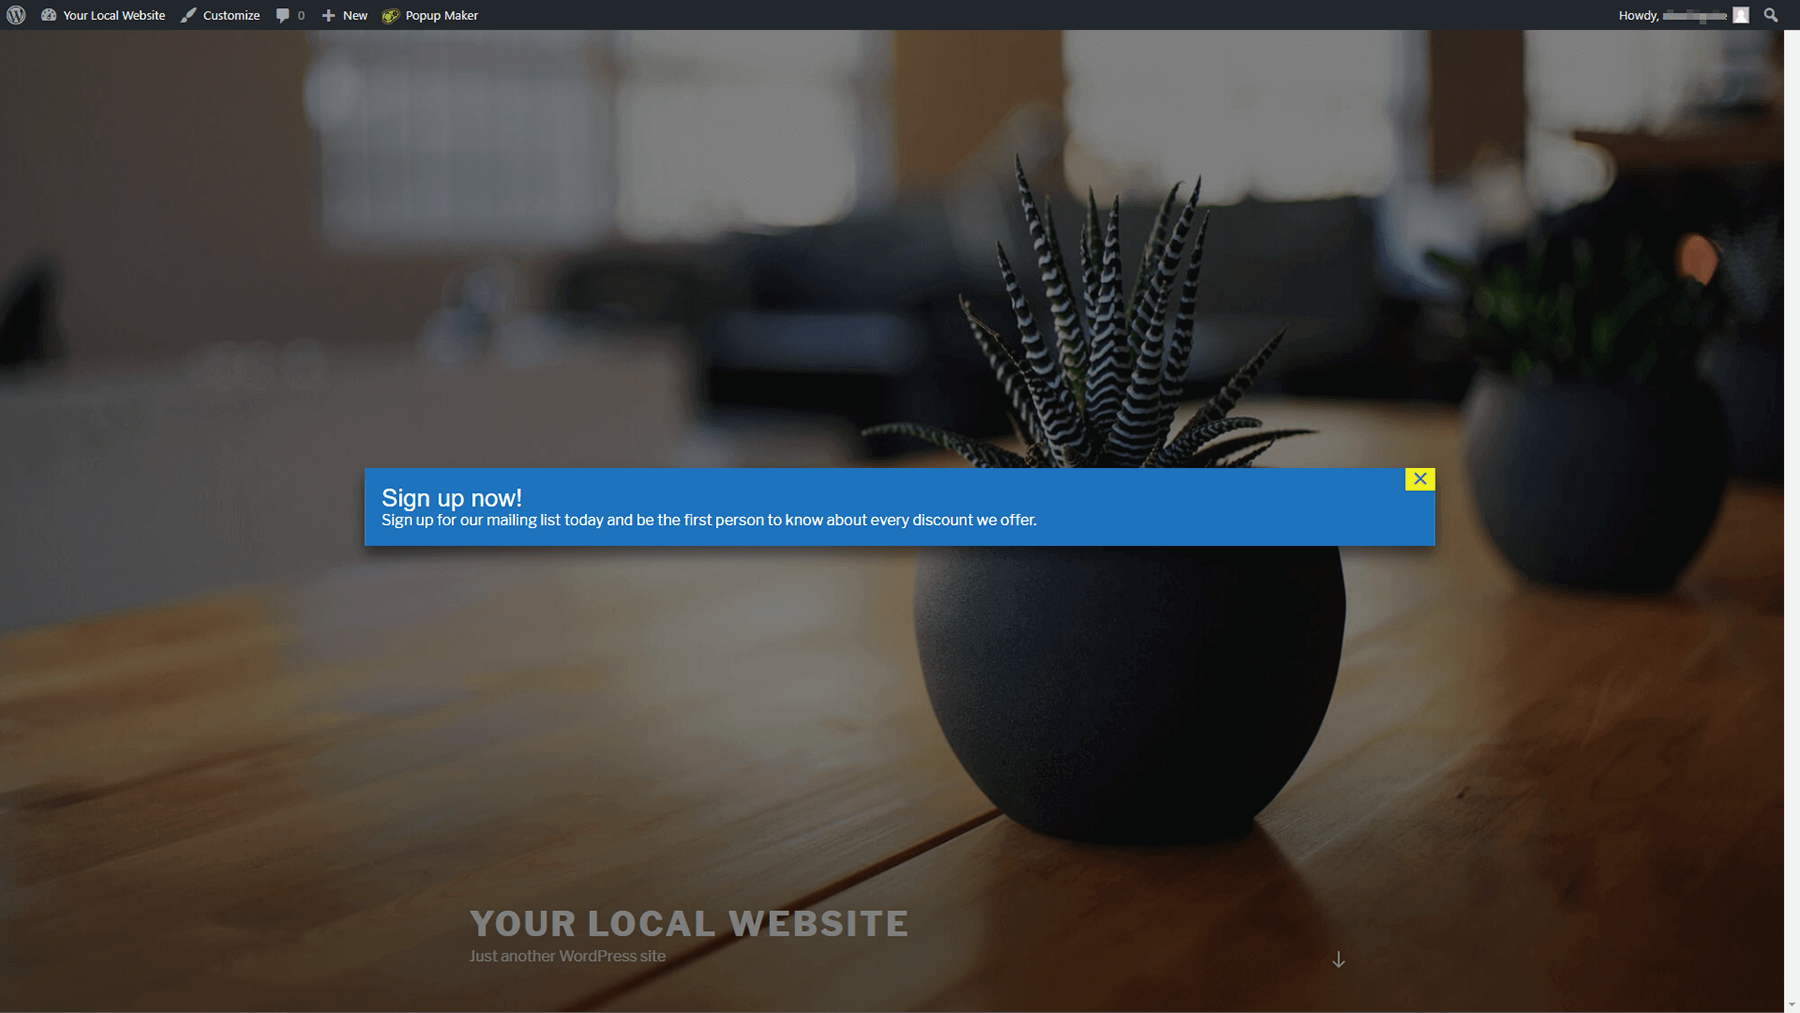
When you’re done customizing your popup’s content and settings, remember to publish it, and check out how it looks on the front end of your website:
If you’re not happy with its appearance yet, you can keep making tweaks until it’s just right. Then, simply repeat this process whenever you need to add another popup to your site!
Conclusion
Under the right circumstances, popups can be a boon to your website. These days, popups aren’t about bombarding users with random ads. Instead, you can use them to coax visitors into signing up to an email list, encourage them to convert, or inform them about new deals. As long as you design your popups carefully, they can be a valuable feature for both you and your audience.
If you want to jump onboard the WordPress popup wagon, we recommend using the Popup Maker plugin. Simply install it and follow these three steps:
- Configure the Popup Maker plugin.
- Tweak your popup themes.
- Add your first popup.
Do you have any questions about how to add popups to your WordPress website? Ask away in the comments section below!
Image credit: Startup Stock Photos.