
Most websites are made up of multiple pages, even when less content might be more effective. This might not seem like much of a problem, but spreading your content too thin can make it difficult for visitors to find what they want, or even dissuade them from looking altogether.
In some cases, all it takes is one page to share all the information you need. For that reason, one-page designs are becoming more and more common among websites. Moreover, if you’re using the right theme, packing all the features you need into a single page shouldn’t be an issue.
For this piece, we’re going to talk about when it makes sense to use a one-page design, and discuss some Uncode features that can help. Finally, we’ll teach you how to create a one-page website in just four steps. Let’s get to work!
When a One-Page Website Is a Smart Design Choice

The concept of a one-page website is simple – you take all the content that you would have otherwise spread out, and condense it into a single location. This can result in long pages, but nowadays people aren’t afraid of doing some scrolling to find what they want.
Naturally, one-page designs don’t work in all cases. For example, online stores with dozens of products often require individual pages for each item. However, using a one-page site makes sense in other scenarios, such as for smaller stores or:
- Landing pages. The goal of landing page sites is to convert you as quickly as possible, so it makes sense to keep things compact.
- Portfolio pages. Depending on how much work you have to show, a single page is often enough to get the job done.
- Brochure business websites. These days, most businesses require an online presence, but not all of them need a multi-page affair.
Imagine, for example, that you need to create a website for a dry-cleaning store. You could easily include all the information you need about your services on a single page, including images, contact information, and more. On the other hand, a realty company would probably need multiple pages to show off individual properties.
As always, no single design trend will work for every website. So it’s up to you to use your common sense to figure out if this one is a good fit for your project. If it is, then you’ll need the right theme to help you out.
3 Uncode Features That Are Perfect for One-Page Websites
Our Uncode theme offers so many features that it would take a small book to cover all of them. Here, we’ll focus on introducing you to the options that are best suited for one-page designs, and discussing how each one can benefit your site.
1. Slides and Simple Scrolling
One-page websites tend to be long. To make up for that, it’s critical to make your single page easy to navigate. Fortunately, Uncode provides you with several advanced scrolling functionalities. For example, the Slides Scroll feature turns each section of your page into a slide, and enables transition effects when you jump between them:
Likewise, the Simple Scroll functionality enables you to turn on ‘dot navigation’. With this feature, visitors can skip between sections of your page by clicking on a few labeled dots at the side of the page. Finally, the Snap Scrolling option adds a simple transitional effect when you move between sections, which makes the user’s experience smoother.
All these effects are simple to implement. Plus, they make your one-page design feel like a more cohesive experience, instead of a bunch of sections strung together with little thought.
2. Tabs and Accordions
Tabs and accordions are simple elements that enable you to pack more information onto a page, without taking up additional space. Accordions, for example, do this by hiding the information vertically, using subheadings you can click to jump between sections:

If you want more flexibility, you can turn to tabs instead. This feature works in a similar way, but provides you with the option to use horizontal or vertical layouts:
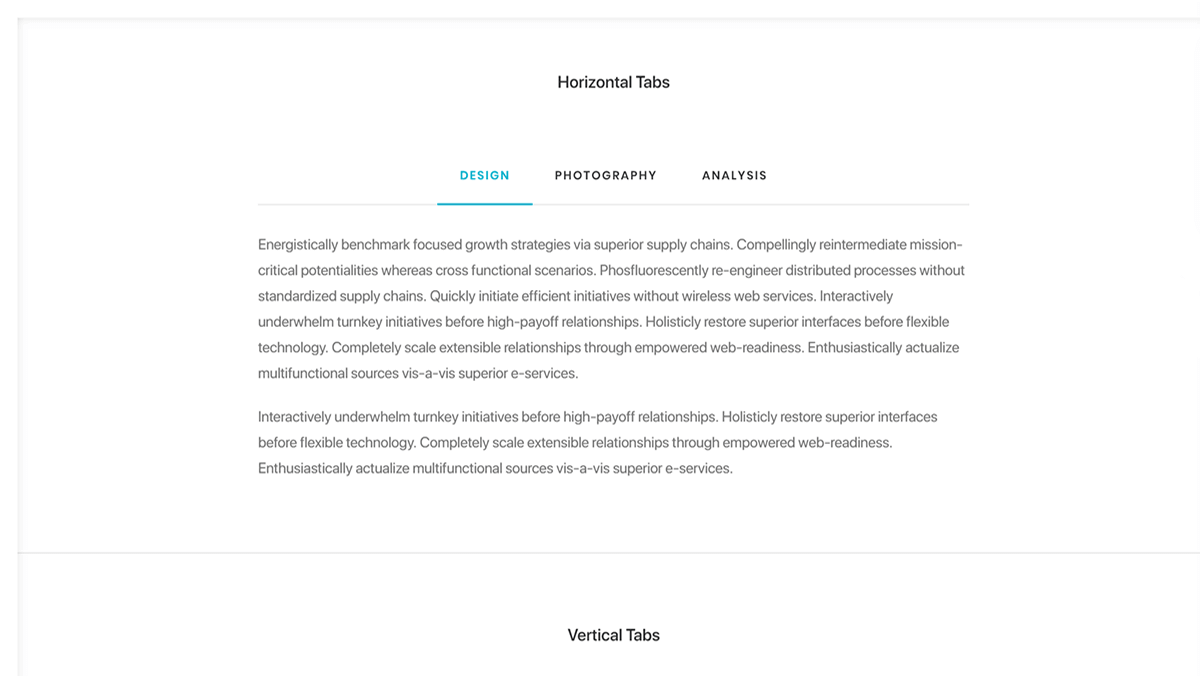
A perfect example of where to use tabs or accordions would be in a Frequently Asked Questions (FAQ) section, or to organize a list of service offerings. On a one-page website in particular, saving space this way can be hugely beneficial.
3. Built-In Support for Contact Form 7
These days, most websites include contact forms that visitors can use to get in touch with you without having to leave the page. Uncode simplifies the process of adding advanced contact forms by integrating with Contact Form 7, one of the most popular WordPress plugins available online:

When it comes to one-page designs, contact forms are particularly important. They can help you capture leads, and let visitors easily ask for information your site doesn’t include. With that in mind, it makes sense to use the best possible tool to manage yours. By using Contact Form 7 alongside Uncode, you can manage multiple forms, customize them, and even add advanced features such as CAPTCHAs.
How to Create a Professional One-Page Website Using Uncode (In 4 Steps)
Now, let’s talk about how to actually build your one-page site. You’ll first want to install and activate Uncode. After that, go ahead and proceed to the first step.
Step 1: Set Up All of Uncode’s Recommended Plugins
One of the ways Uncode enables you to build any type of website is by integrating with several popular plugins, such as Contact Form 7, Layer Slider, Revolution Slider, WooCommerce, and more. It’s a smart idea to activate all of Uncode’s integrations if you want to make the most out of the theme.
To do that, go to the Uncode > Install Plugins tab in the dashboard:

We recommend installing and activating all thirteen plugins, to keep your options open. However, since we’re talking specifically about one-page websites, here are the plugins that will be most important:
- Uncode Core. This one is necessary for Uncode to work in the first place, so it should be the first plugin you install.
- Uncode Visual Composer. You’ll need to install this plugin if you want to have access to Uncode’s page-building functionality.
- Contact Form 7. As we mentioned earlier, contact forms are one of the best ways for one-page websites to attract leads.
- Layer Slider or Revolution Sliders. Everyone appreciates a good slider these days, and either of these plugins will enable you to create an outstanding one.
- WooCommerce. If you want to use your one-page website to sell products, you’ll need a solid e-commerce solution.
Installing any of these plugins is simple. Click on the Install button below their names, and then choose the Activate option afterward. When you’re done, you’re ready to move on.
Step 2: Import One of Uncode’s Demo Layouts
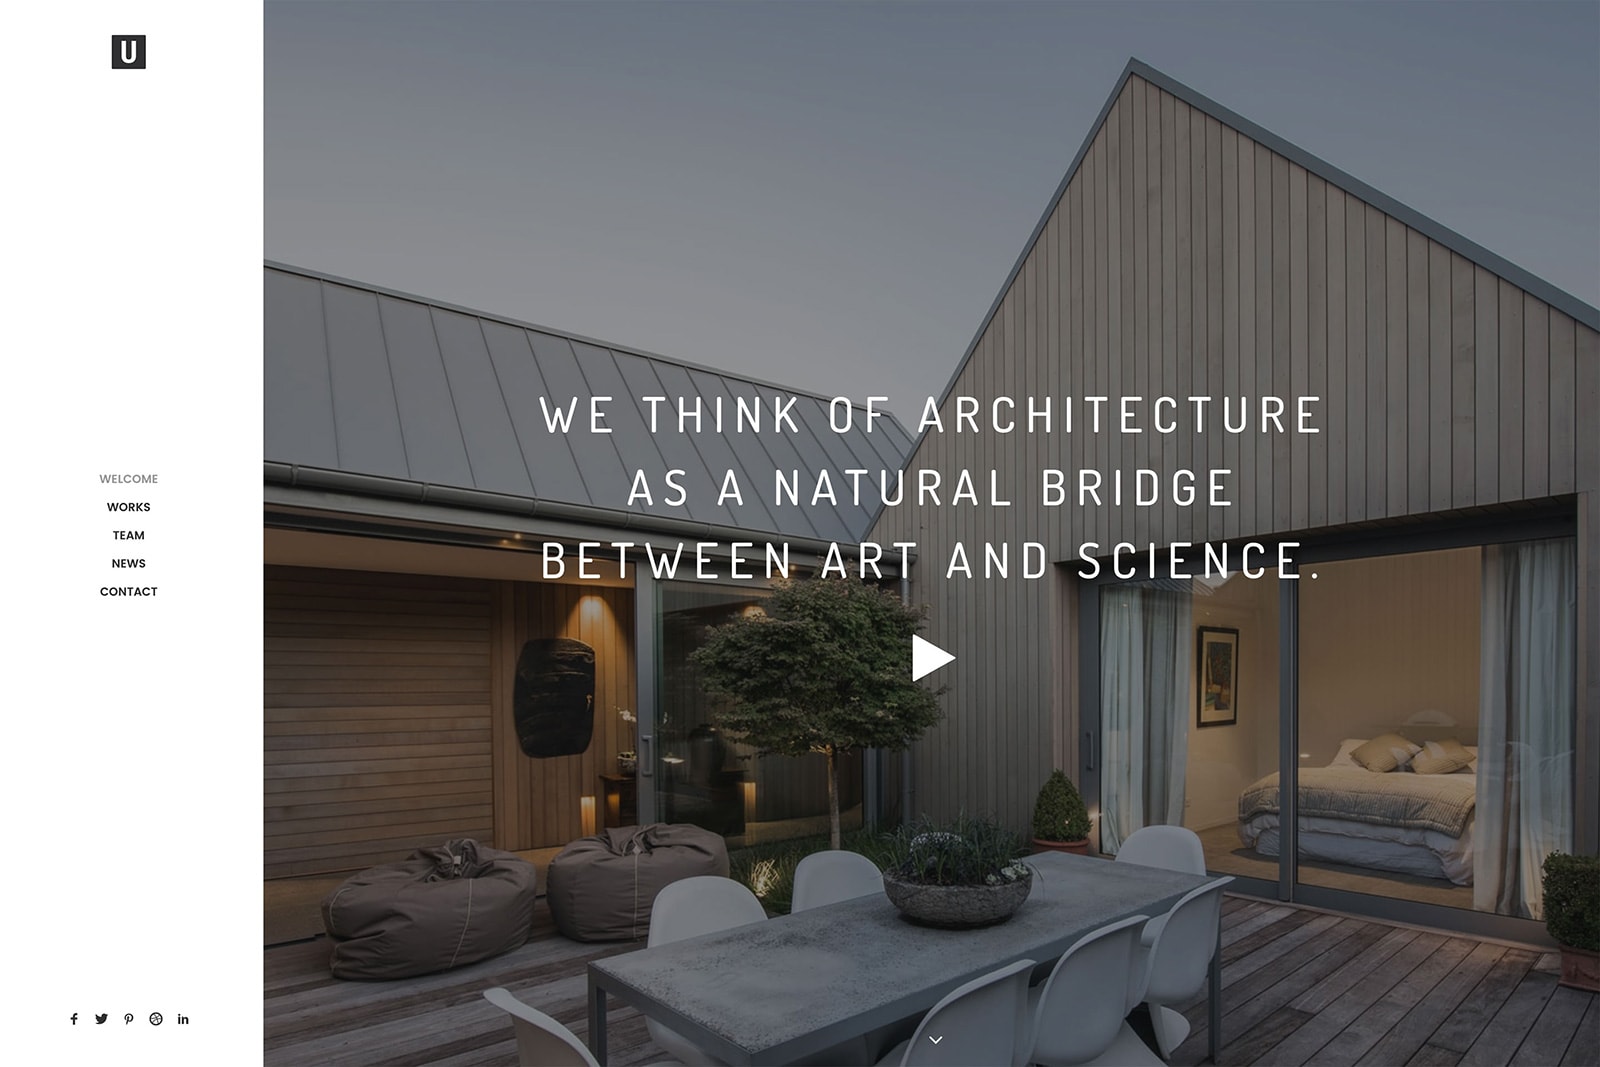
Uncode ships with dozens of page layouts you can use as a way to kickstart your designs. You can import any of them, and get to work on customizing your site. Several of Uncode’s pre-built designs are perfect for one-page websites, such as Creative Artist:

This particular demo showcases how you can create an awesome portfolio on a single page. It includes all the information you’d need to share as an up-and-coming artist, including embedded videos and soundtracks, a photo gallery, and links to social media.
Another great option is Classic Studio, which replaces dot navigation with a classic sidebar:
Finally, as we mentioned earlier, you can also use a one-page design to build your online store (as long as you’re intending to keep it small). Shop Techie exemplifies this, by enabling you to include compact product sections in the middle of your home page:

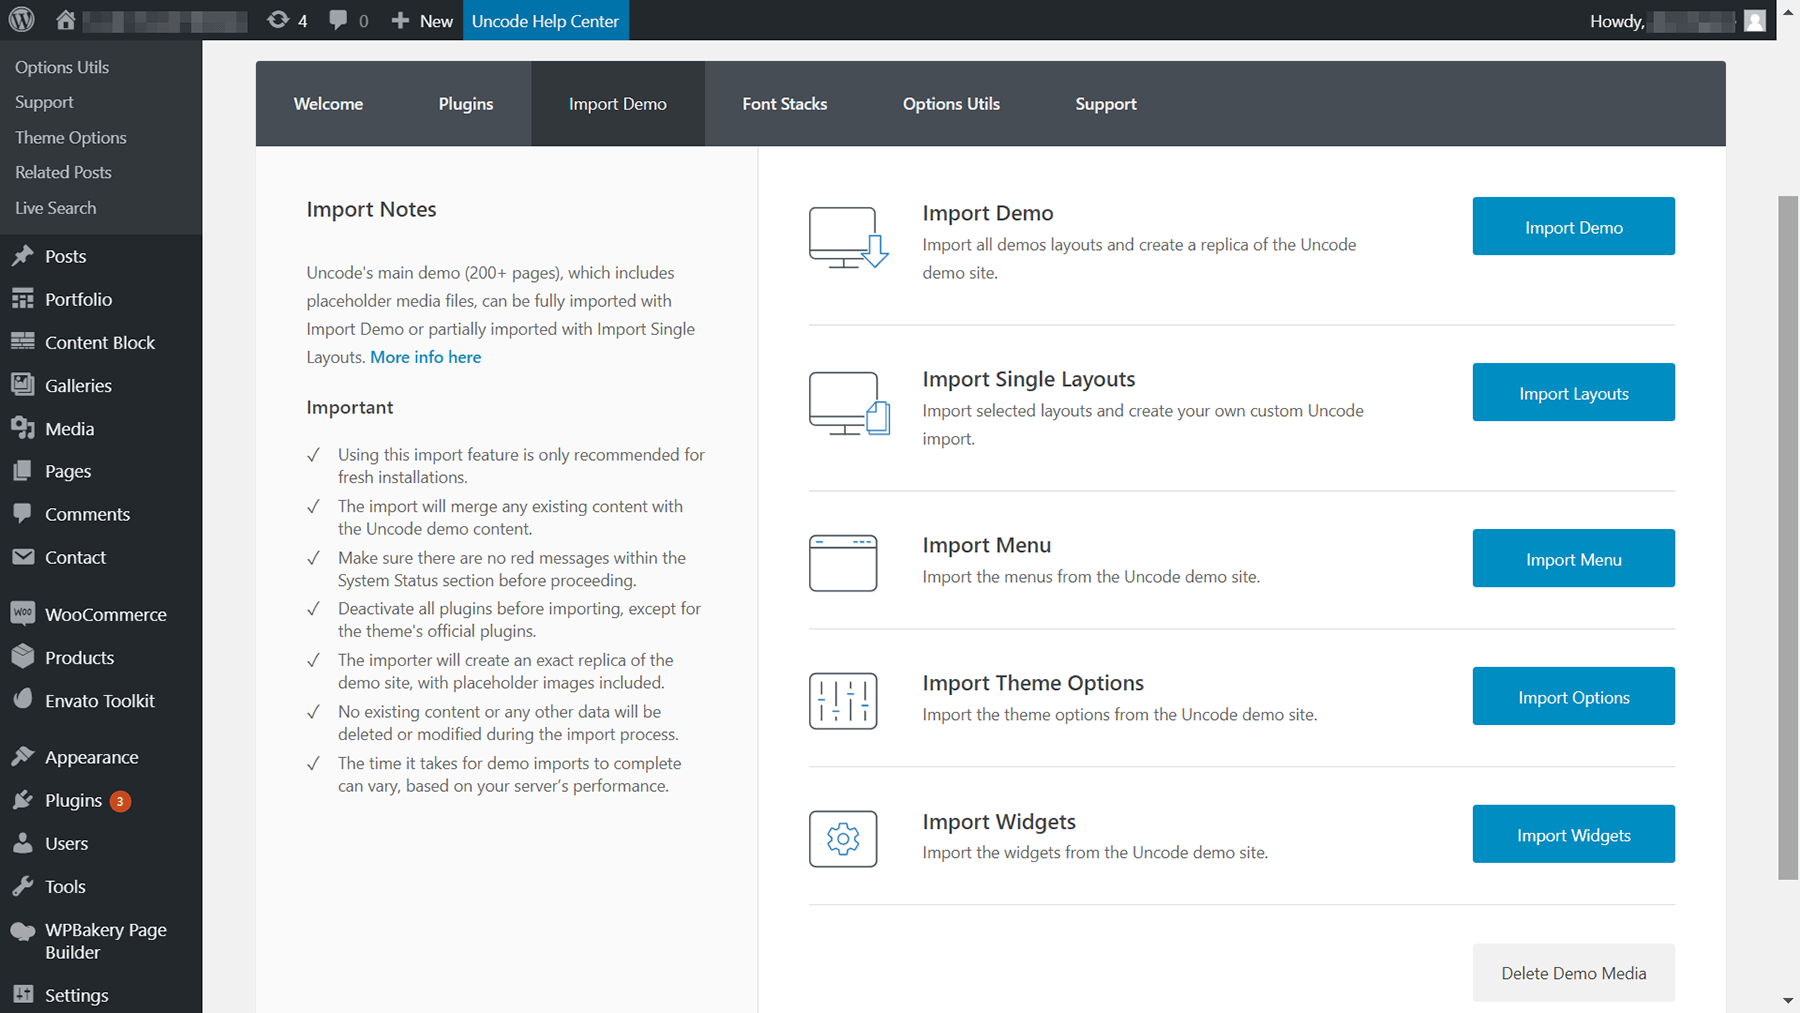
Regardless of which layout you pick, the importing process remains the same. Go to the Uncode > Import Demo page, and click on the Import Layouts option next to Import Single Layouts:
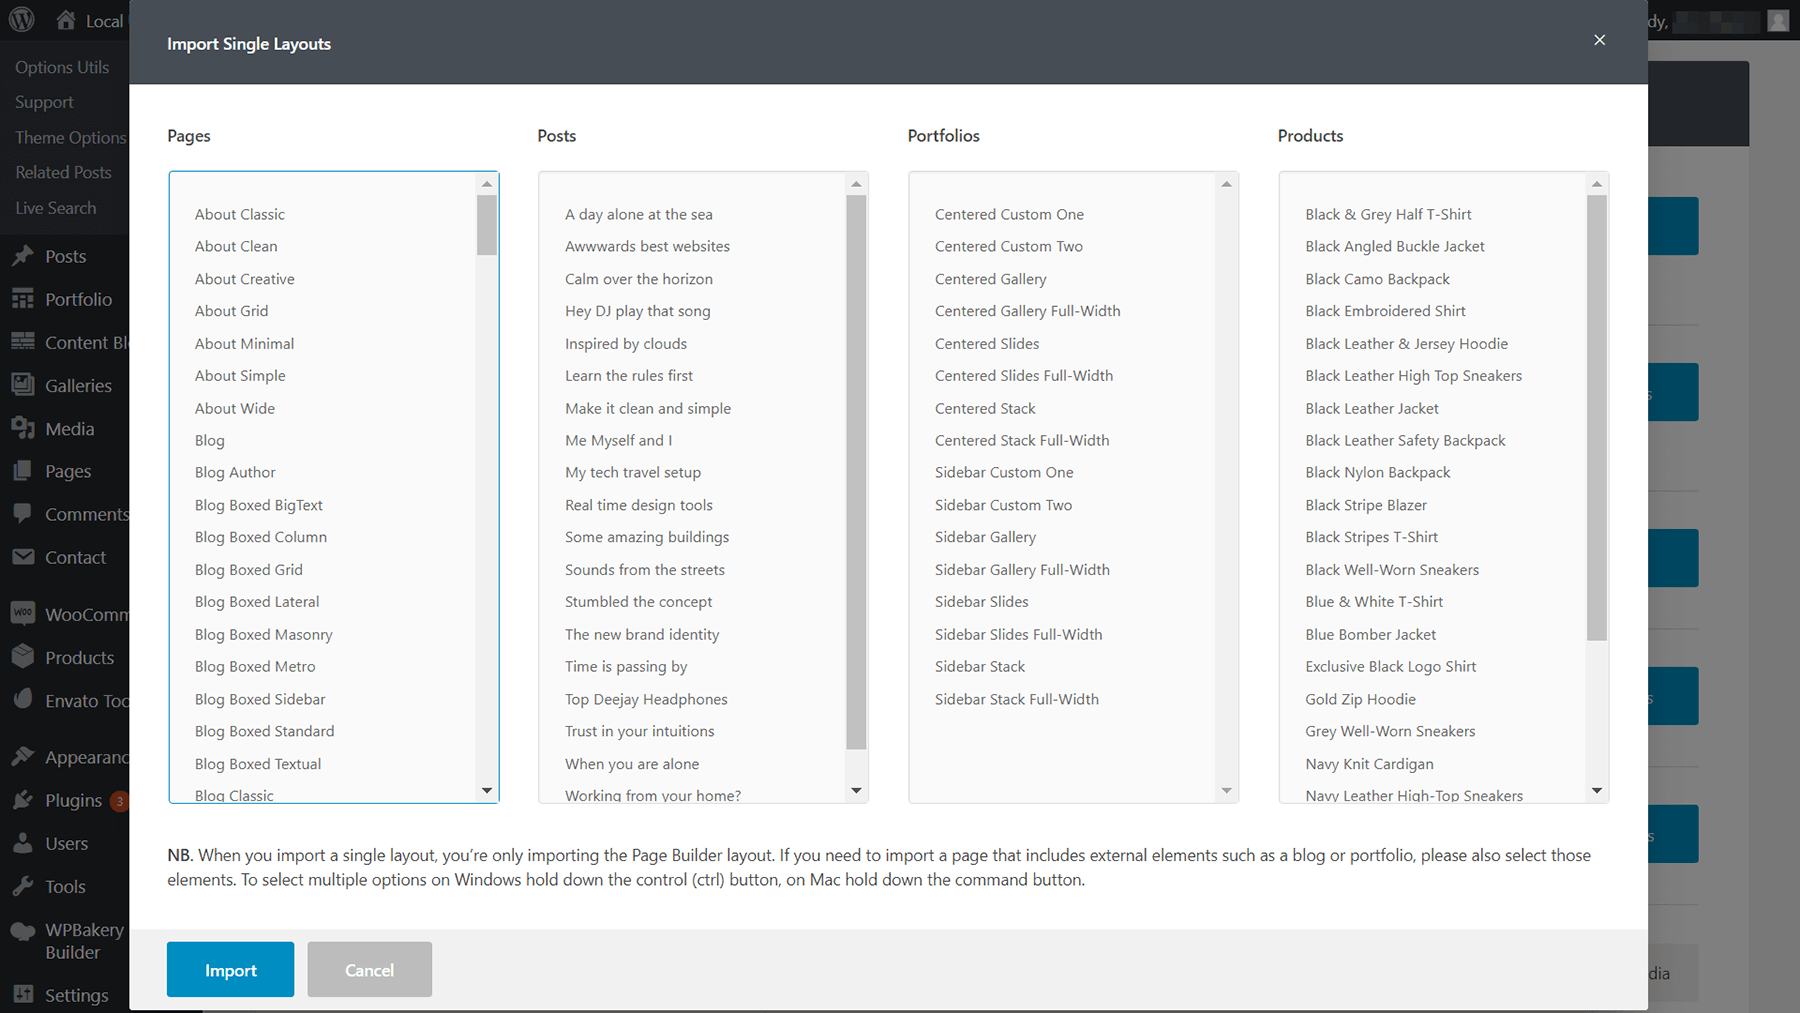
A new window will pop up, offering dozens of demo options. All the ones we mentioned earlier are included in the Pages column. Look around for the one you want, and click on the Import button when you’re ready:
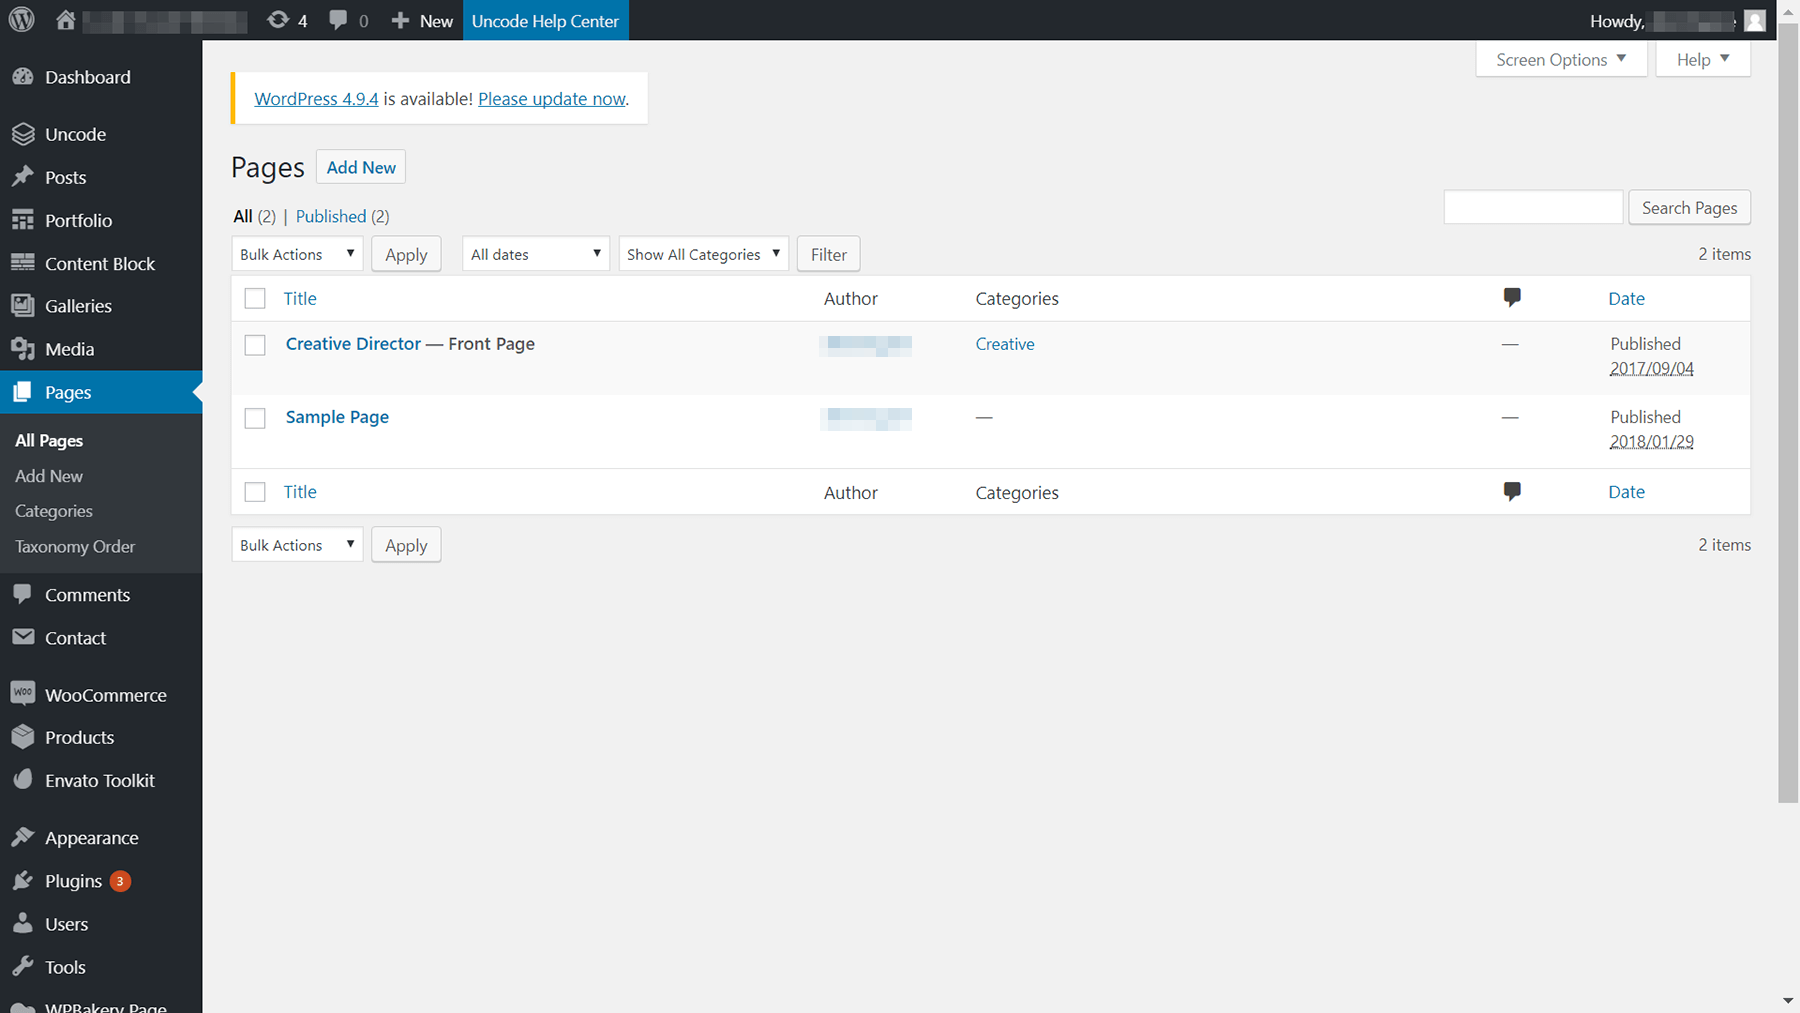
Then you’ll need to confirm your choice, and Uncode will begin the import process. When your new page is ready, it will show up under the Pages > All Pages tab:
After that, the next step will be to tell WordPress to treat this page as your home page.
Step 3: Set Your Imported Demo as Your Home Page
By default, WordPress shows a list of your most recent posts on your site’s home page. However, you can configure the platform so that it points new visitors to any static page you want instead. Now that your imported demo page is up and running, let’s go ahead and do just that.
You’ll need to navigate to the Settings > Reading tab, and look for the option labeled Your homepage displays. Now choose the option that says A static page, and select the page you imported during the last step from the drop-down menu:
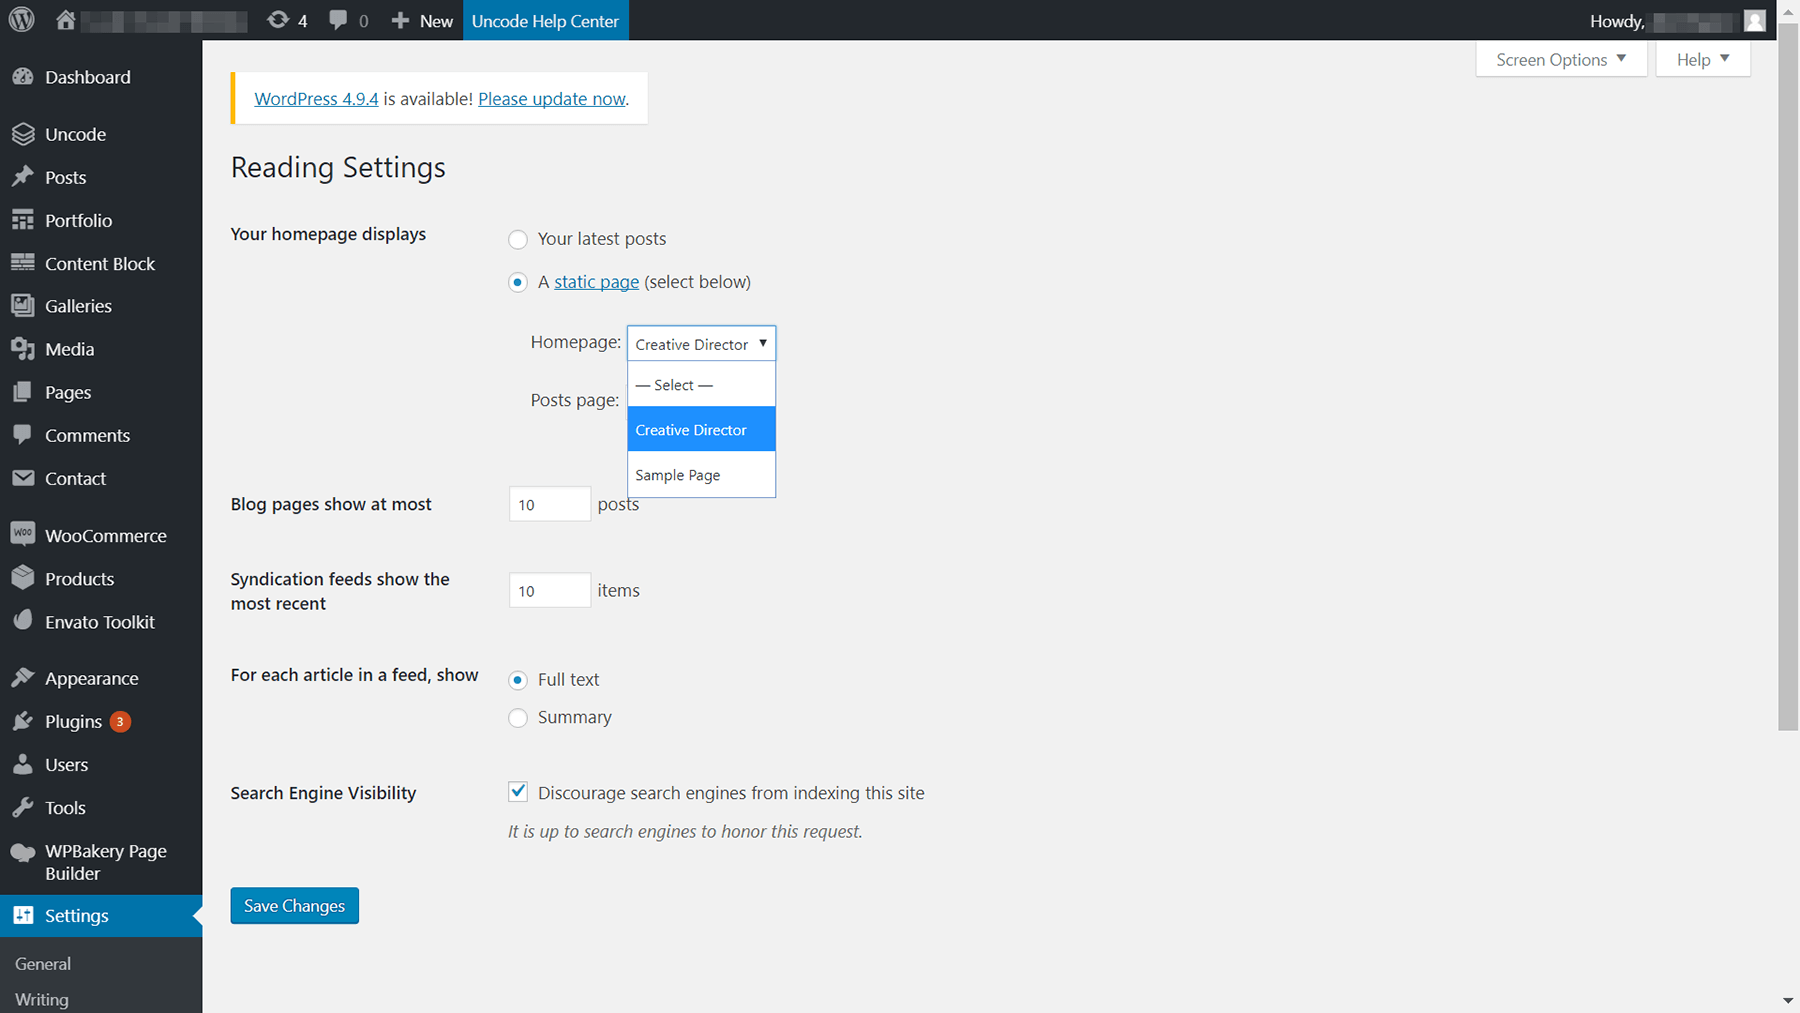
In our case, that page is called Creative Director. Click on the Save Changes button when you’re ready, and try to access your home page. You should see a page that displays some stock content:

Now, all that’s left to do is to customize your home page. Making it your own is simple, using Uncode’s page builder.
Step 4: Customize Your Imported Demo Page
As we mentioned earlier, Uncode includes its own page builder, which is a custom version of the WPBakery Page Builder plugin. When you open your page to edit it, you should see something like this:
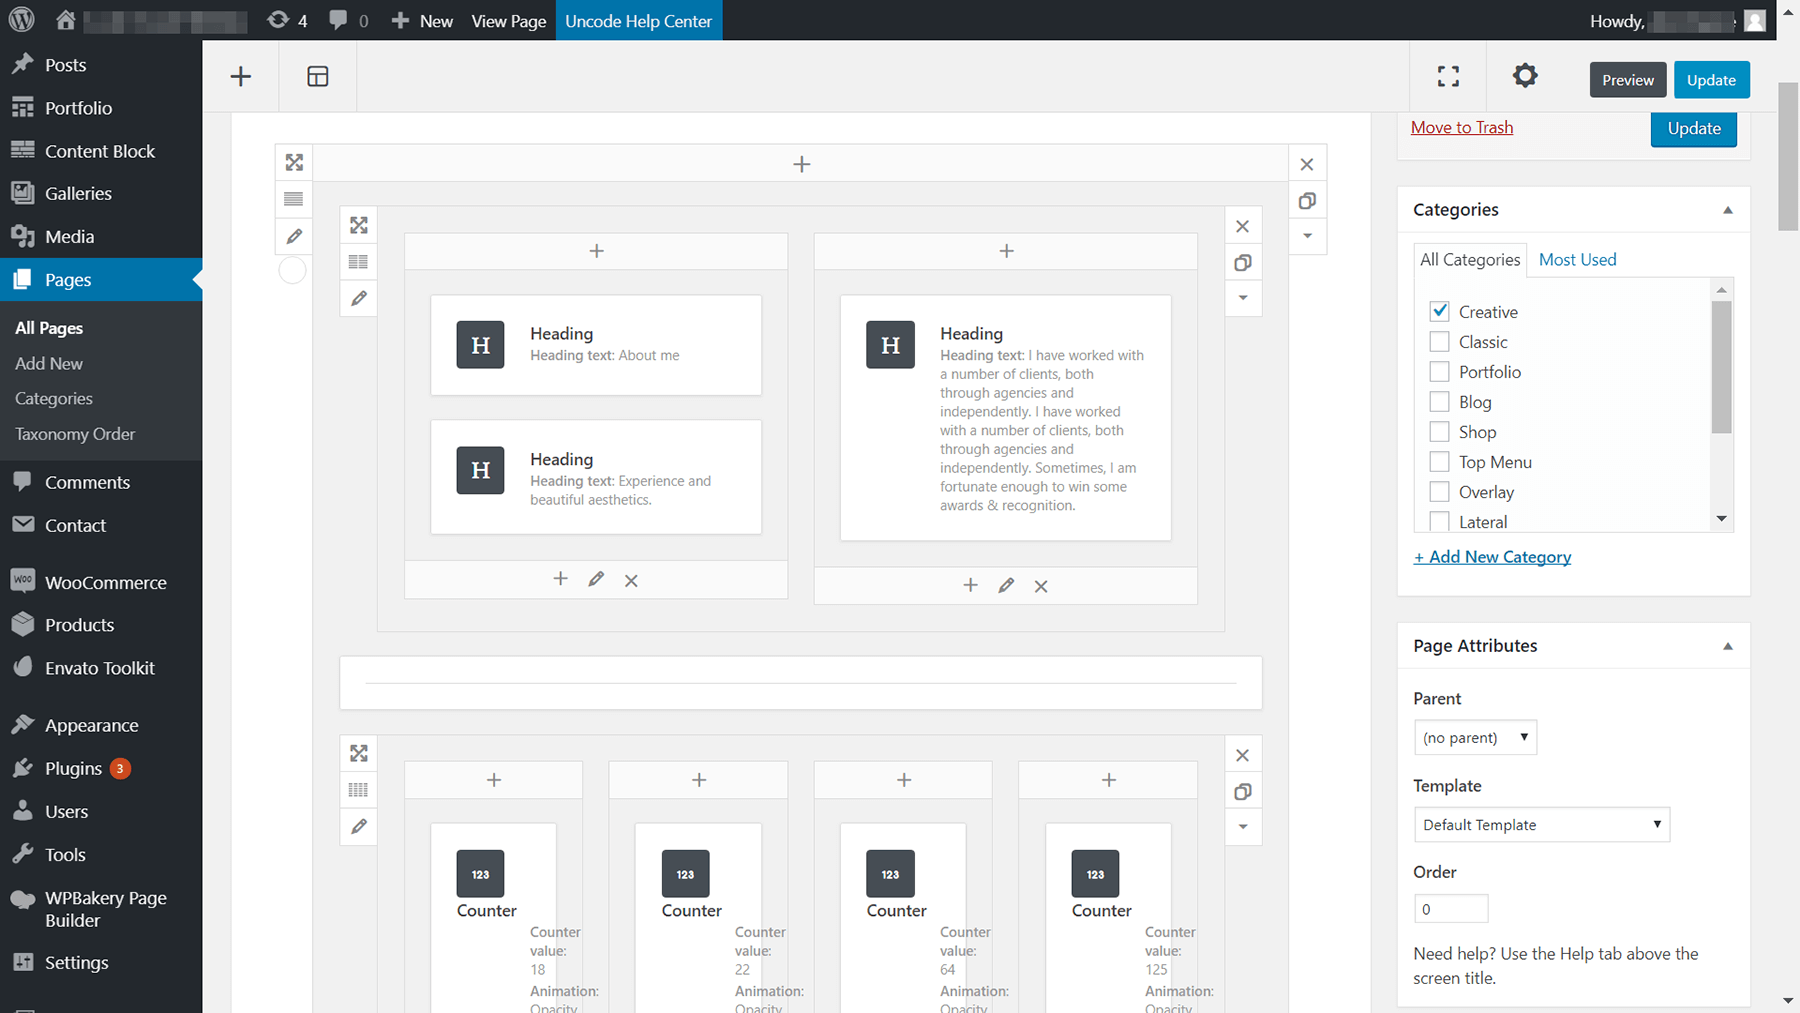
To use the page builder, you can add empty sections or rows to your pages by clicking on the plus sign at the very bottom of your page:
Then you can choose a structure for your sections, using the columns icon to their left. For example, you can decide to use full-width sections or include multiple rows:
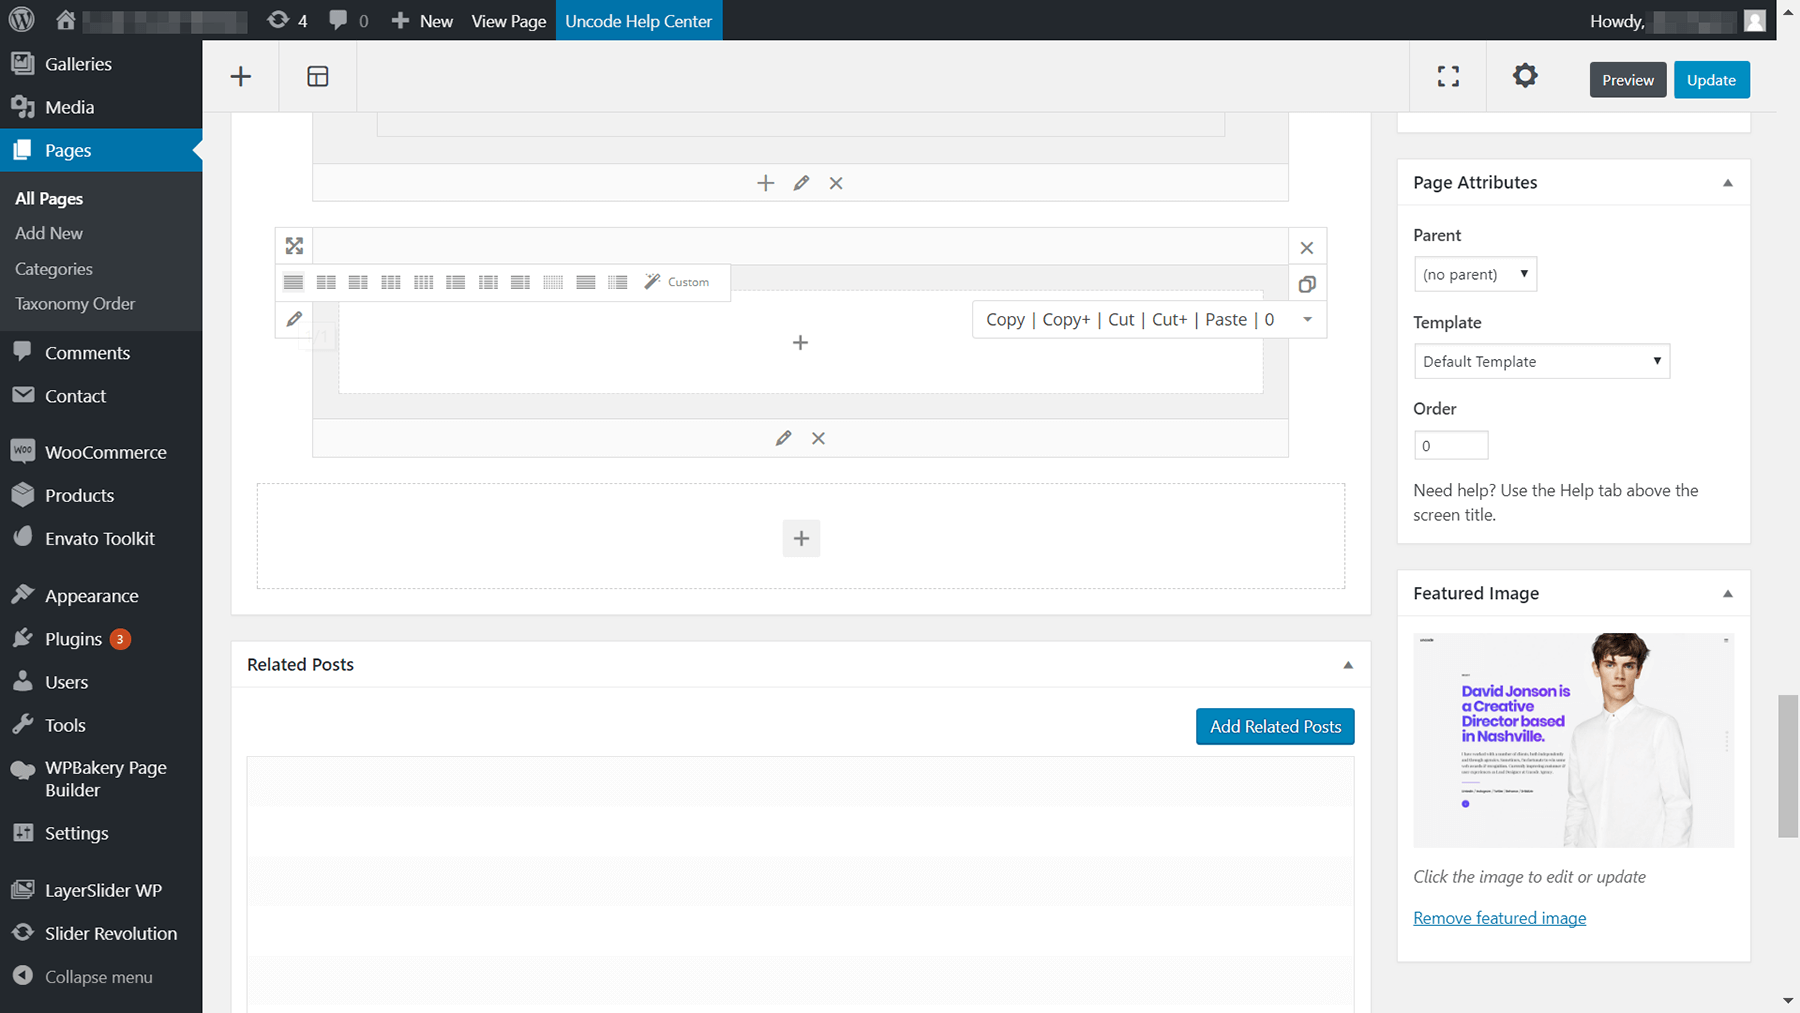
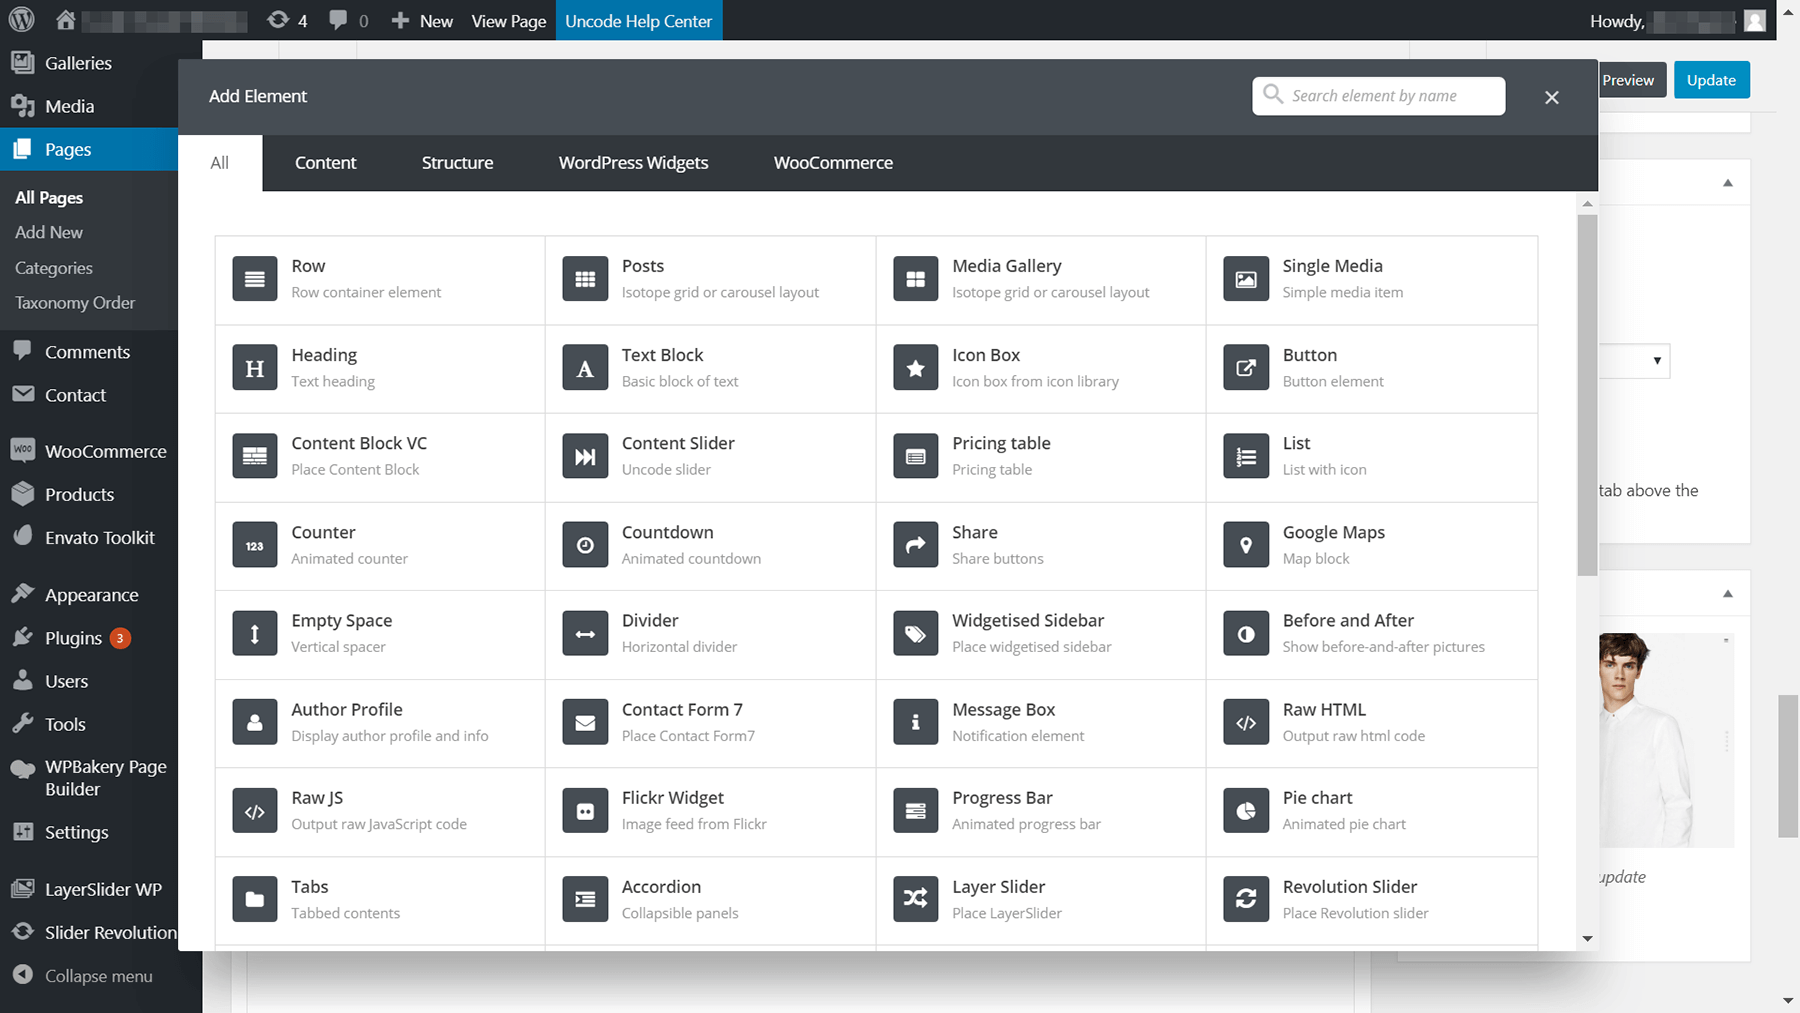
Once you’ve chosen a structure, you can add the modules you want to your sections. To do this, click on the plus sign at the top or bottom of the section you want to modify. You’ll see a list of the modules you can add, including tabs, accordions, and contact forms:
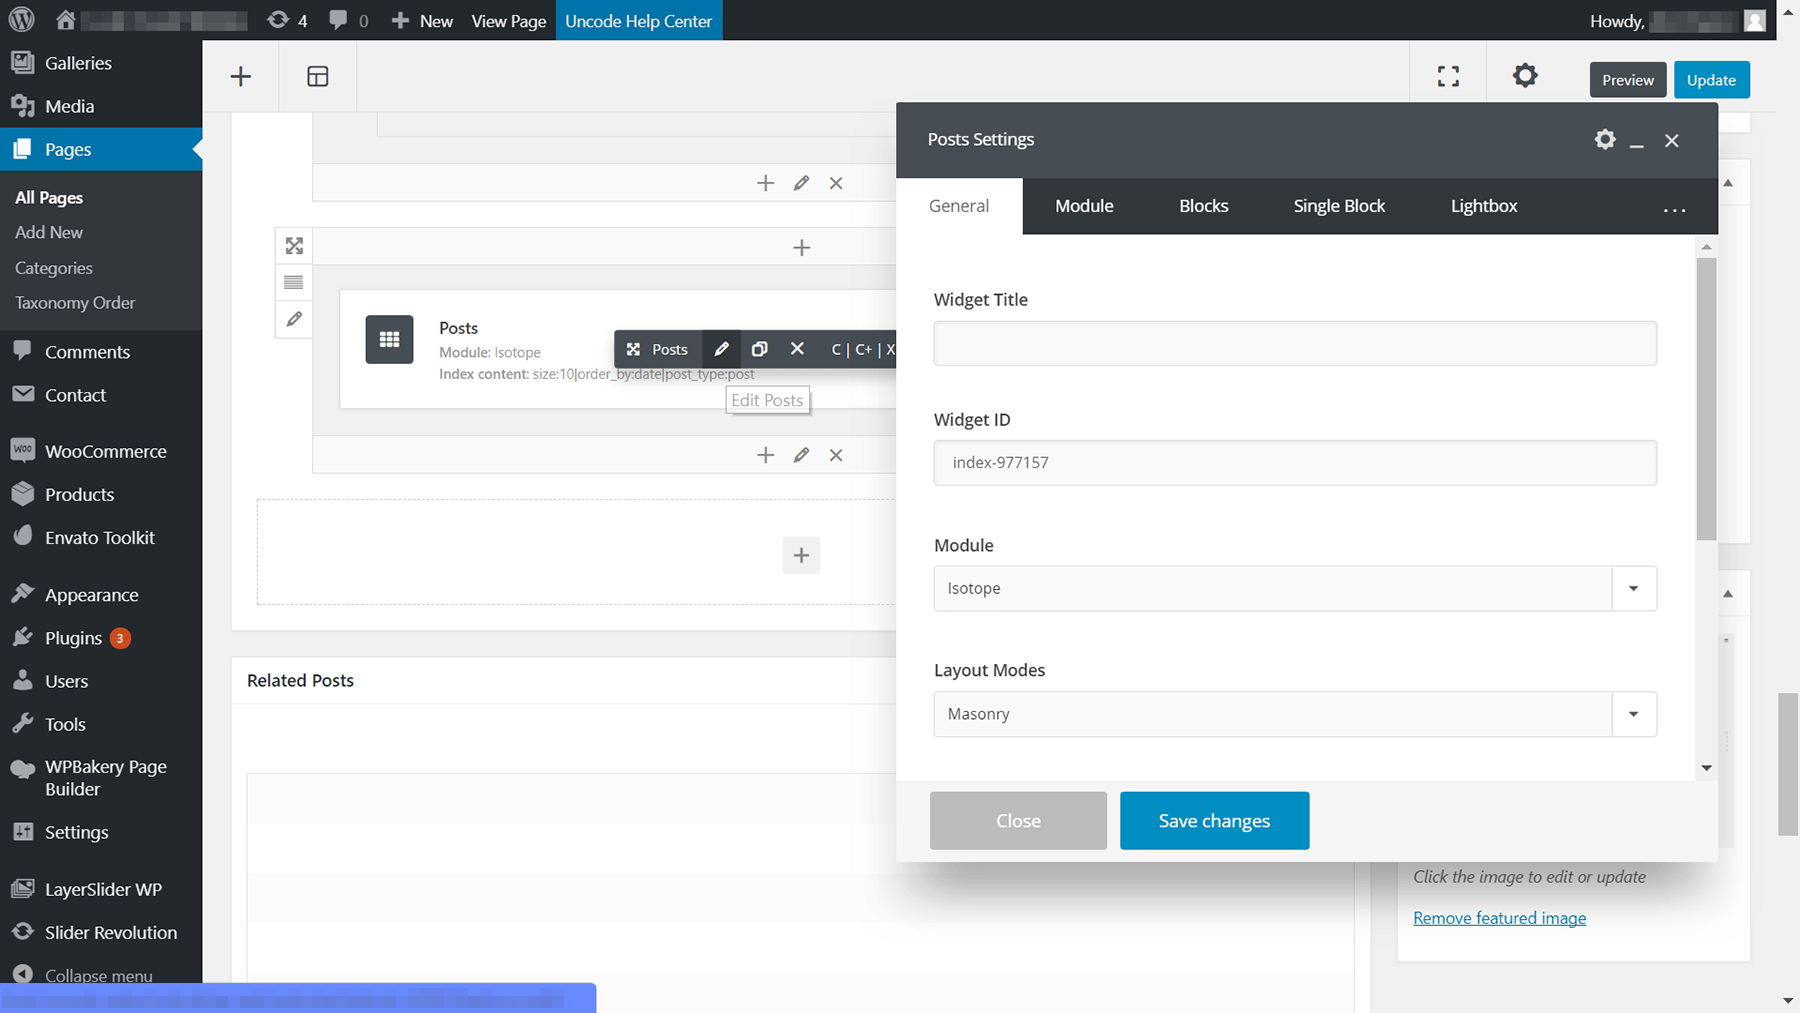
After you’ve chosen a module, it will show up in the section you chose, and you can edit it by clicking on the pencil icon that shows up when you mouse over it:
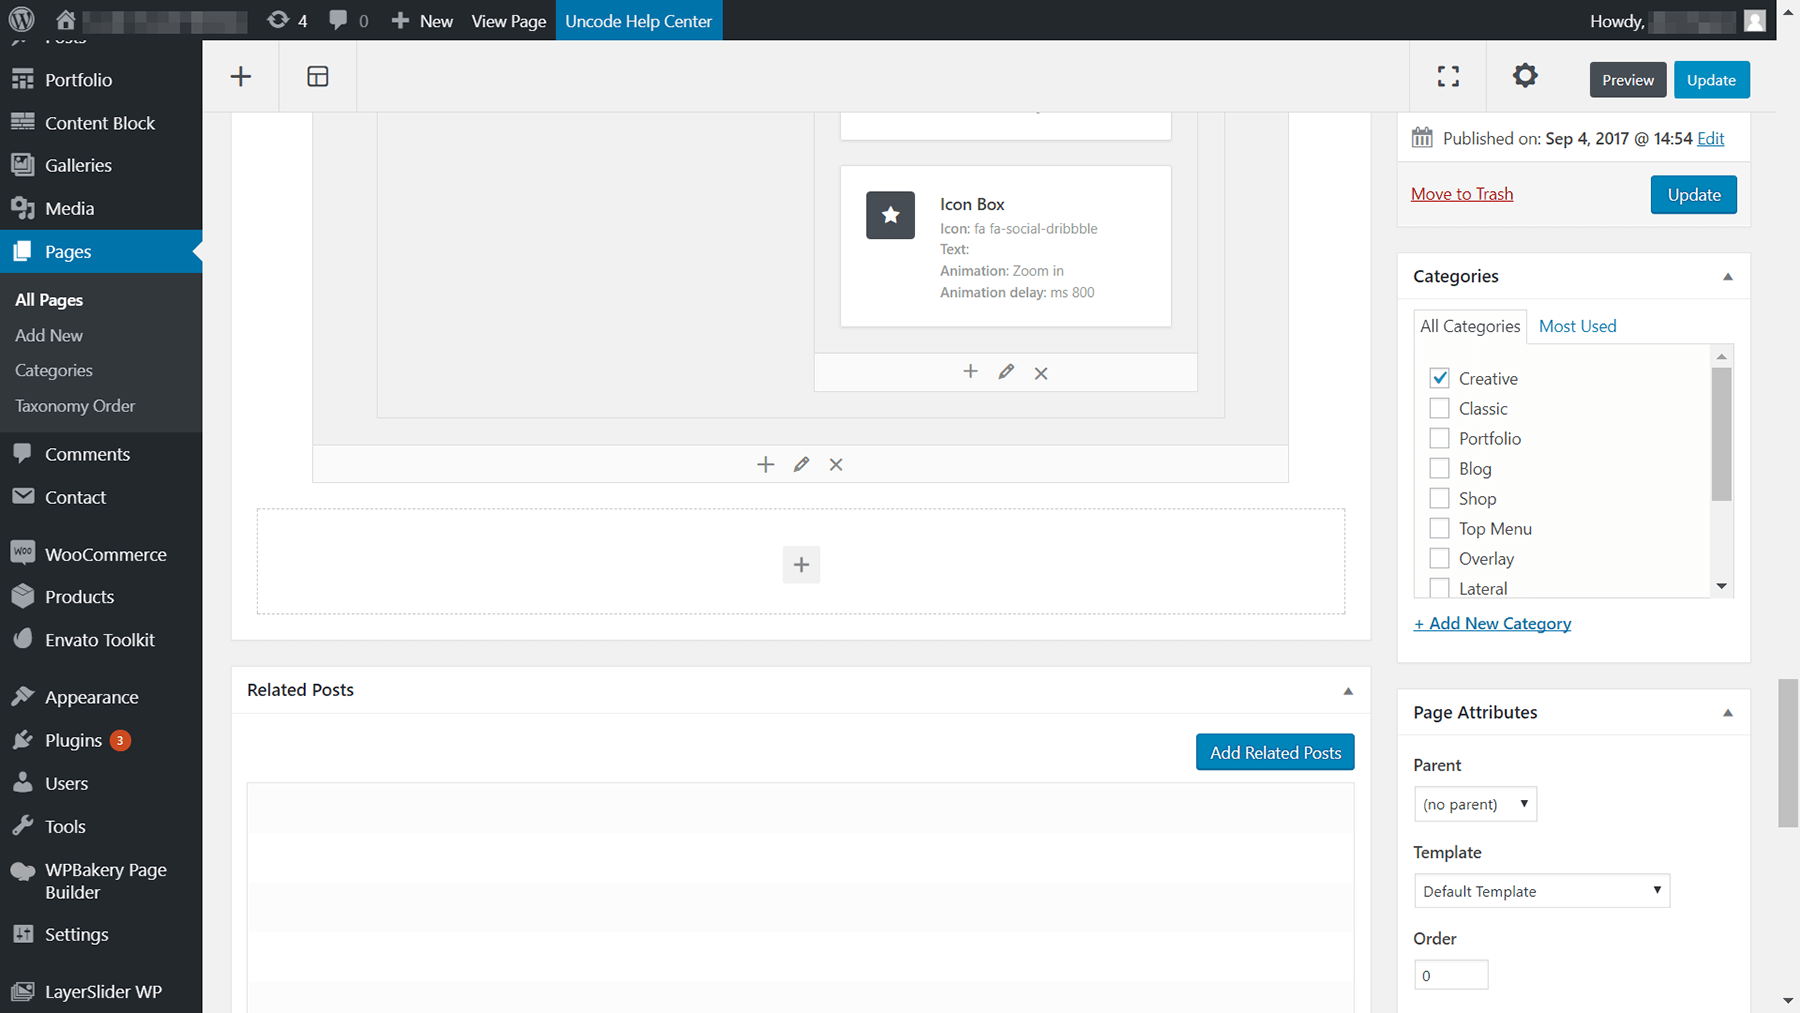
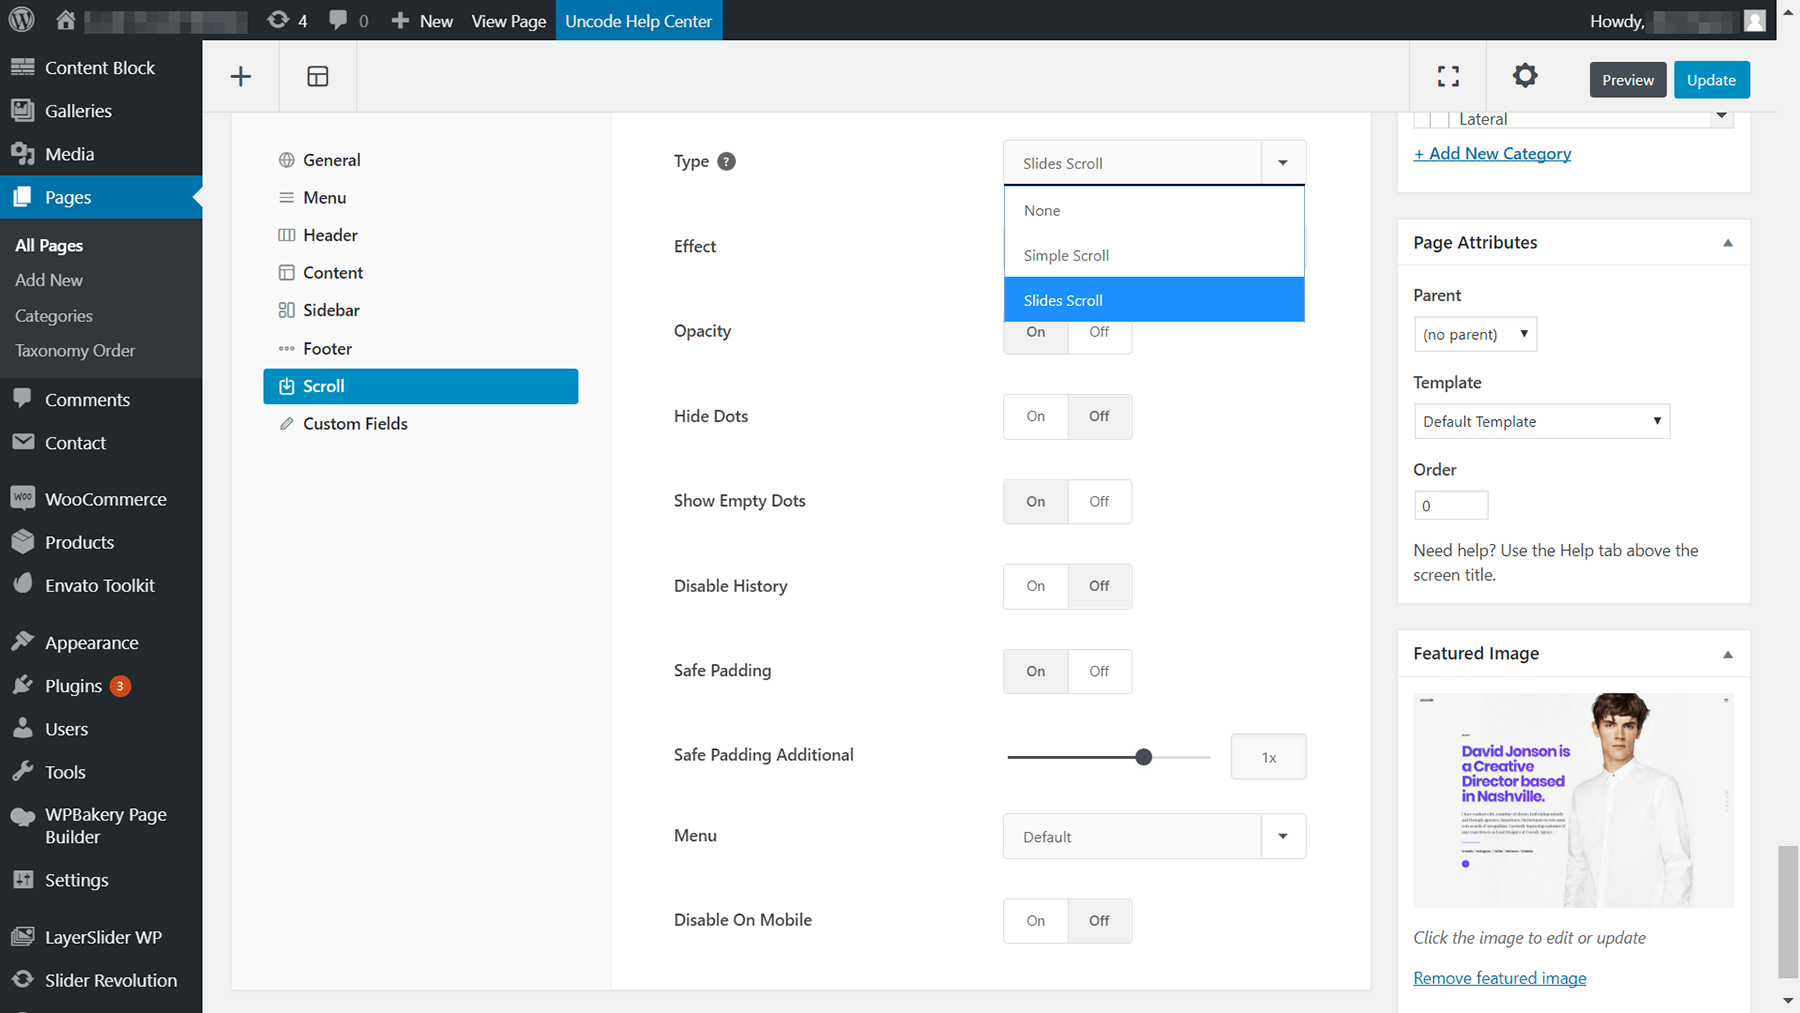
Since you’re building a one-page site, you’ll be particularly interested in scrolling options. You can configure those by looking for the Page Options widget at the bottom of the page. There’s a tab called Scroll there, and you can choose which type of effect you want to use right at the top:
The customization possibilities are nearly endless, since there are dozens of modules available (each with their own settings). The demo layout you chose should save you some work, by providing you with a solid structure that you can easily customize. However, you can always import another layout to try, if you’re not happy with your first pick. We also offer lots of useful documentation you can turn to if you ever have a question about one of Uncode’s features.
Conclusion
One-page websites are perfect for a lot of projects. Landing pages are a classic example, but it’s even possible to pack entire portfolios or business websites onto a single screen. If you can fit all the information you want to share on one page, all you need is the right theme to make it happen. That’s where Uncode comes into the picture.
After you’re done installing Uncode, here are the four steps to creating a simple one-page website:
- Set up all of Uncode’s recommended plugins, so you have access to the features you need.
- Import one of Uncode’s one-page design demos.
- Set your imported demo as your home page.
- Customize the imported demo page.
Do you need any help deciding if a one-page design is right for your next project? Let’s talk about it in the comments section below!