
What is a WooCommerce Bookings and Appointments plugin used for?
Booking a service or product online is a pleasure people cannot afford to lose, not by a long shot. The ability to sell bookable products is becoming more and more important for businesses. As a result, there’s a growing significance of WooCommerce Bookings Plugin.
The WooCommerce Bookings and Appointments plugin by PluginHive allows you to convert your physical products, time, services or resources into bookable items. You can set booking periods, availability, prices, add optional items & services, and much more.
Along with your enticing bookings, the right theme can work wonder in bringing customers again and again to your website.
How to set up the PluginHive WooCommerce Bookings plugin?
With PluginHive WooCommerce Bookings and Appointments plugin alongside the Uncode theme, you already have an awesome combination. Let’s see the working of the WooCommerce Bookings plugin and how Uncode theme enriches its features.
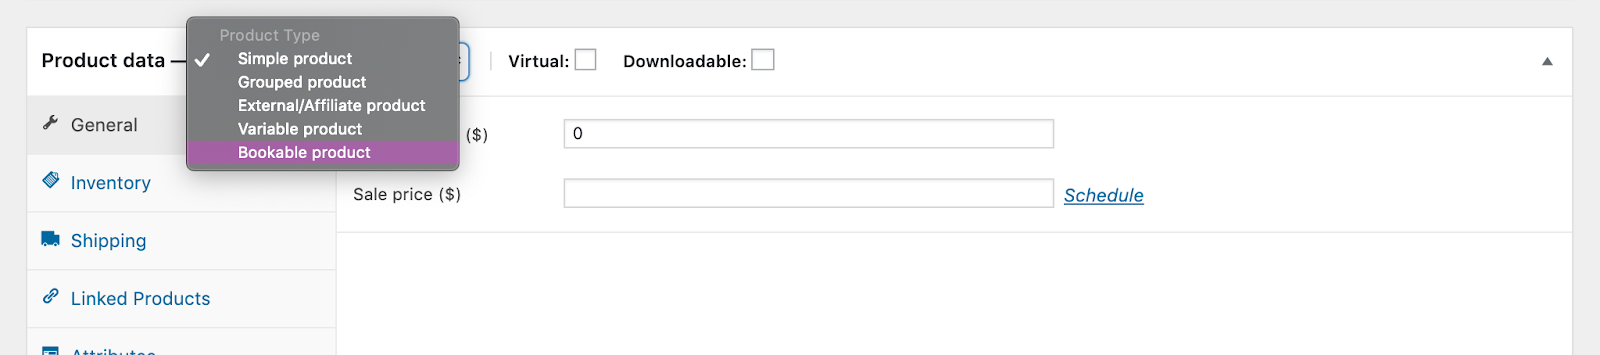
Once you’ve installed the plugin, the first thing you need to do is set your product as bookable. This can be easily done by selecting the Bookable product under the Product data drop-down available in the product setting page.
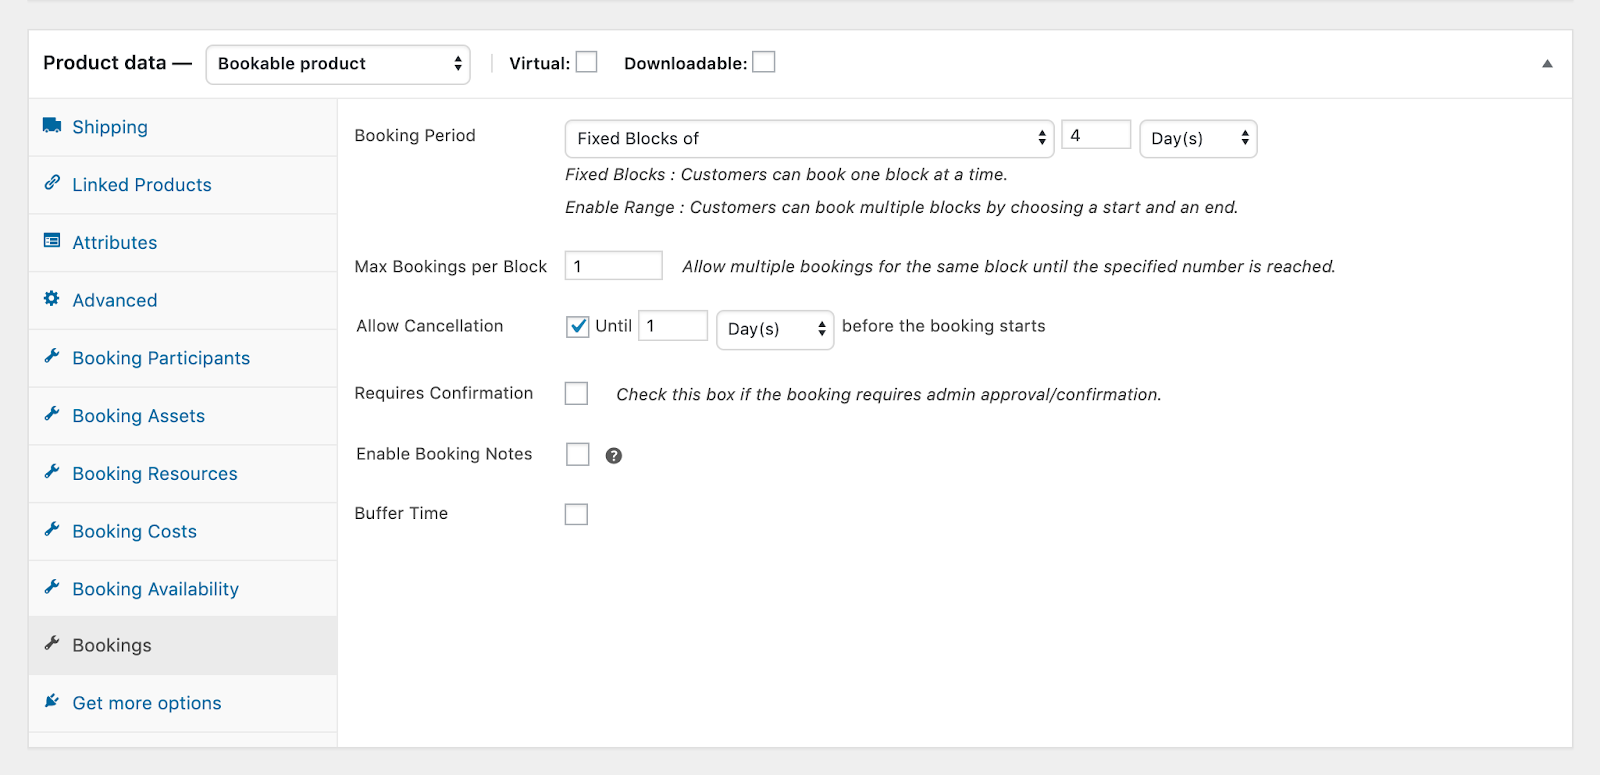
After defining the product as bookable, you would immediately see the additional booking options. The Bookings tab will let you set the booking period and along with other options to define booking cancelations, confirmations, Buffer time, etc.,
In the below screenshot, you can see a fixed booking window of 4 days along with the cancelation condition, i.e, 1 day before the booking starts.
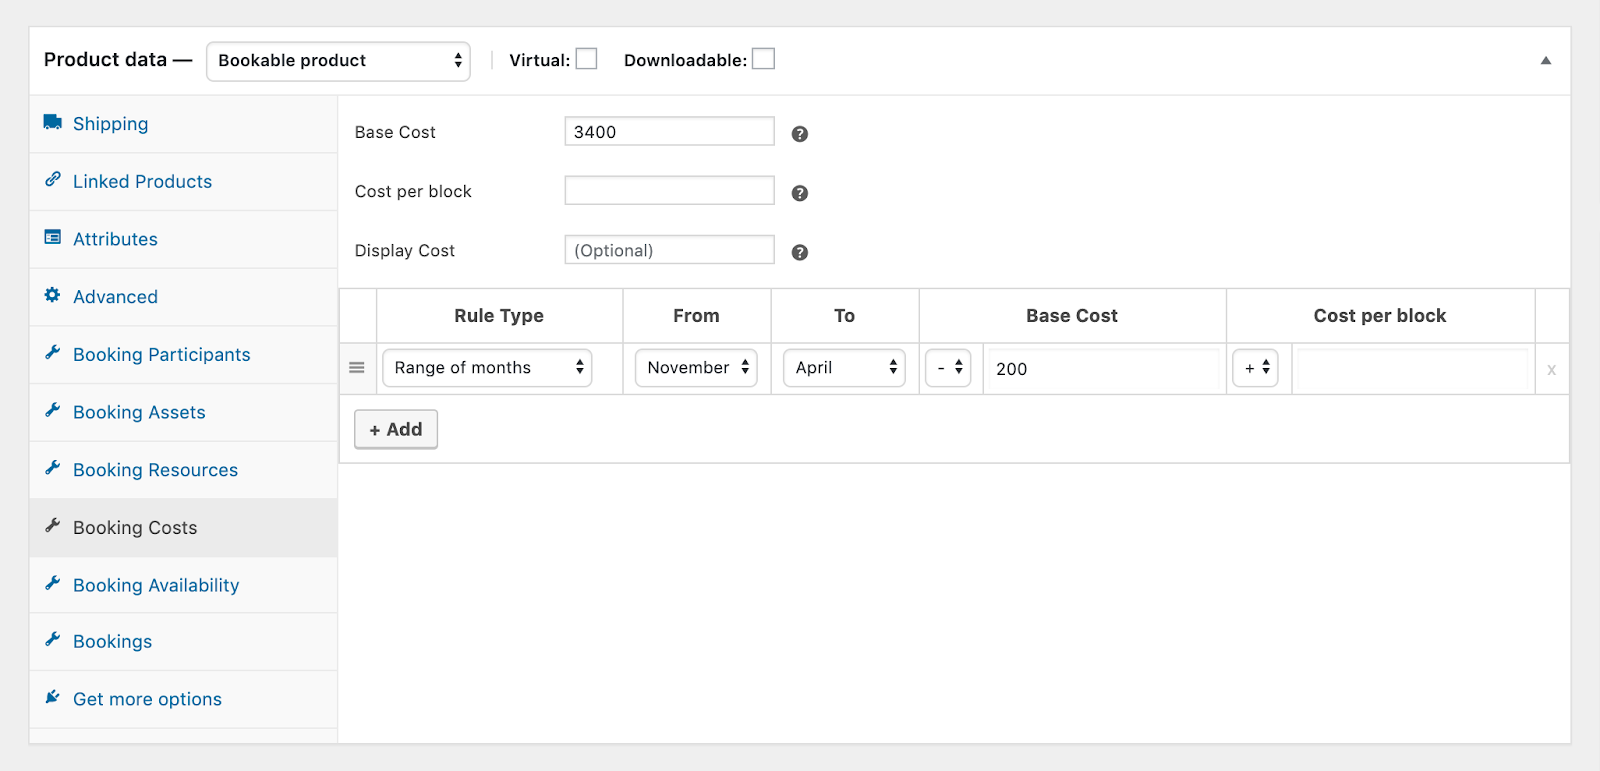
Now if you require to set availabilities for your booking you can do that under the Booking Availability section. The next option is the Booking Costs which lets you set the prices according to your needs.
In the image below, the Base Cost of the 4-day holiday package is set as $3400 which is scheduled to decrease down by $200 during the off-seasons(Nov-April).
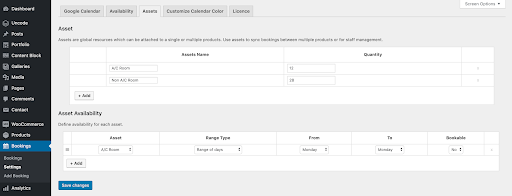
You can also define an asset which is basically an item/resource that can be used across your bookable products. In this example, you can see two different assets—A/C Room and Non A/C Room.
You can manage the quantity(in this case, rooms) and availability for the assets under the Assets tab accessible under the Bookings → Settings option on your WordPress Dashboard. Based on the availability and quantity of the rooms customers can pick the dates and reserve their holiday package.
You can use Booking Participants tab to set the number of people joining the holiday, where you can also set the minimum and maximum limits. And if you wish to offer other amenities like Breakfast and Parking Space, you can do that under the Booking Resources. You can even set prices and charge for the additional resources here.
How the shop page displays the bookable items?
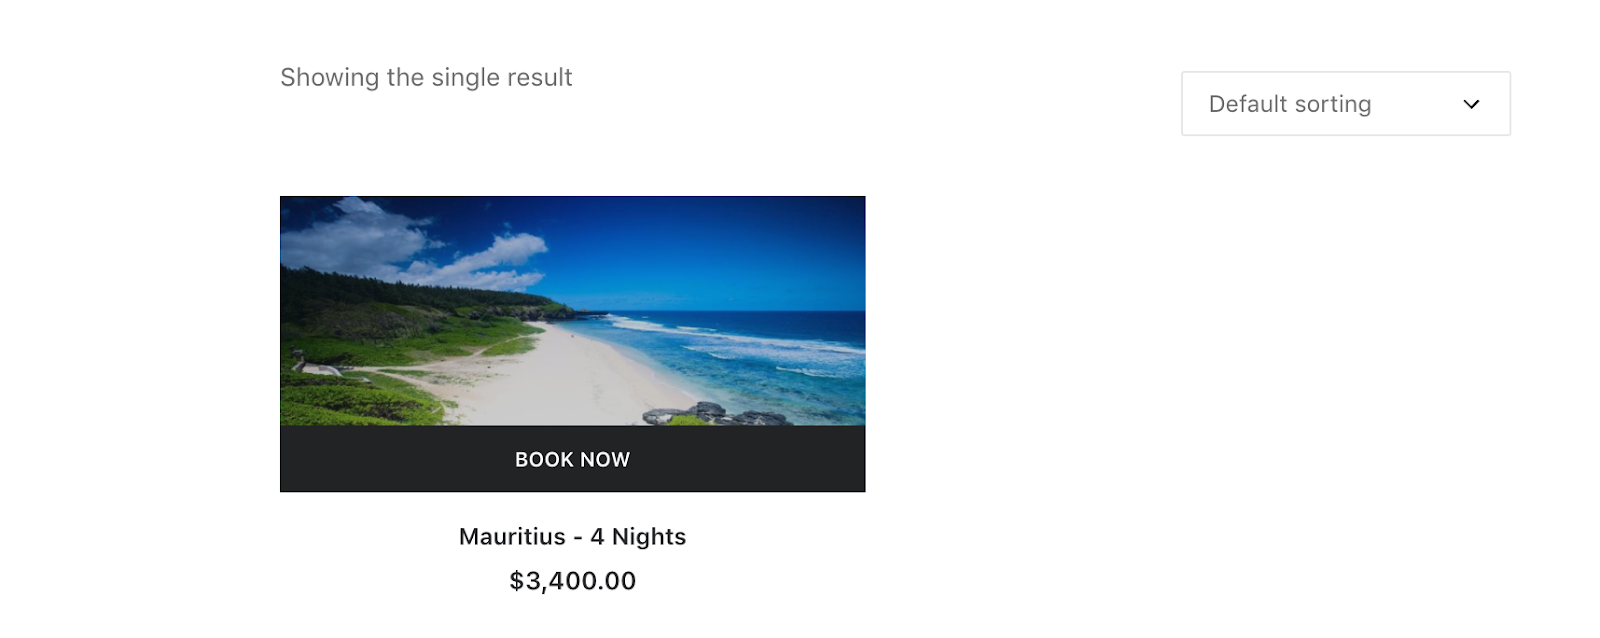
Now, with the above booking rules in place, the 4-day holiday package would appear beautifully on the shop page. Notice that the Add to cart button is replaced with Book Now, alongside the base cost.
 How does the product page look like?
Product pages are very much dependent on the theme. It’s essential that the theme goes well with the product images, descriptions, prices, and most importantly, in this case, the booking calendar. The Uncode theme has a lot to do with how the booking information is displayed to the customers.
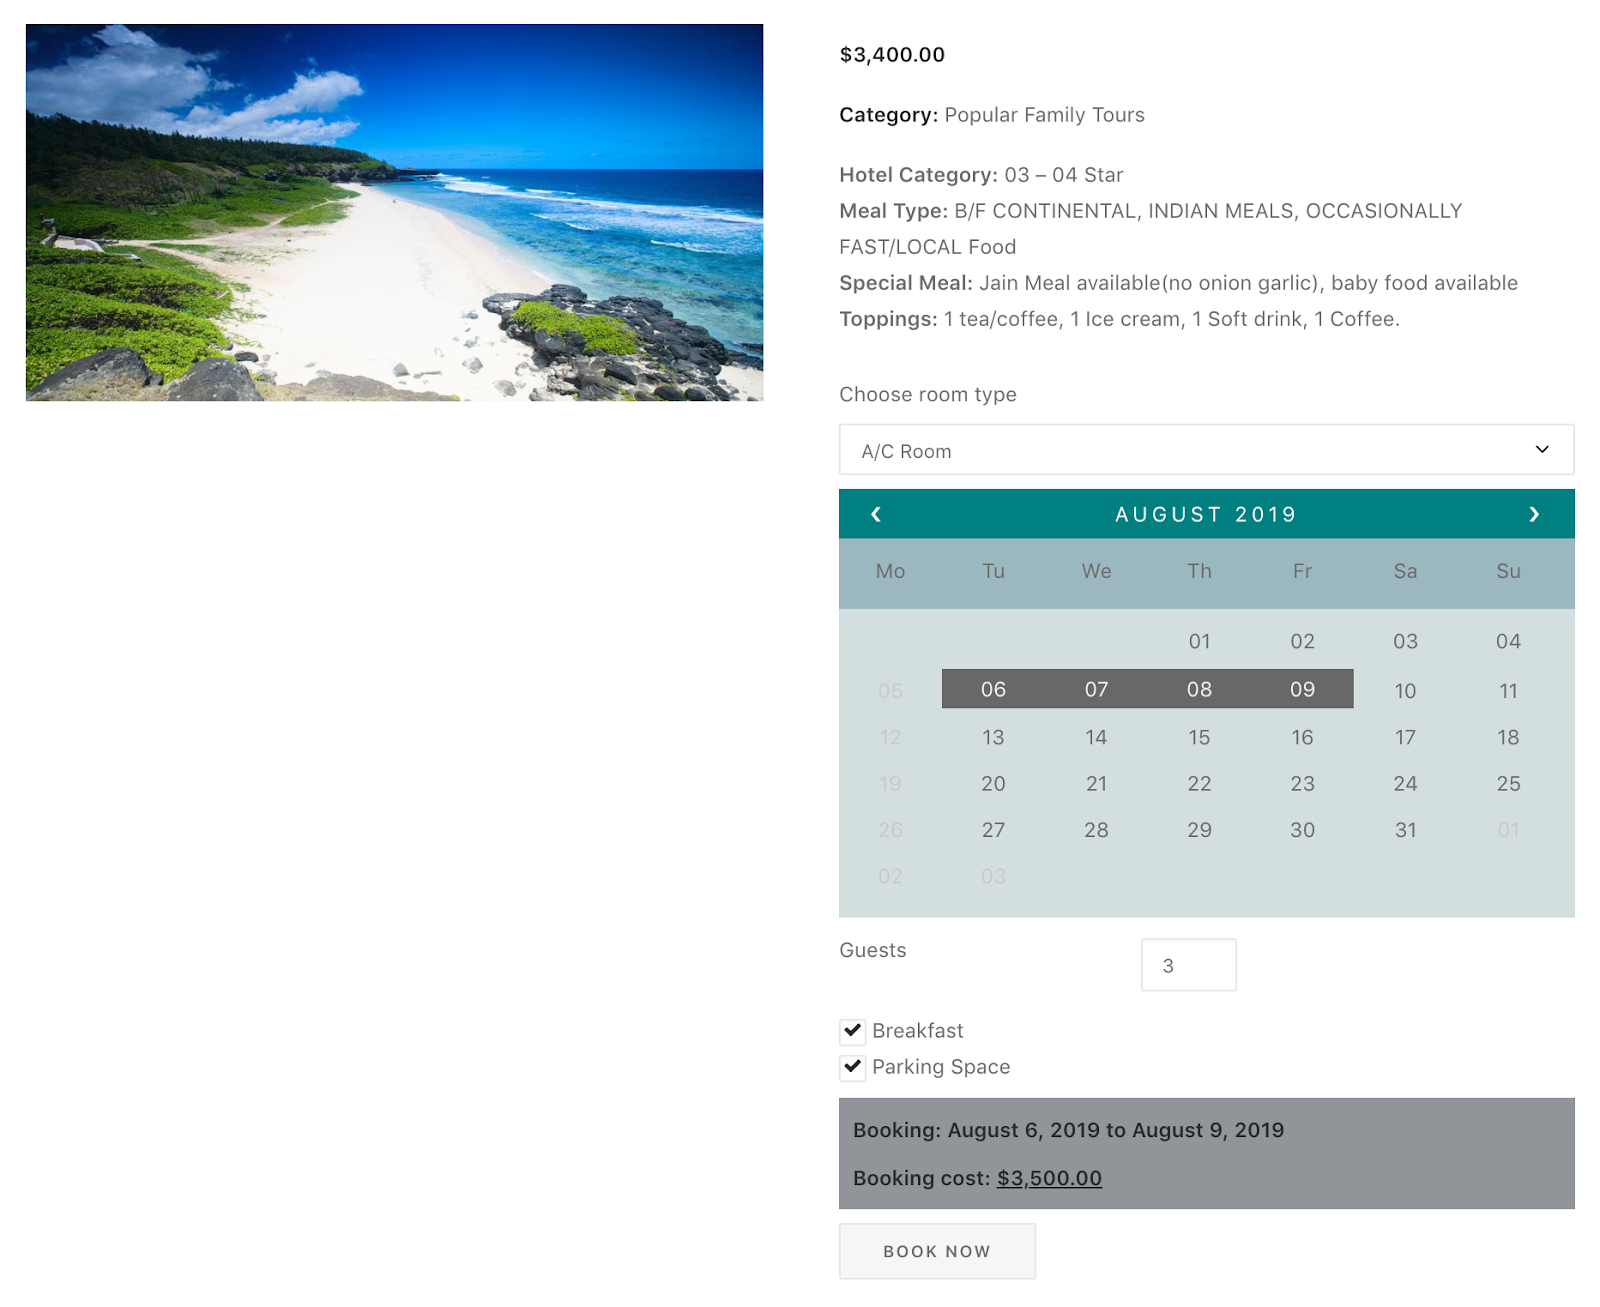
Starting from the top, you have the choice to select the room type followed by the calendar itself. In the calendar, you can see Monday isn’t available/not-bookable for the A/C Room type which is correct based on the rule defined under the Asset tab.
The empty field next to the Guests label indicates the area where the customer needs to mention the number of guests joining the trip. This is followed by the two optional resources, i.e, Breakfast and Parking Space, defined previously.
There’s also a price calculation section right below the calendar which displays the exact booking duration and cost. This plugin dynamically calculates and adds up the cost of each and every element present in and out of the calendar. So your customers would always be able to see the total cost right then and there on the product page.
How does the cart page display the Booking details?
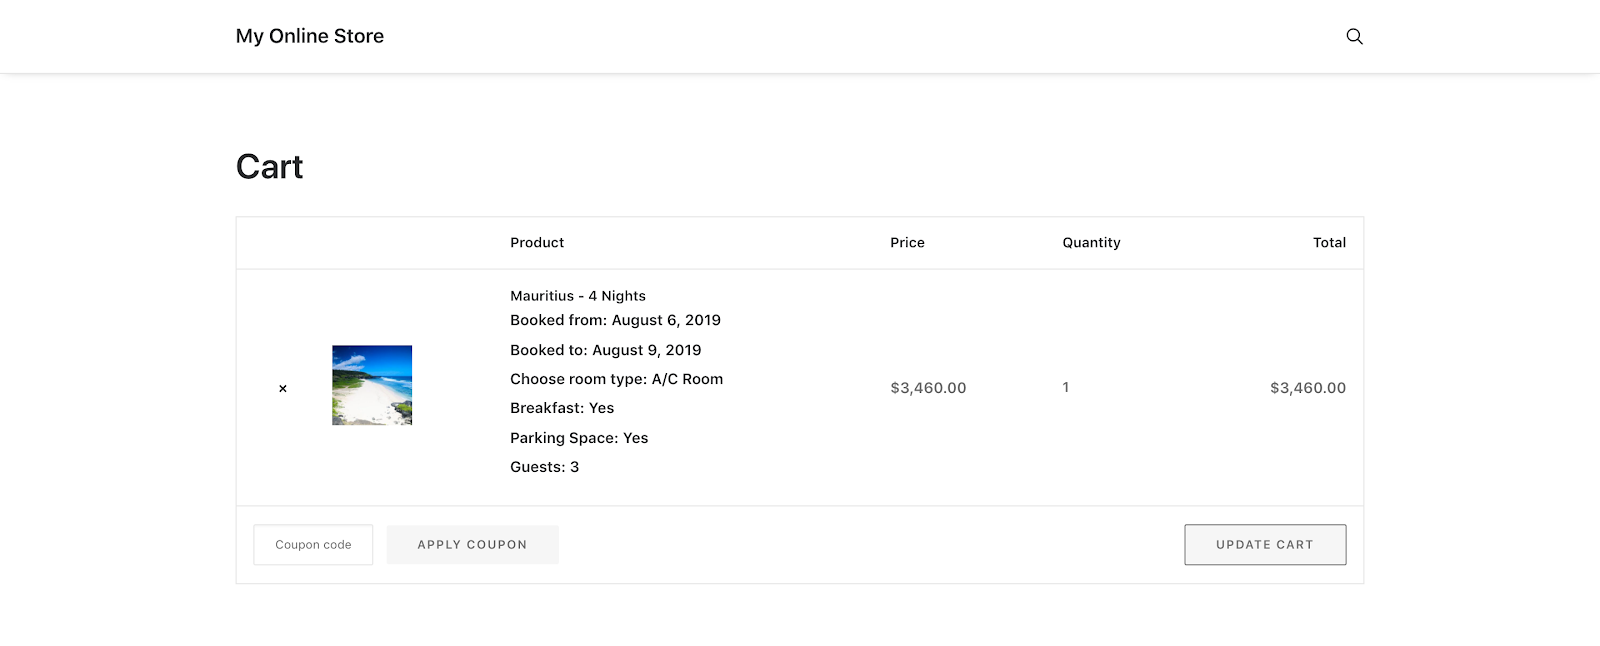
As expected, the complete information is displayed correctly on the Cart page including important details like booking cost, duration, resources, number of guests, and more.
Customers can simply follow the on-screen instructions to pay the booking amount. Once the booking is confirmed, an automated email is sent to the customer and the complete information is synced with your Google Calendar. You can further manage(edit, cancel, confirm, etc.,) your bookings under the Bookings section located under the WordPress Dashboard.
And that’s it! Your website is now ready to attract your customers through its compelling bookings and elegant design.