Introduction
We are pleased to bring you Uncode 2.5.0 latest and greatest version of our pixel-perfect, creative, and WooCommerce WordPress theme.
This update introduces new Titles and Table layout modes for the Posts module, new animated effects like Text Marquee and Rotating Headings, the new Custom Fields modules, and a new set of options that significantly increase performance and make the process of optimizing your website a whole easier.
In Uncode 2.5.0, we are excited to present features that lay down a foundation on which Uncode will grow with more modules without adding bloat to your website. In addition, we modularized the Uncode framework and assets, loading and processing only what’s needed on-demand based on the modules and features you use on a specific page.
Following the final release, we will publish 5 new demos and 90+ new sections wireframes.
We thank you in advance, and we kindly ask you to keep this information strictly confidential. Thank you!
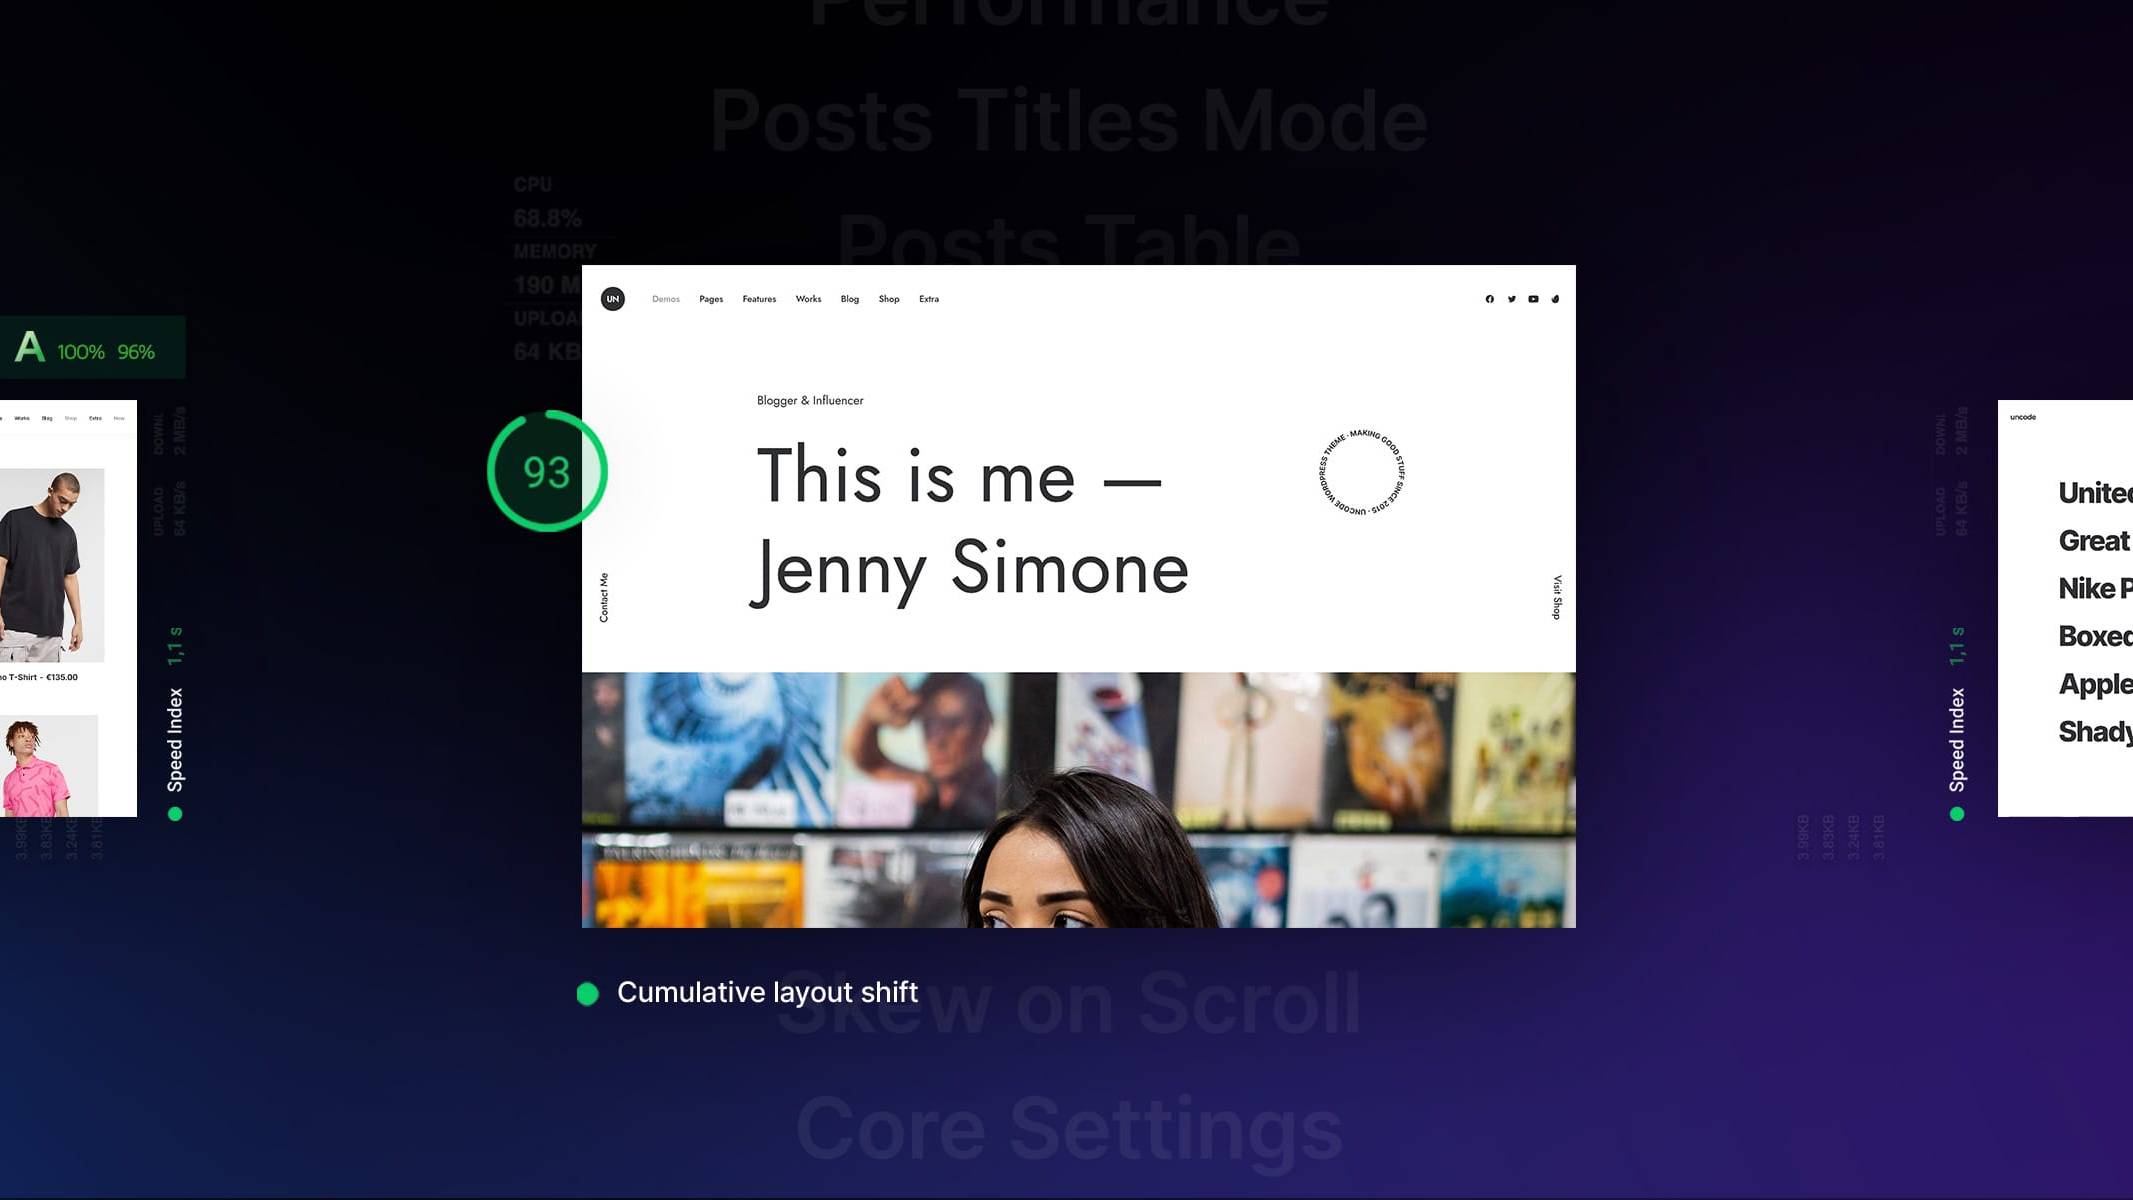
Tests performed on the upcoming Performance Test page based on the famous Comparative Divi Speed Test using Uncode 2.5.0.
Performance Optimisation
Website performance and optimization can be a reasonably complex topic. So in Uncode 2.4.0 and Uncode 2.5.0 we introduce a vast array of performance enhancements that make the process of optimizing your Uncode website a whole easier.
In Uncode 2.5.0 we are excited to release new features that speeds up Uncode and lays down a foundation on which Uncode can grow with more modules and features without adding bloat to your website. We modularized Uncode framework and assets, loading and processing only what’s needed on-demand based on the modules and features you use.
Uncode 2.5.0 also introduces a collection of new options that automatically improve performance, deferring various render-blocking requests and removing unneeded resources. The new version of Uncode eliminates bloat and gives you the freedom to build fast and performant websites.
You can find the new optimization features in the Theme Options → Performance:
Split & Modular JS
Activate this to load each JavaScript library on-demand only when it’s needed by the specific modules you are using on a page. We modularized the Page Builder portion of Uncode’s JavaScript file, allowing Uncode to load each JavaScript library on-demand only when it’s needed by the specific modules you are using on a page. If your page only uses 3 of 30+ Uncode’s modules, the framework only processes the functions needed for those 3 modules, and it skips the rest.
Split & Modular CSS
Activate this to load each CSS library on-demand only when it’s needed by the specific modules you are using on a page. We applied that same anti-bloat logic to CSS. We took the Uncode’s CSS file and broke it up into small components. Now Uncode loads only the files needed to style a particular page module. The result is a substantial decrease in the CSS file size on each page you build.
Defer CSS Styles
Activate this to defer non-critical styles, loading them in a non-blocking way. This option is recommended if you are using a caching plugin otherwise you would see a flash of unstyled content (FOUC). Also, beware of third-party cache plugins settings as they may interfere with this option preventing it from working. Rely on their settings in this case and leave it on-off.
Defer CSS Style Custom
Activate it to defer the dynamic style (style-custom.css) as well. If you’re having FOUC (flash of unstyled content) problems, try leaving it off. Third-party caching and optimization plugins may break this functionality. Rely on their settings in this case and leave it off.
In-Line Core Style
Activate this to inline core styles at the head of the page. Third-party caching and optimization plugins may break this functionality. Rely on their settings in this case and leave it on-off. This option is dependent on the Split & Modular CSS option.
In-Line Style Custom
Activate this to inline dynamic styles at the head of the page. Third-party caching and optimization plugins may break this functionality. Rely on their settings in this case and leave it on-off. This option is dependent on the Split & Modular CSS option.
Google Fonts On-Demand
Activate this to load Google Fonts on-demand only when needed by the specific modules you are using on a page.
Google Fonts Display Swap
Activate this for faster rendering with possible flash of unstyled text (FOUT).
Disable WP Emojis Script
Activate this to remove native WordPress Emojis assets.
Disable WP Embed Script
Activate this to remove the native wp-embed.min.js script.
Disable WP Gutenberg Style
Activate this to remove the default Gutenberg Block Style.
Disable Animations on Mobile
Activate this disable animations on mobile devices.
Move jQuery to Footer
Activate this to move jQuery to the footer (unless there are no other third-party scripts loaded to the head with jQuery in its dependencies).
Optimize WooCommerce Assets
Activate this to remove unused CSS/JS files from pages where no WooCommerce asset is used.
Optimize Contact Form 7 Assets
Activate this to remove unused CSS/JS files from pages where no Contact Form 7 asset is used.
Optimize Wishlist Assets
Activate this to remove unused CSS/JS files from pages where no Wishlist asset is used.
Optimize Live Search Assets
Activate this to remove unused CSS/JS files from pages where no Live Search asset is used.
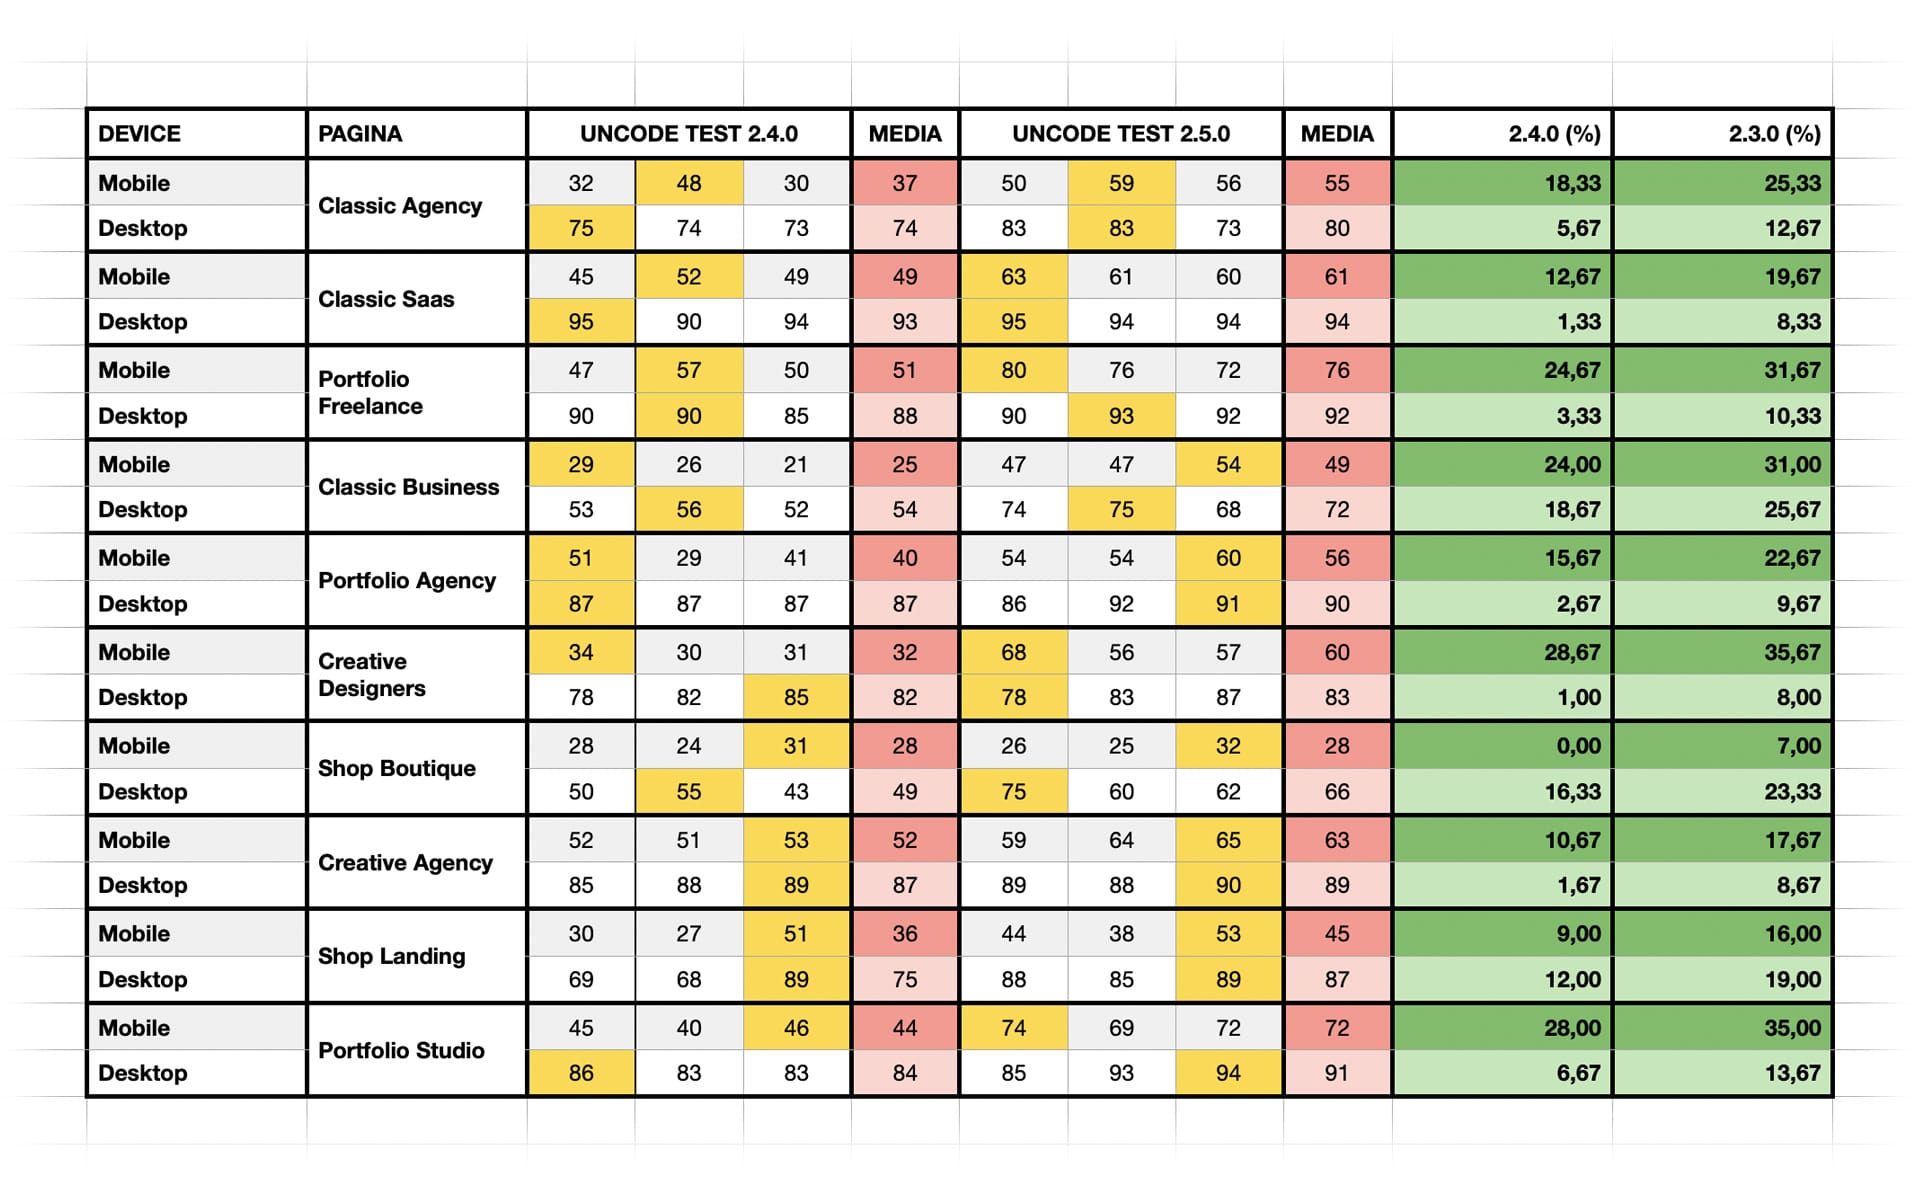
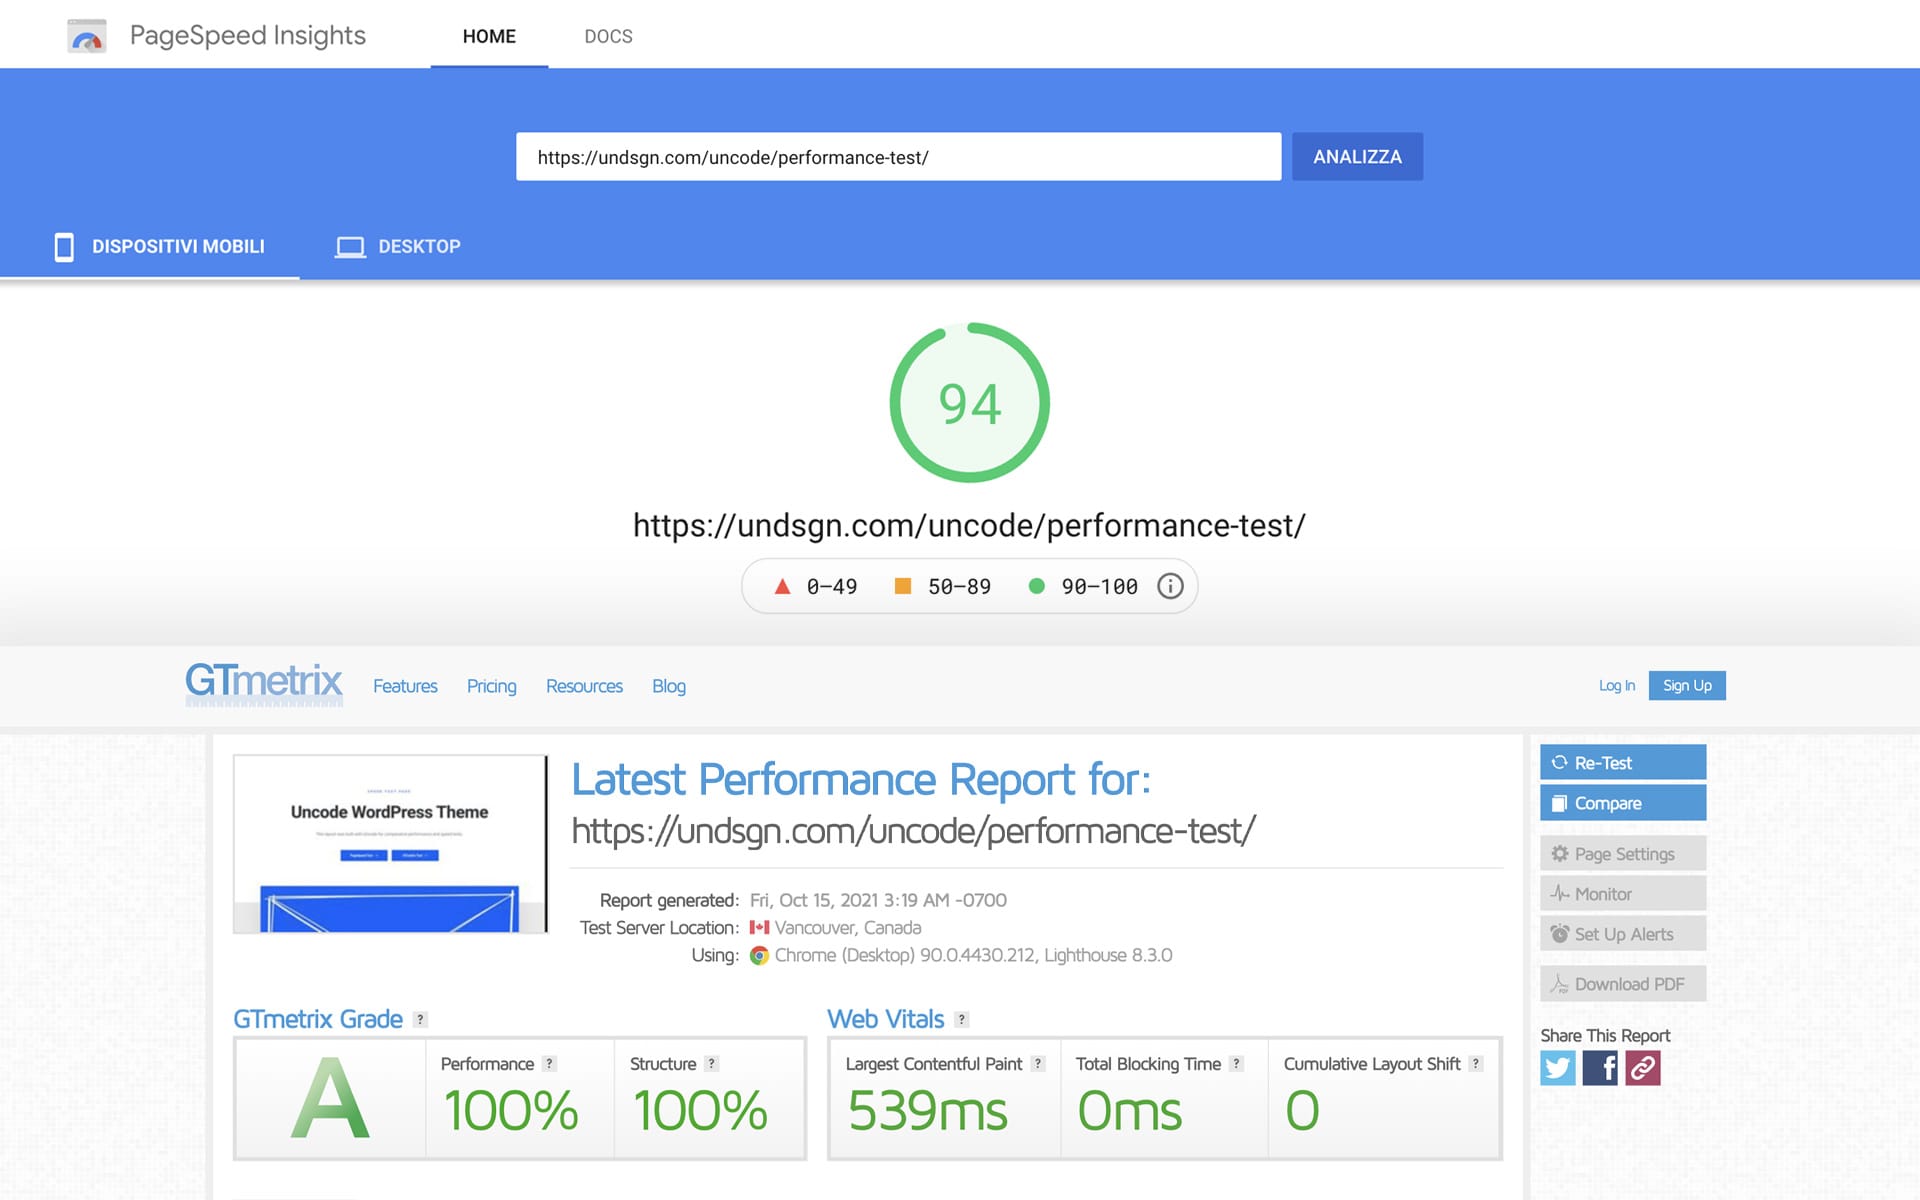
Please find above speed reports performed on some pages of our demo site to test the performance improvement, activating both the Dynamic SrcSet Images and the new performance options. The estimated average improvement of Uncode is 20% to 30% over version 2.3.0.
Note
Please note that it is not recommended to activate all these options together to improve your site’s performance. Website optimization is a process that must be done differently on each website based on the design, the specific features used and the type, and the kind of finish you want to achieve (effects, animations, extra marketing scripts, etc). So instead, we recommend that you proceed in steps when you activate these options and see what you need for your specific context.
Links
Posts Titles Layout
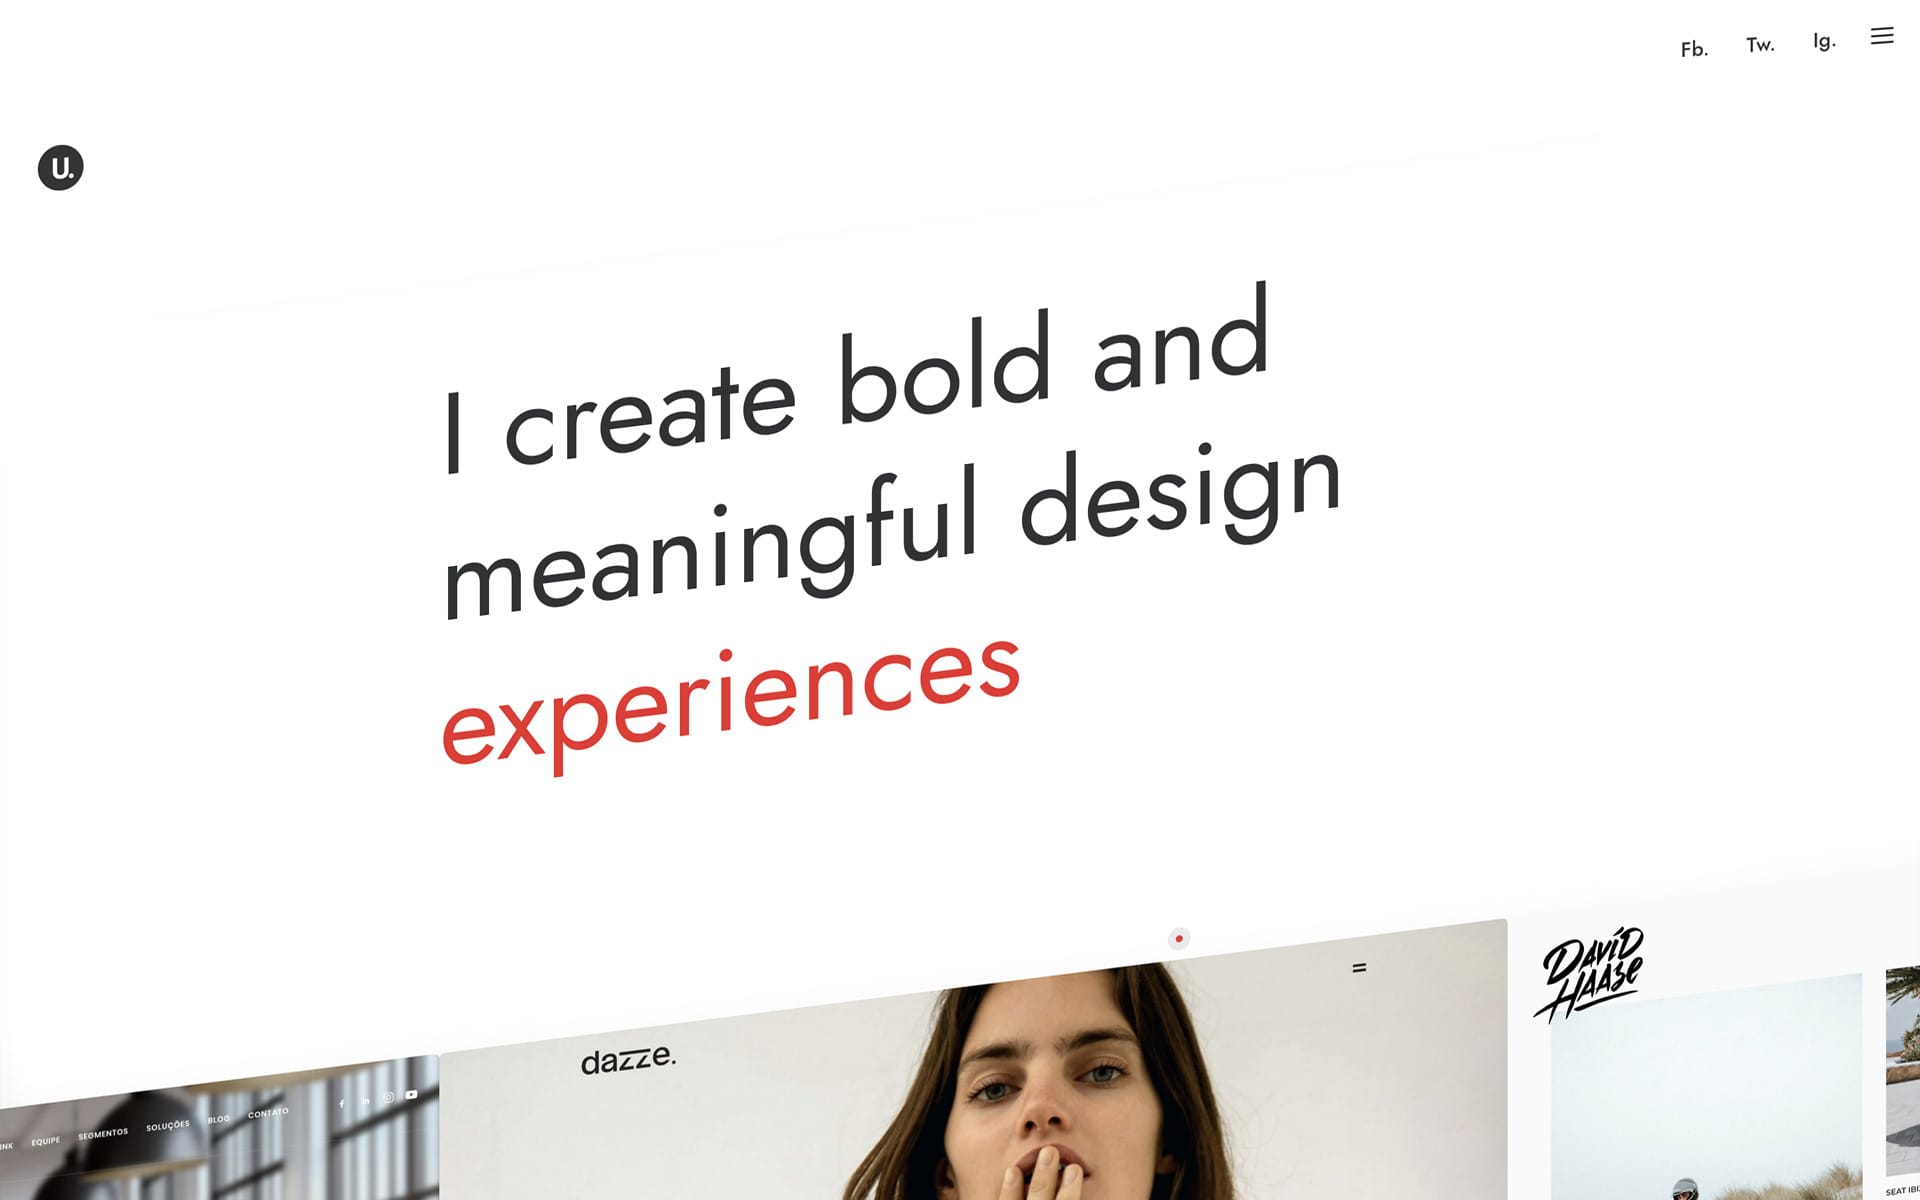
From Uncode 2.5.0, the Posts module offers a new layout variation named Titles. The Titles layout is a modern design approach for displaying your Post Types, blog, portfolio, products, or any other custom Post Type. The Featured Media (images or video) appears on text hover in varied creative ways. You’ve probably seen this new design mode used recently by many award-winning design sites.
This layout mode can be an alternative, successful and creative solution for all demanding designers who want to create a modern portfolio or an unconventional shop. This mode emphasizes typography, loading speed, and minimal design with a surprising effect.
To activate the new Titles layout mode, please open the Posts module and select General tab → Layout → Titles, (screenshot).
Block and Inline layouts
When you select this layout, in the Module tab → Display Layout, you have two major design options:
- The Block option creates a vertical list of items, and it is convenient when using a medium or large font size, (screenshot);
- The Inline option creates a horizontal list of items on the same line until they wrap, and it is a good solution when using a small or medium font size, (screenshot).
Background and Mouse modes
Associated with these two modes, there are other two main options for displaying the media via the Media Position setting:
- The Background Row or Background Column options display the media as the background of the Row or Column container of the Posts module. This option is generally used combined with the Background Attachment Fixed option;
- The Mouse option displays the media in an absolute position that follows the movement of the mouse.
Fine-tune settings
Unlike the Grid, Carousel, and Table layouts, within the Titles layout, it’s not possible to select specific Elements that create the ‘thumbnail’. Anyway, it’s possible to choose an additional element to be presented within the main title, named Meta, and consequently, some display and positioning options. The Titles layout also has specific options for fine-tuning the design, both on Desktop, Tablet, and Device via the Mobile tab options.
Frontend Editor note
Please note that animated effects such as the Media appearing in Background or the Media following the Mouse are disabled when working in Frontend Editor.
Links
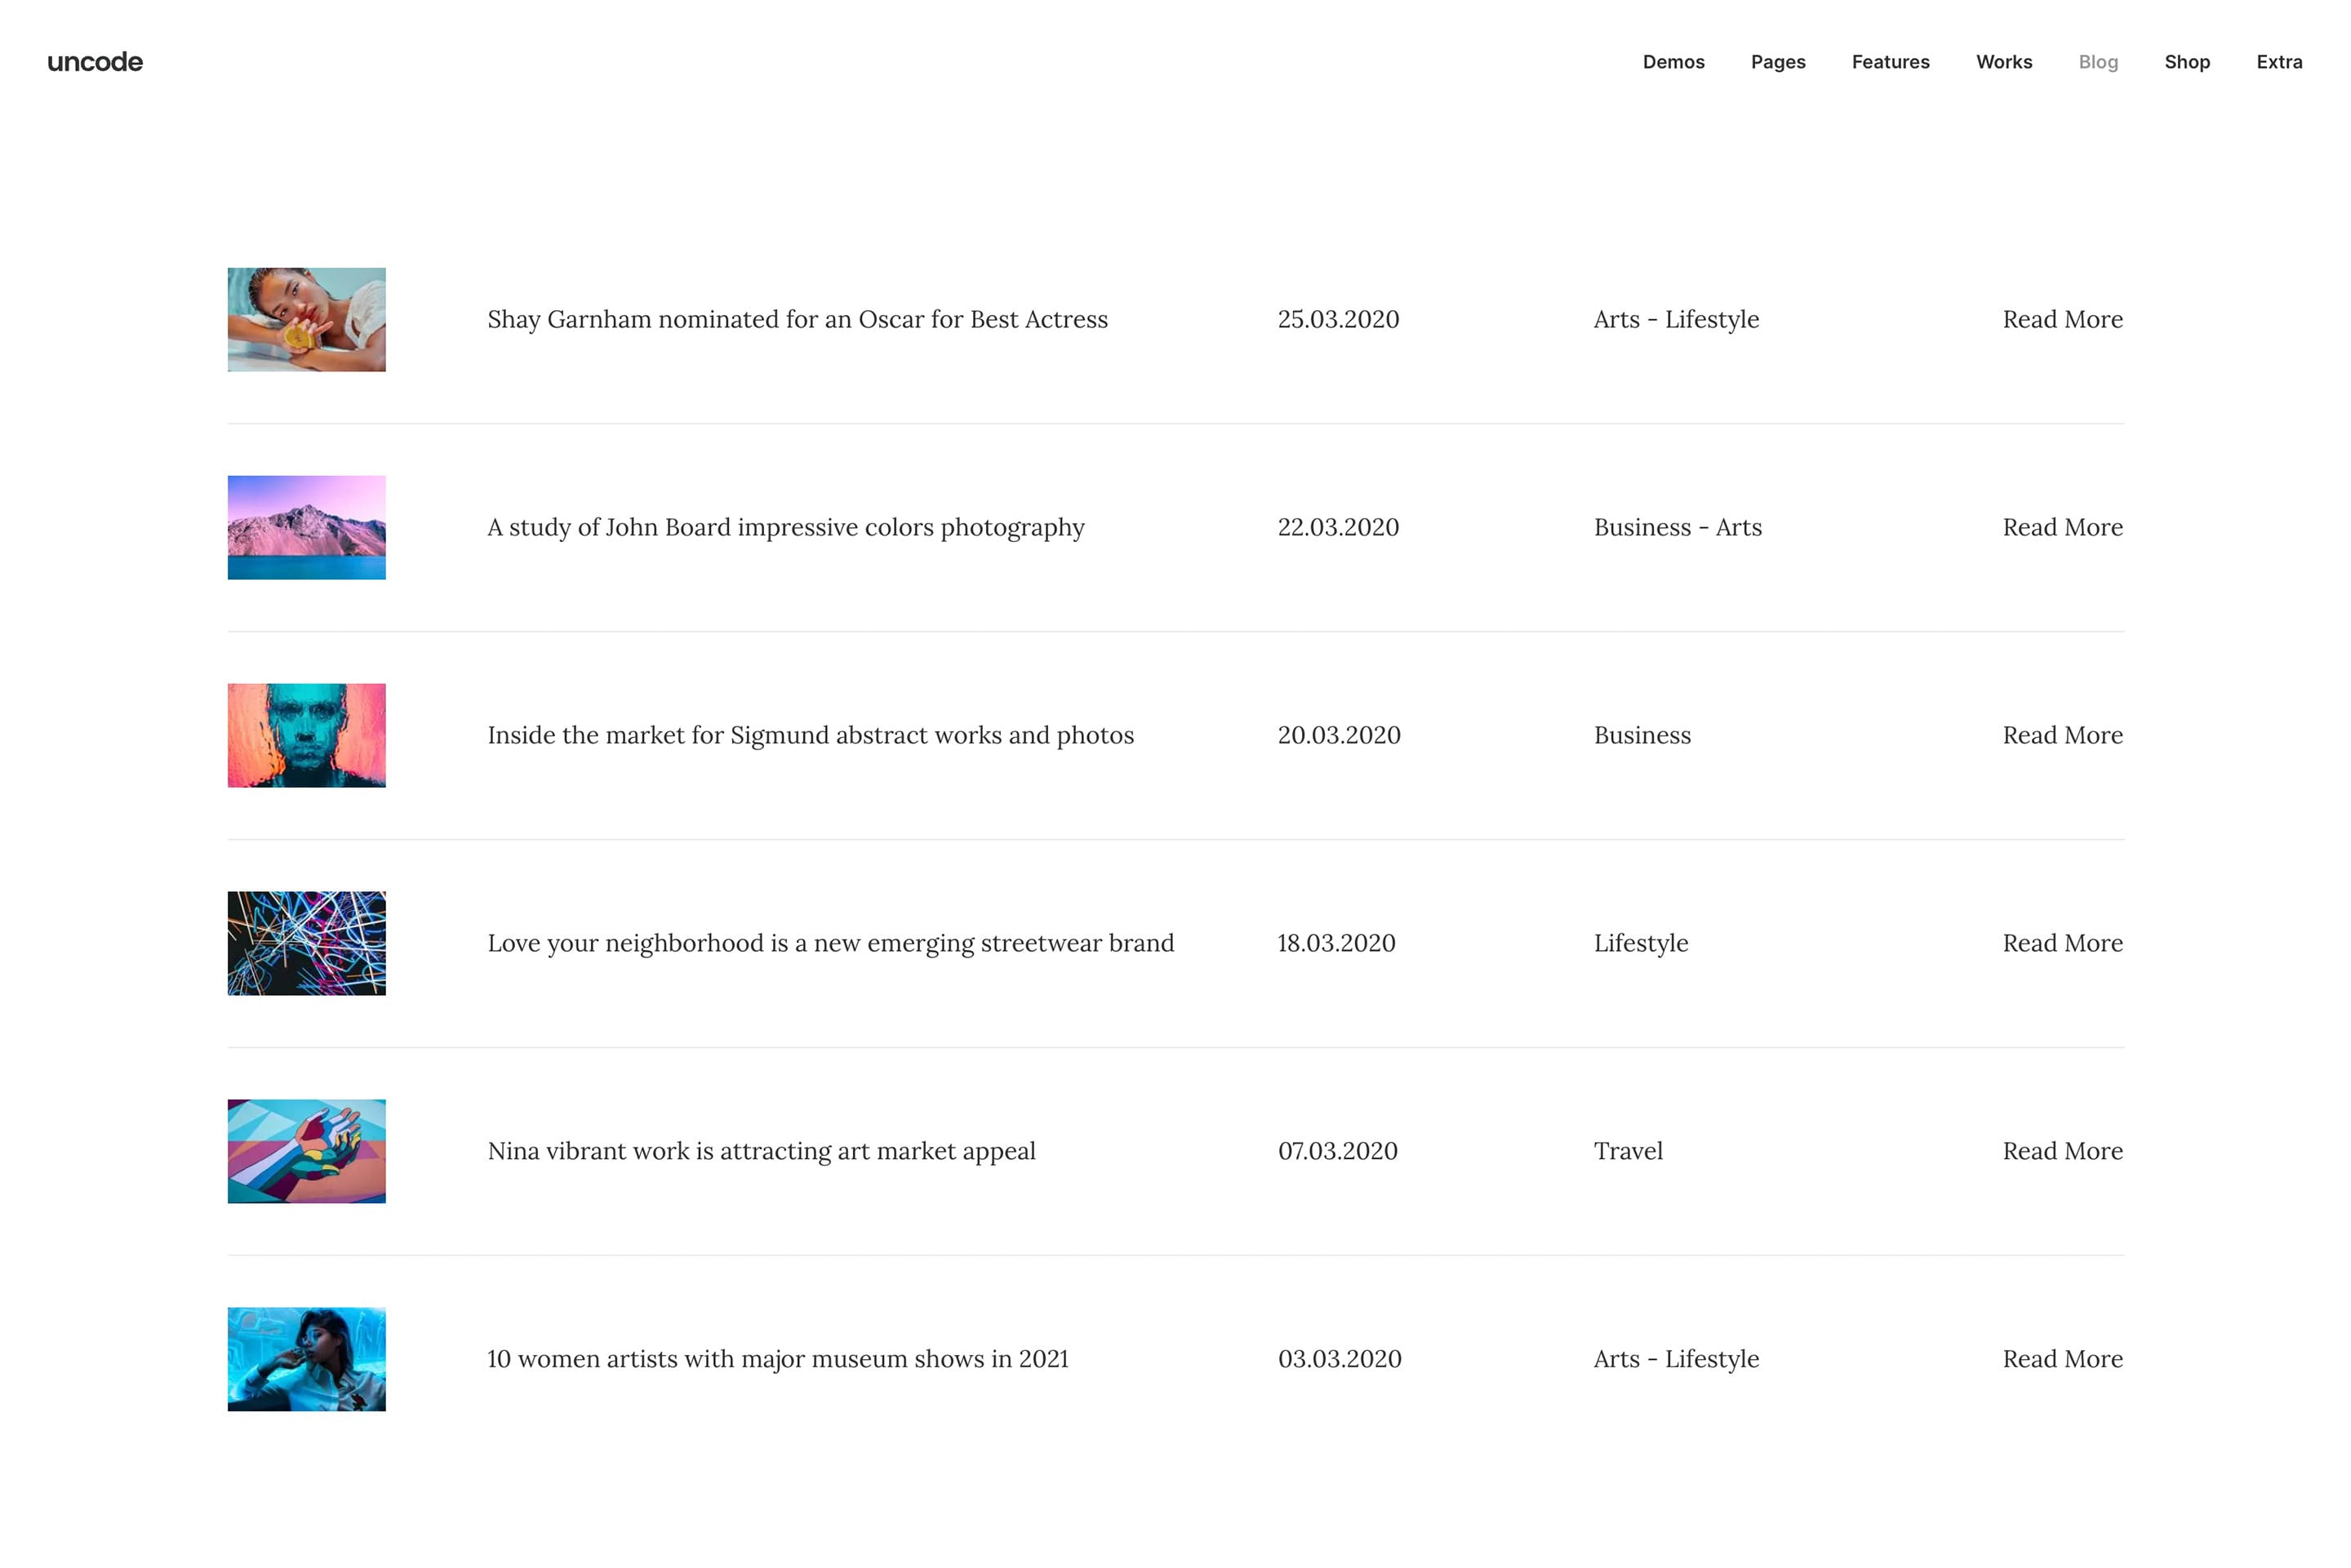
Posts Table Layout
From Uncode 2.5.0, the Posts module also presents a new layout variation named Tables. The new Table layout represents a clean, minimalist, and modern approach to presenting your Post Type content through a diverse set of possible variations. This layout is perfect when you want to create regular lists.
The new Table layout can be a winning solution for presenting news on a page, creating a portfolio index, or even an e-commerce catalog view. This layout mimics a table design, where rows represent the items (posts), and the elements of the items (image, title, date, author, etc..) can be organized in columns.
Set a Table layout
To select this mode, please open the Posts module and select General tab → Layout → Table, (screenshot).
The creation of the Table layout is handled in the Module tab in the Elements group of options, thanks to these options you have the maximum flexibility to create your ideal layout.
To define a column, please insert a Column Definer (‘Column’ element). All the elements that will be inserted after the Column Definer will be part of the column until a new Column Definer closes the first column and opens the next one. In each Column Definer, please select the width of the column on a base of 12 divisions (the same as the Uncode grid). For example, to create a layout with three columns, please insert 3 Column Definers with the values 6/12, 3/12, 3/12, and between one and the other the elements you want to present in each column, (screenshot).
Table responsiveness
When using the Table layout, at the Mobile tab, there are options (Items Not Stacked On Tablets and Items Not Stacked On Device) that you can use to control the layout on devices. Thanks to these options, you can “break” the table layout and stack the items, exactly as it happens for the main grid of Uncode.
In any way, please note that there may be some display issues on Tablet or Mobile depending on how many columns and contents you include in your tables, especially if you decide not to use the above options.
Unfortunately, it is not feasible to create programmatic admin options that can cope with the possible different needs. If you need to hide the columns of your tables depending on the device you are using, please find here an example code that you can use and adjust to your specific needs (of course, ‘post-table-column-1’ identifies the first column, a hypothetical ‘post-table-column-2’ will identify your second column, etc.):
/* Desktop */
@media (min-width: 960px) {
    .post-table-column-1 {
        display: none;
    }
}
/* Tablet */
@media (min-width: 570px) and (max-width: 959px) {
    .post-table-column-1 {
        display: none;
    }
}
/* Devices */
@media (max-width: 569px) {
    .post-table-column-1 {
        display: none;
    }
}
Links

Marquee Text
From Uncode 2.5.0, it’s possible to take advantage of a new type of animation for the Heading module, named Marquee. The Marquee option is designed to display custom headings that slide from left to right or vice versa, with an automatic or triggered on scroll animation. Marquee is an excellent solution for conveying an important message or vitalize a web page. It can be used to display a successful commercial message or for creative solutions.
The Marquee option can be activated from the Heading module → Animation tab, and there are two different types of animation presets:
- Marquee Auto: automatic and independent from the interaction with the page;
- Marquee Scroll: activated and progressive with the scroll of the page.
You can choose the direction for each of these modes, whether from right to left or vice versa. You can also enable the Marquee Edge To Edge option to have text with an infinite repeating effect.
Notes. Please note that the Marquee Scroll at the moment it comes activated needs to be positioned at the center of the viewport. Therefore, if the Marquee is inserted in the header of a page or in a section above the folder, it is advised to apply an animation to the Column container to hide the initial moment when the effect is created and positioned by the JavaScript engine. Please also note that this animation supports only one line. It is impossible to create a Marquee heading with more text lines.
Links

Rotating Heading
The Rotating Heading is available since Uncode 2.5.0, and it is the new shortcode for the Heading module that allows you to loop different words with an animation loop.
Thanks to Rotating Headings, it’s possible to delight your website users with multiple interchangeable words that change with animation effects and display different content in a sentence. This shortcode is advantageous when you want to convey various messages in a single sentence.
An example of a shortcode can be found below. The words inside the shortcode tag, separated by the pipe symbol (or vertical bar), will be the words that will replace the main word in the loop animation:
I like Google
You can add or modify the following parameters:
- fx: transition effect “opacity” or “zoom” (leave empty for the default vertical animation);
- wait: waiting time in milliseconds before the first and between animations;
Notes
- Please note that a rotating string with a line break will lead to possible problems; so please never use this effect if the text inside the shortcode may have a line break on page load or on resize event.
- Please note that even if possible it is suggested not to combine this shortcode with the advanced text animations (Lines Curtain, Letter Typewriters, etc.). Combining these animations may stress the JavaScript rendering engine.
- Please note that Rotating Headings are not compatible with the Content Slider (Header Slider).
Links
Skew Effect on Scroll
The new Skew Effect available since Uncode 2.5.0 is a unique scrolling effect for the most creative creators that creates a memorable first impression. This effect creates a skew visual distortion when scrolling the page. Probably the most up-to-date developers and designers have seen this effect recently on several award-winning design websites. The new Skew effect is perfect for presenting an unconventional portfolio, a trendy product, or a creative landing page.
This option can be activated, depending on the context you want to use it:
- For the whole site from the Theme Options → Customise → Scroll & Parallax;
- For a specific page from the Page Options → Scroll;
- For the Row/Columns, Posts, Media Gallery, Single Media, and Heading modules at the Extra tab.
Notes
- For technical reasons, this effect is not compatible with the fixed position elements, such as Sticky columns or absollute Vertical Element.
- If you use this option on a page where the Header and Footer have different colors, with speedy scrolling, you might see the HTML background, which remains visible when the page is repositioning. To get around this, you can insert a simple code in Page Options → CSS and give the HTML Background the same color as the Footer. This is an example of configuration, taken from the Creative Designer example, (screenshot)
body:before {
    background: #fff;
    content: '';
    display: block;
    height: 100vh;
    left: 0;
    position: absolute;
    top: 0;
    width: 100%;
    z-index:0;
}
Links

Textual and underline Buttons
From this update, you’ll also be able to use a new creative and modern button layout. In fact, thanks to the new options, there will be more typographic controls for text buttons and new possibilities for underline animations.
To activate the new controls, please follow:
- In the Button module, select Size → Standard link;
- Select a text size using the Text Size option;
- Select one of the underline options via Underline;
Links
Custom Fields
Custom Fields are one of the primary features to unlocking WordPress’s power. So if you want to build custom, dynamic WordPress sites, it’s essential to understand how custom fields work. Custom Fields let you store additional information about your blog posts, pages, portfolio, or even custom post types. In a nutshell, Custom Fields make it possible to use WordPress as a powerful content management system.
With Uncode, you can even take the information from your Custom Fields and dynamically include it in your Uncode designs and Page Builder dynamic templates. For example, you could add a Custom Field for each piece of information so that you can quickly enter it in the backend editor and then automatically display it on the front-end of your site according to your template.
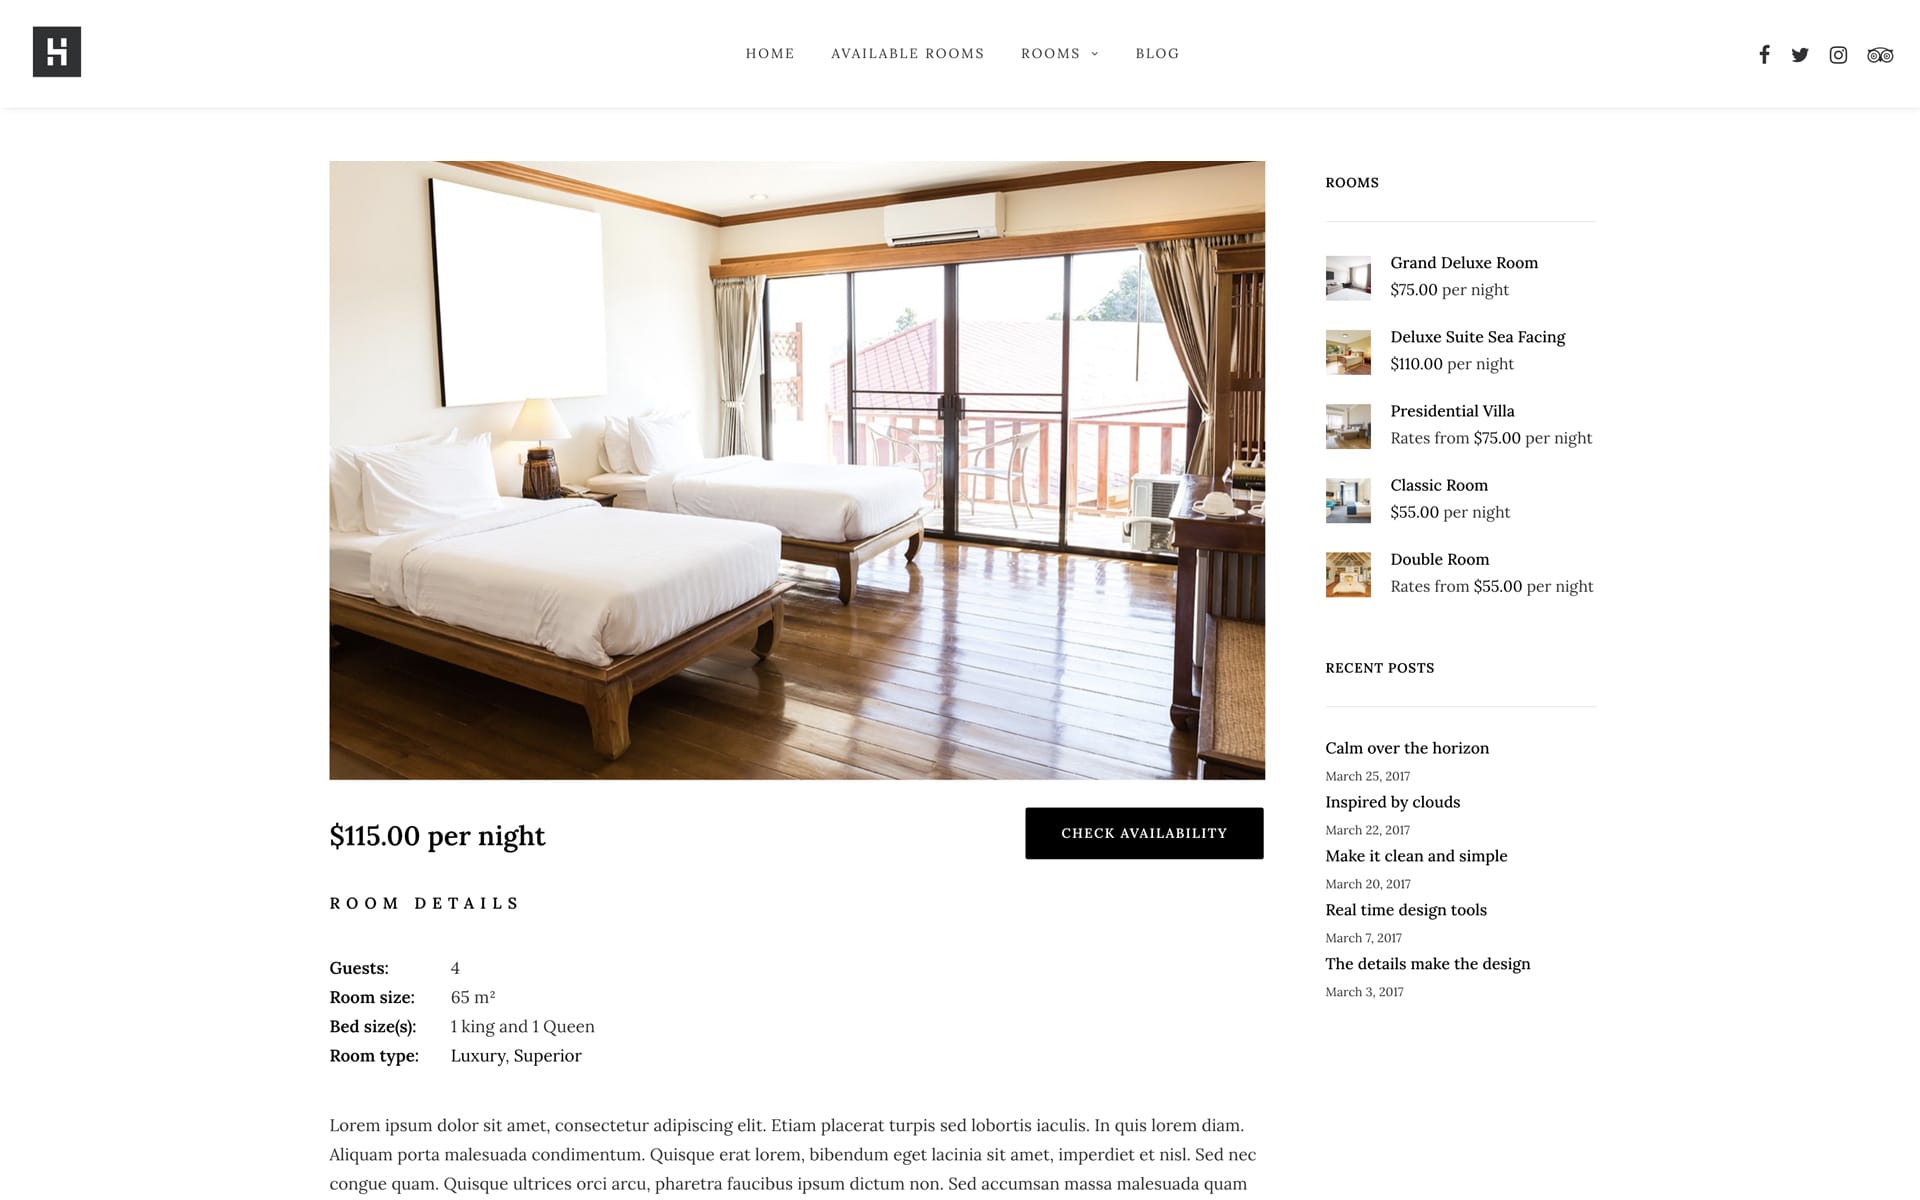
To better understand what Custom Fields are for, let’s take into consideration some scenarios:
- Event: use Custom Fields to display lists of participating artists, dates, and must-see performances, etc.
- Ecommerce: use Custom Fields to display additional metadata associated with your products.
- Real Estate: use to display information such as location, square footage, number of rooms, etc.
- Restaurant: use to create a menu with fields as the dish’s price, any relevant dietary concerns, calories, etc.
How to display Custom Fields on a page
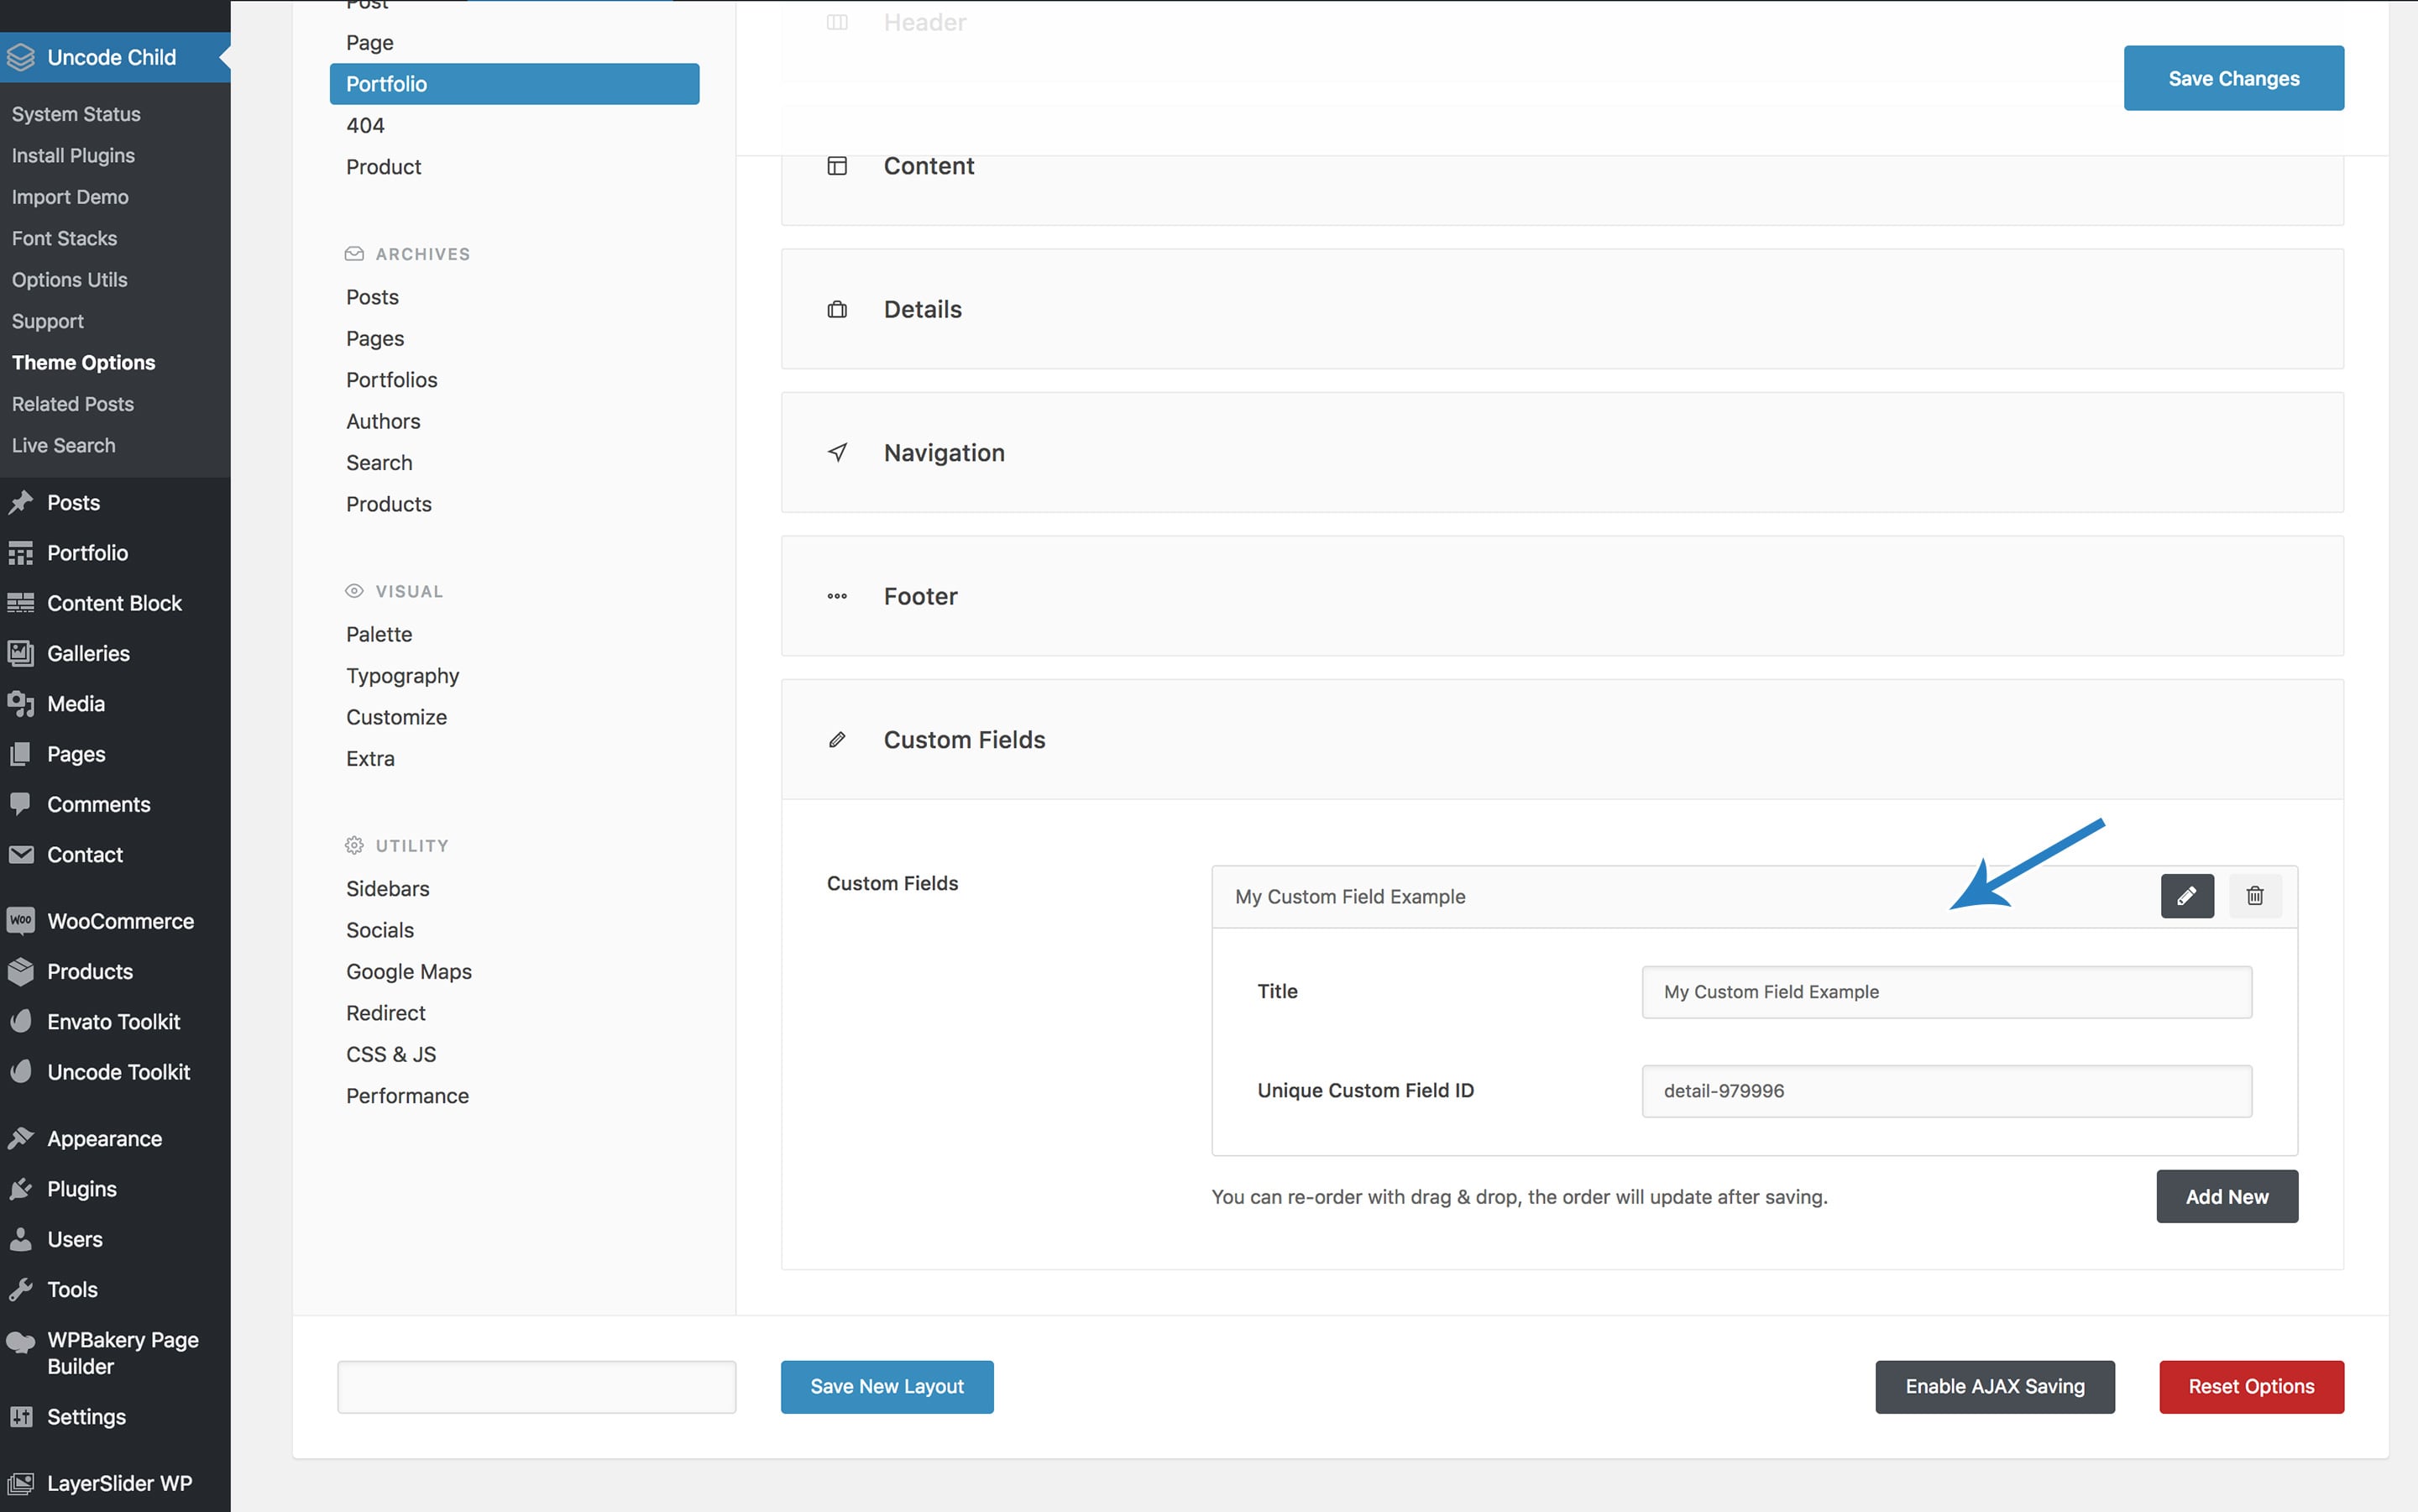
To display a Custom Field on a post, page, portfolio, or product on your site, please follow:
- Navigate to the Theme Options → Post (Page, Portfolio or Product).
- Create a new Custom Field and Save, (screenshot).
- Navigate to a single Post (Page, Portfolio or Product) and insert a value for the Custom Field in the Page Options, (screenshot).
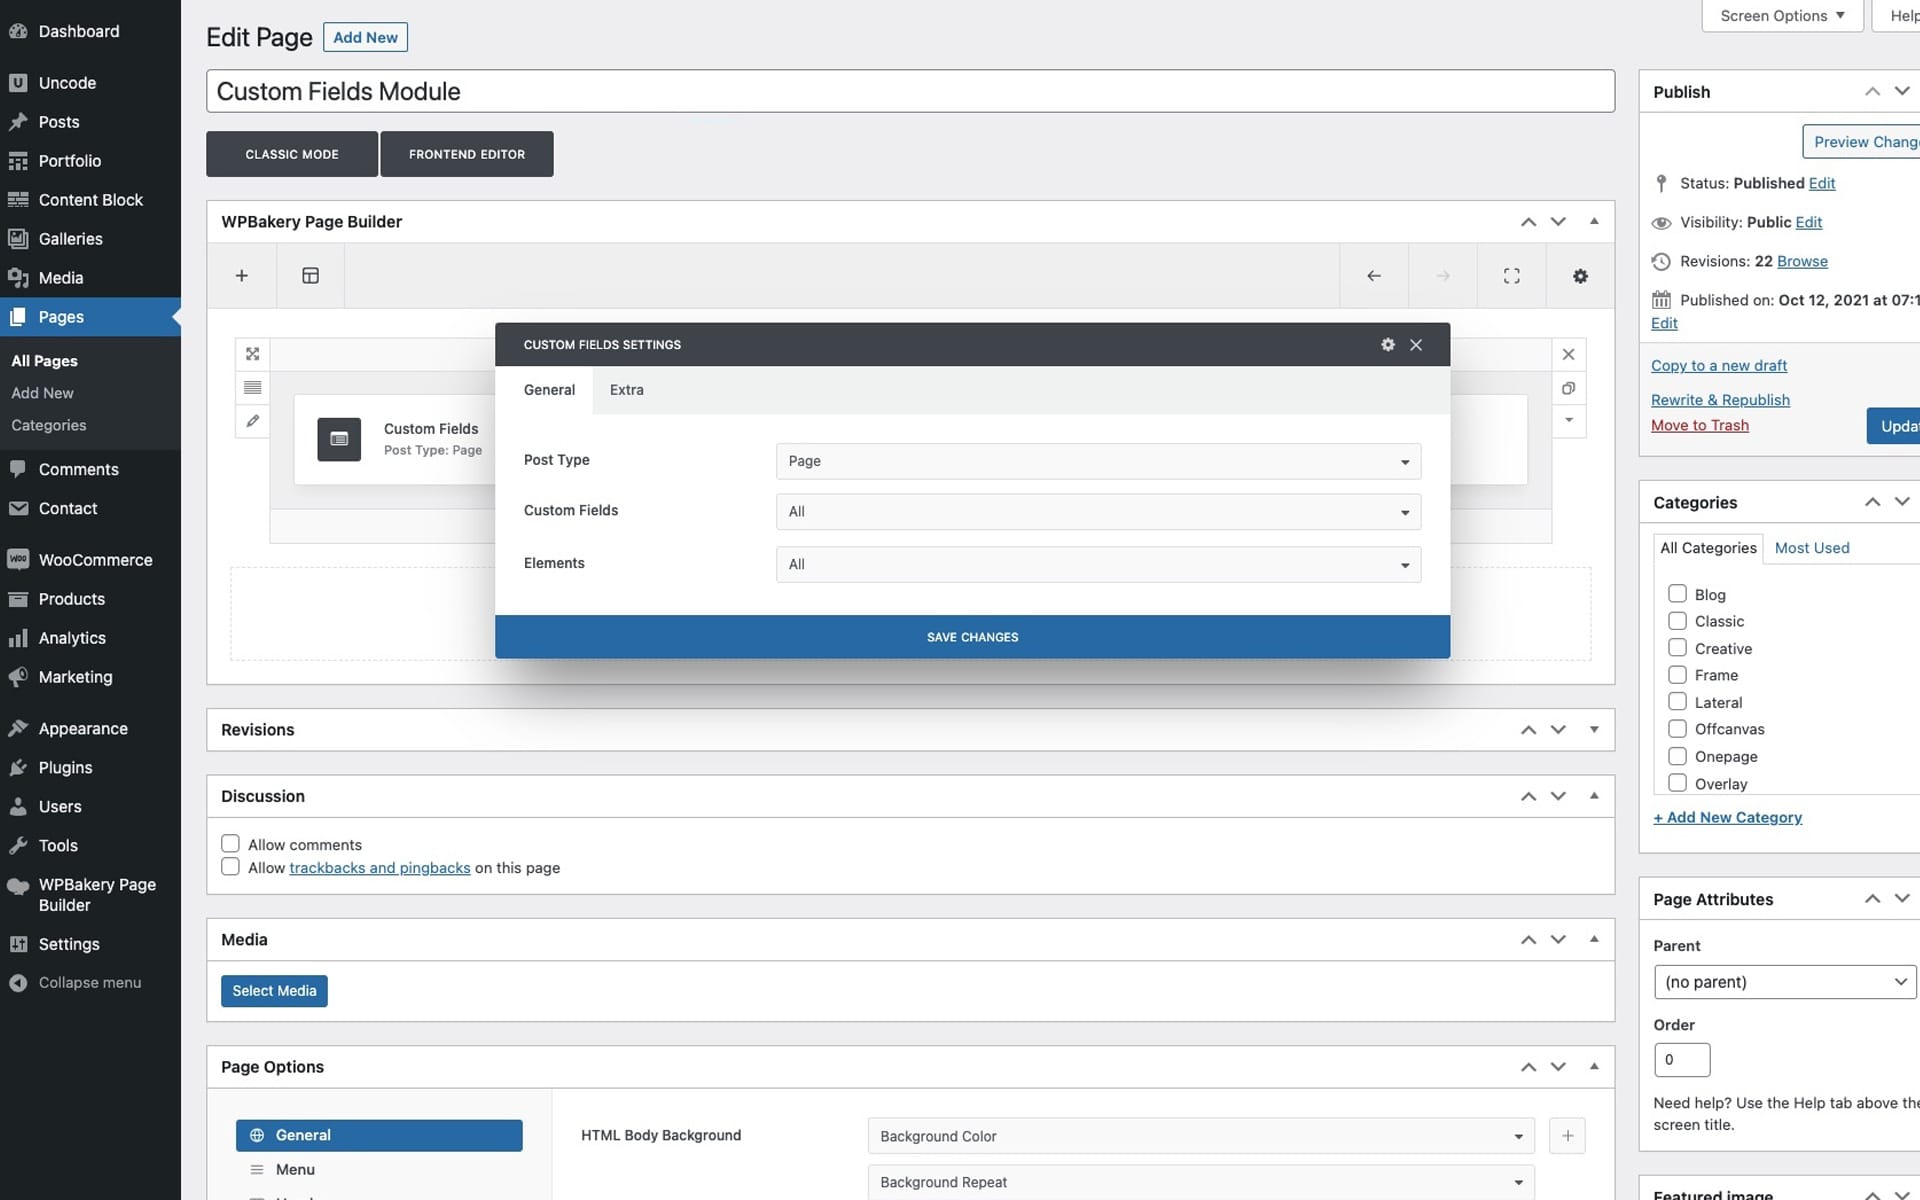
- Insert the Custom Fields module within your page, and adjust the various options, (screenshot).
Custom Fields modes
The Custom Fields module can be configured with various methods so that each user can benefit from it based on its own scenario. The main modes are:
- List: labels and values are printed as a simple list text (for example, it is perfect to list characteristics of a product or of an apartment). To use this mode, select the correct option for the ‘Post Type‘ option.
- Single List: print a specific custom field, including label and value. To use this mode, select the correct option for the ‘Post Type‘ option and the desired value for the ‘Custom Fields‘ option.
- Single value: print a single specific label or a single specific value of one particular Custom Field. Associated with the options of the ‘Typography‘ tab, this is the most creative solution because it allows you to position labels or values in any position of the page, and with any typography (for example, it is perfect to create a dynamic title for the custom field). To use this mode, select the correct option for the ‘Post Type‘ option, the desired value for the ‘Custom Fields‘ option, and the ‘Element‘ to display.
Links
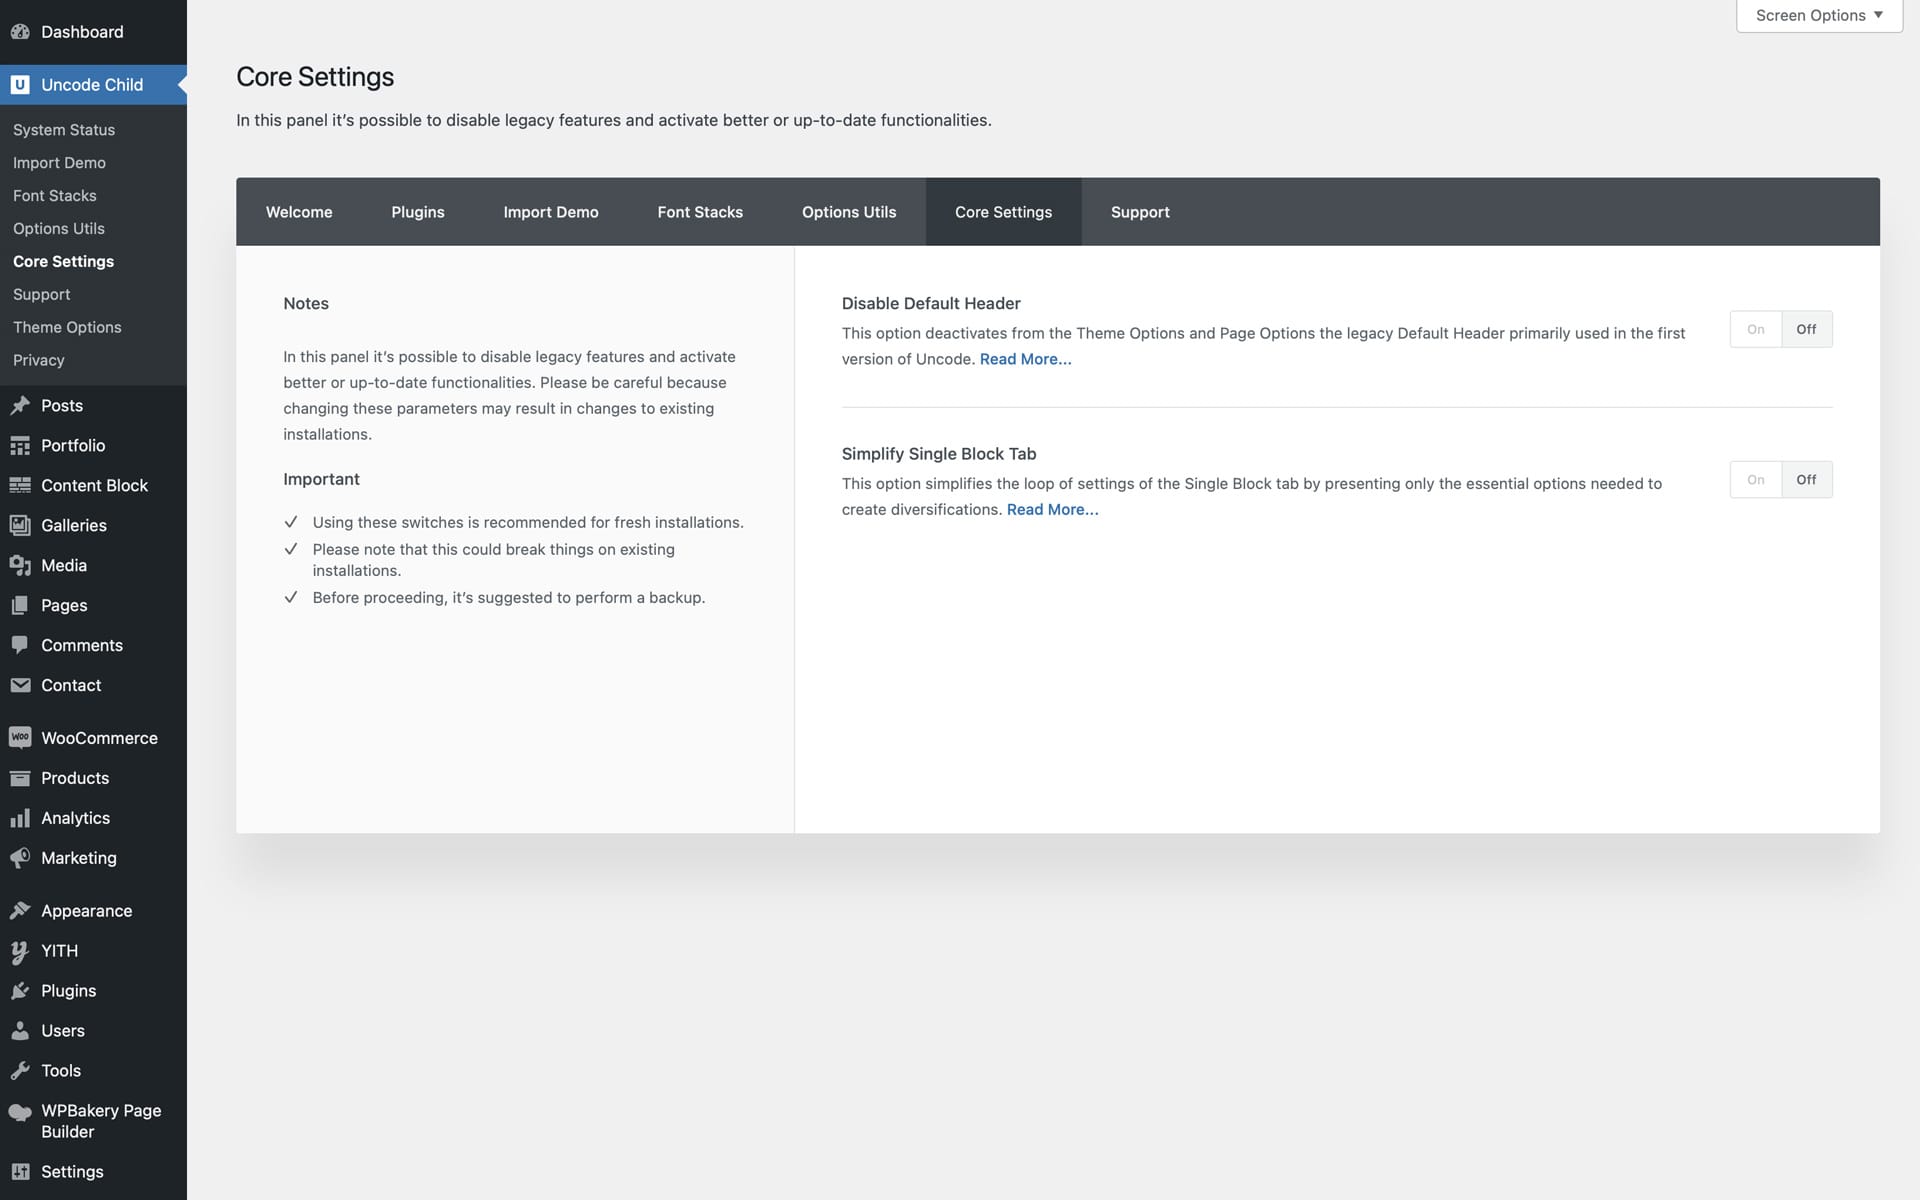
Core Settings
The Core Settings panel, available from Uncode 2.5.0, lays the foundation on which Uncode will grow in the future. In fact, the Core Settings, will present from the following updates switches to enable new features or disable old features. Thanks to this panel, it is possible to activate or deactivate significant features at the user’s choice. Some enthusiasts users always want to use the latest features, still, others built their site years ago, and they are only interested in updating the theme without encountering possible problems when dealing with a substantial update of the theme’s features. Moreover, this panel will allow the user to decide, in the future, which features to activate when replacement features are introduced. This solution meets both needs.
In a few words, the Core Settings panel has both the function to improve the usability over time and disable or replace functions that have become obsolete with new ones. All of this leaves the user the possibility to decide, thus avoiding possible problems if everything had been automatic at a hypothetical theme update.
In the following updates, we will insert other fundamental switches that will allow the theme to evolve. For example, many users have asked to change the Lightbox plugin, so it is possible to assume a switch to select a different lightbox plugin for the future. We can, for example, decide to activate a potential Header Builder, use another Page Builder, or a new Theme Options system. The crucial part is that the user will decide everything based on his needs, ensuring maximum compatibility for old installations simultaneously.
To get started the Uncode 2.5.0 update introduces the possibility of disabling the Default Header (or previously called Basic Header) and disabling unnecessary functions of the Single block tab.
Disable Default Header
The Default Header, the native method for making headers in the first versions of Uncode (about 2015), was later replaced in users’ preferences by headers created with the Page Builder through the Dynamic modules. These make it possible to create the exact layouts of the Default Header and add many more possibilities (thanks to the Page Builder, you can create any header design). So during times, the Default Header had become a limited and cumbersome option.
In addition, the Default Header creates numerous settings for each group of Theme Options Single and Archive. Some installations that did not meet the minimum server Max Vars 3000 could create problems such as Setting loss. Deactivating the Default Header, the variables drop needed from 1100 to 730, thus falling below the minimum of 1000 vars supported by any server.
Simplify Single Block Tab
On the Posts and Media Gallery modules, the Single Block tab is used to create thumbnails diversifications. Using the Single Block tab makes it possible to create advanced variations that can be repeated in a pattern with the Matrix. All the 40 options of the Block tab are repeated in the Single Block tab to style each thumbnail independently. So on a Query of 10 items, the Single Block tab features 400 options. These were often redundant and made, depending on the Query, loading on less performing servers problematic.
Activating the new Simplify Single Block Tab option, only the most essential options are created for single thumbnail diversification. Anyway, these options are the same we used on our demo to create some creative layouts, such as Metro. So you can rest assured that creativity is not compromised.
The Simplify Single Block Tab option reduces the available settings to a selection of the 8 most important settings. This results in improved loading times and improved user usability.
Links
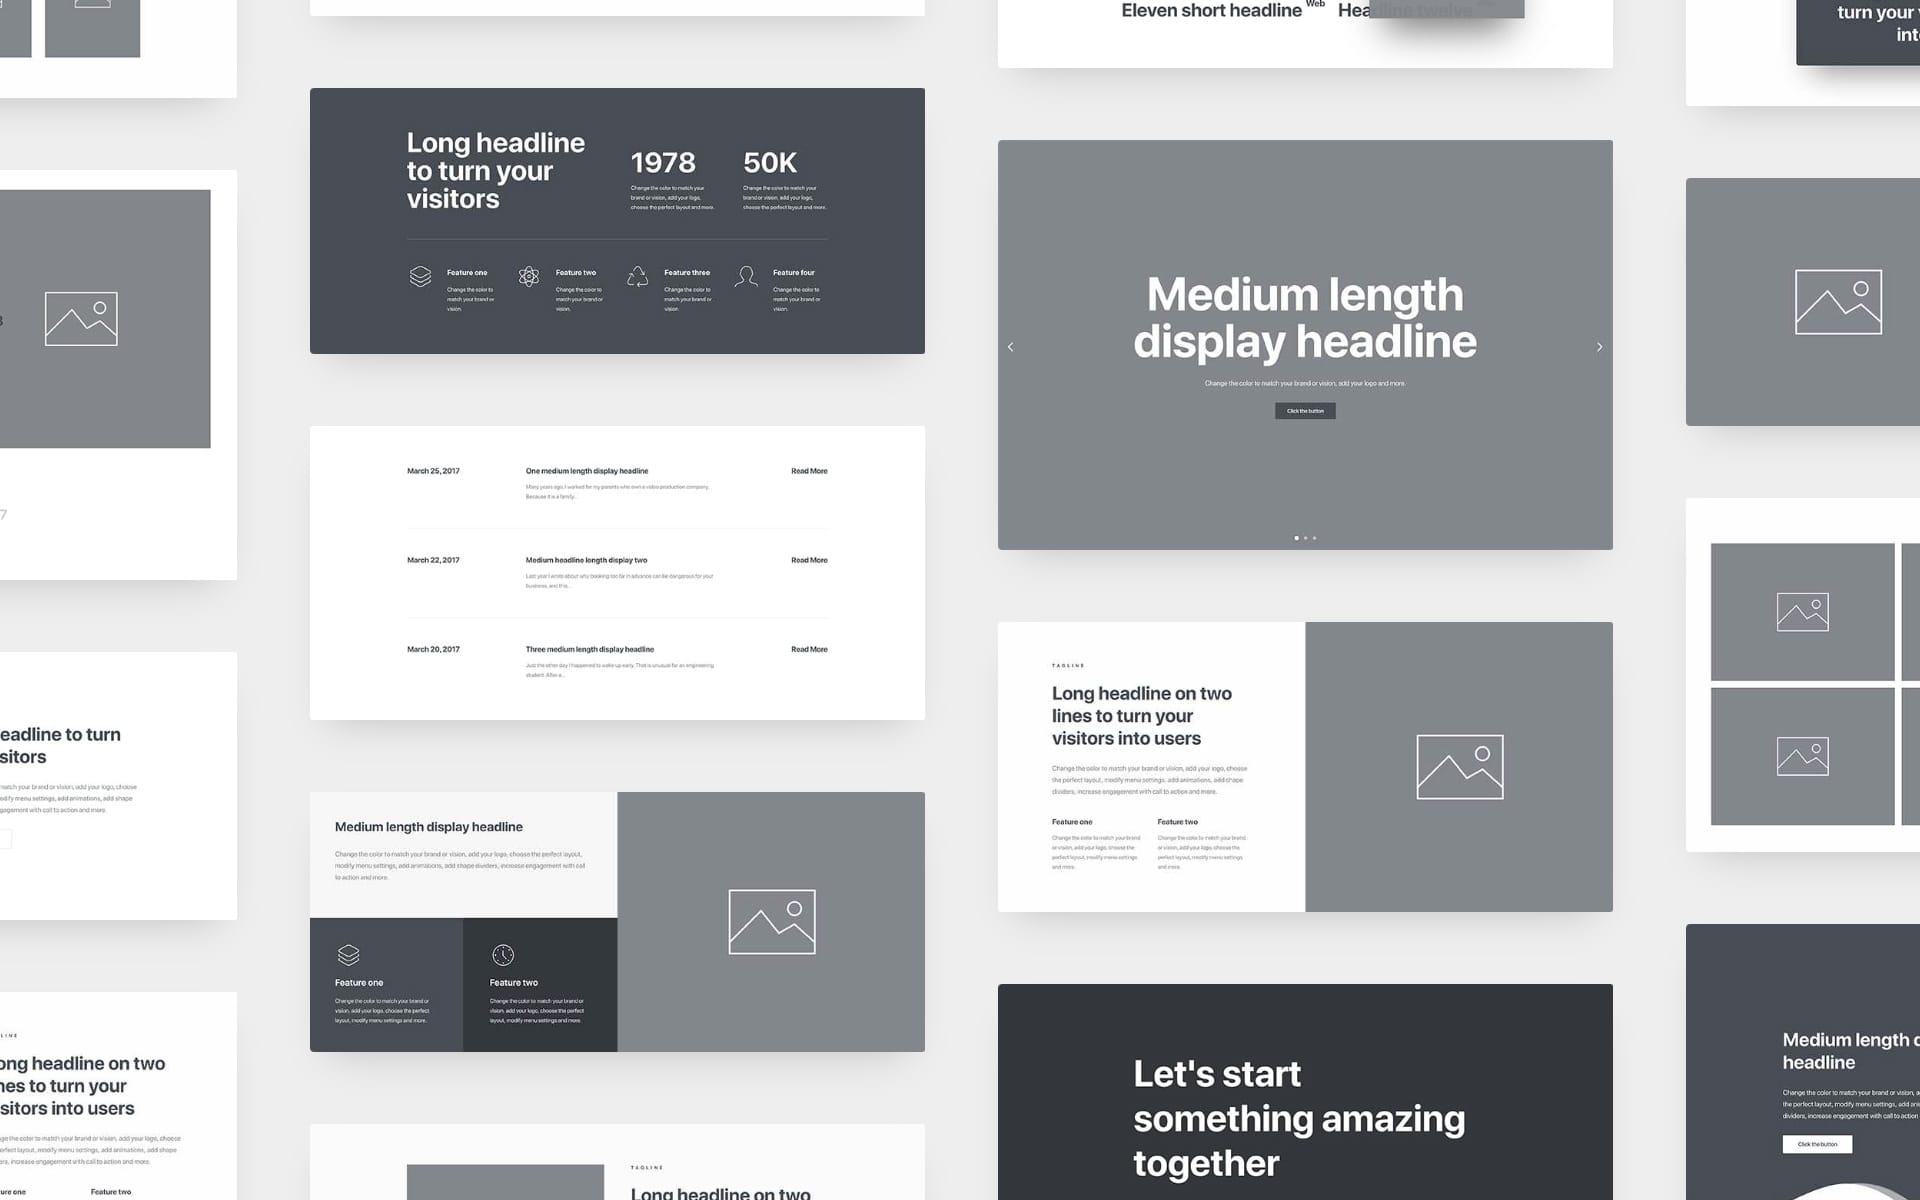
Wireframes update
In Uncode 2.5.0, massive update of the useful Wireframes plugin with new pre-made sections featuring the new features. The Wireframes Plugin now reaches 550 ready-to-use designs.
Links
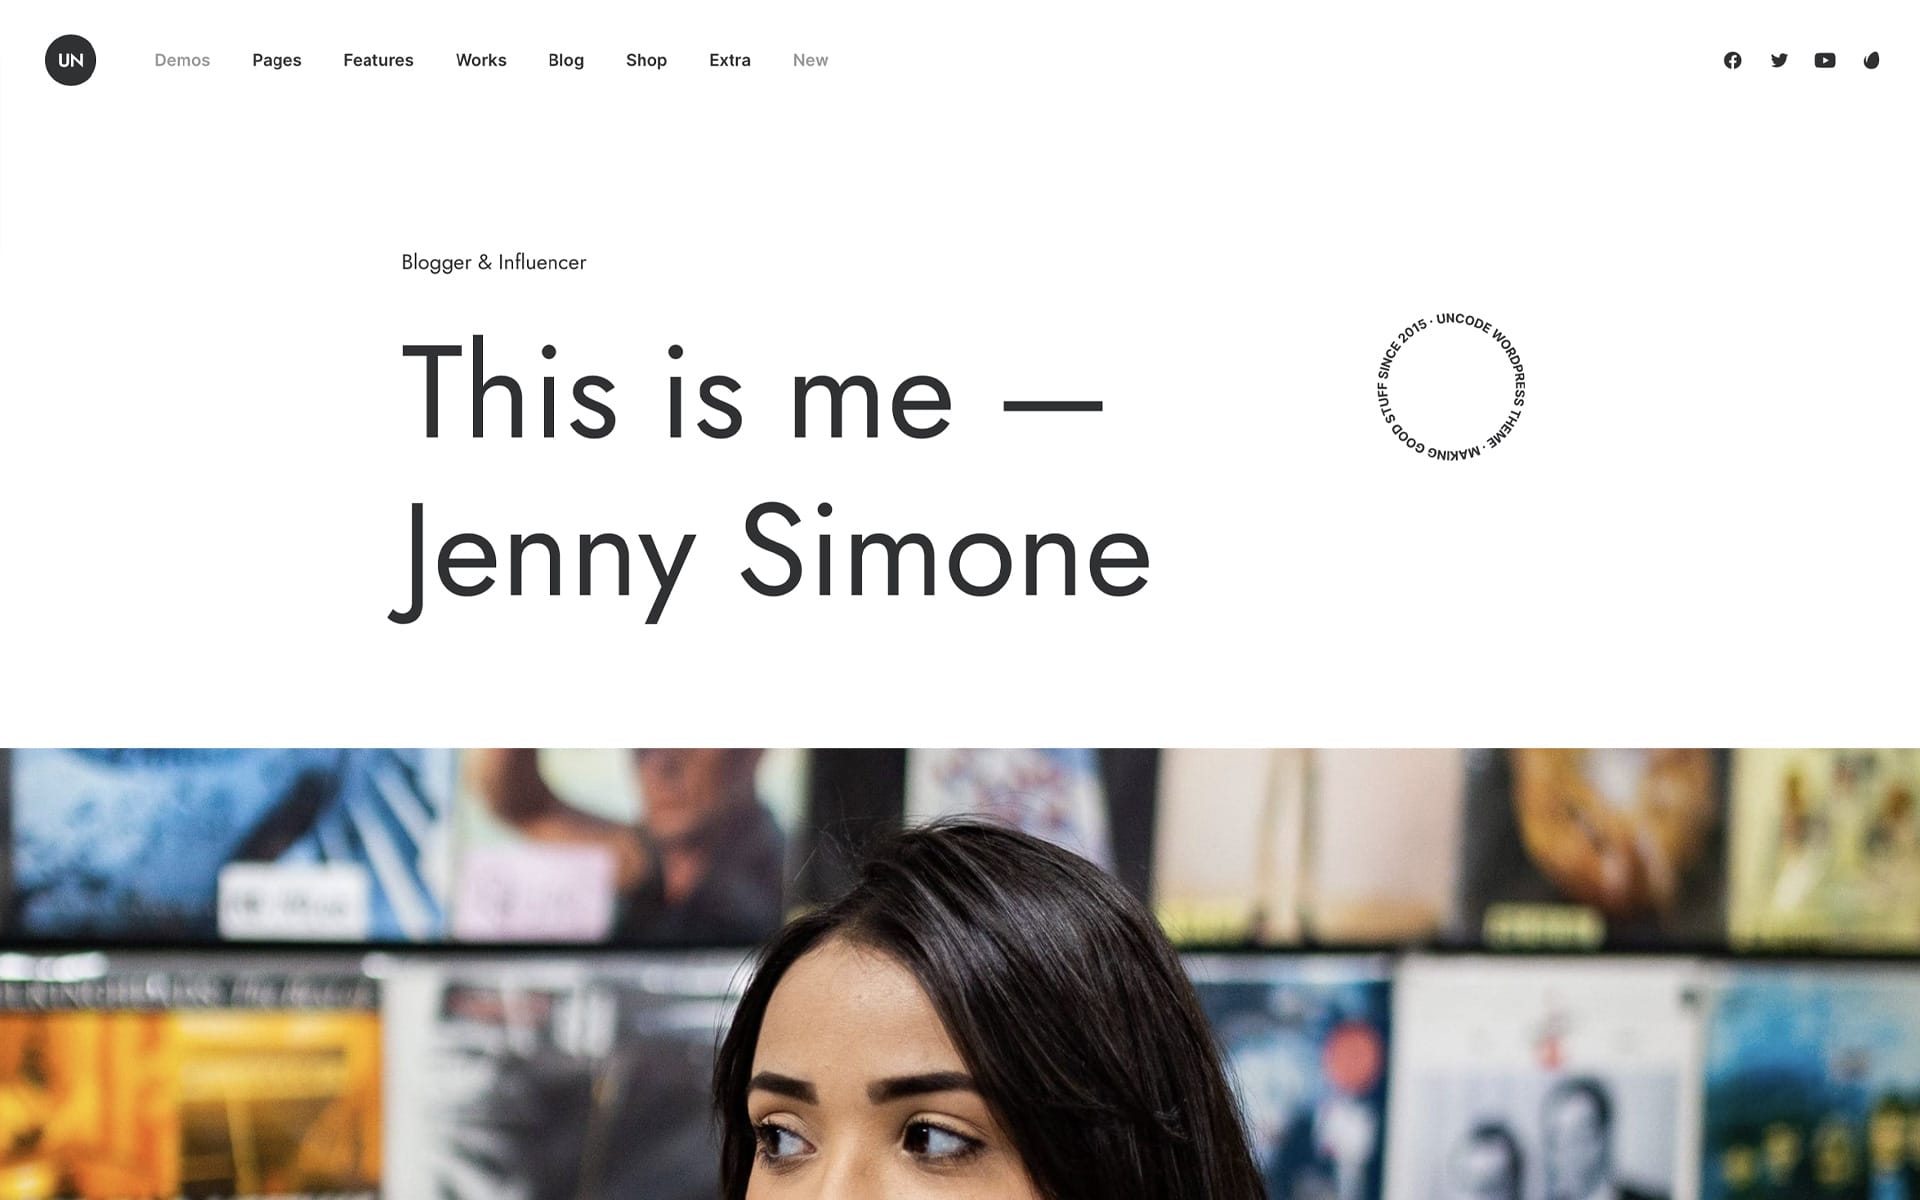
New Layouts and Demo Contents
With this update will be published a massive restyling of the Uncode demo. New 15+ demos, 20 revamped demos, and 18 new pages to start your new creations! Lots of inspiration and trendy designs ready to be used!
Links
How to update Uncode
There are three methods to update your theme: the easiest way is the Automatic Update which requires you to register your purchase, the Envato Market Plugin update method and the traditional method that involves more steps via WordPress or via FTP. Please find more info in the dedicated documentation:
Links
Change Log
2.5.0 (2021/11/03)
ADD:
- 'Titles' Posts layout
- 'Table' Posts layout
- Performance Options (on-demand JS & CSS, Defer CSS, Fonts, Disable and Optimize)
- Marquee Headings
- Rotating Headings
- Skew Fx on Scroll
- Textual and Underline Buttons
- Spinning Images
- Custom Fields module
- WooCommerce rating stars for Posts module
- Core Settings panel (Disable Default Header, Simplify Single Block Tab)
- New Wireframes

IMPROVEMENTS:
- Theme Options loading times
- Markup optimization when elements not used
- Automatic paragraphs with Content Blocks
- My Account page responsive tables
- LayerSlider moved to main ThemeForest package
- WooCommerce 5.9 support
- ContactForm7 5.5 support

FIX:
- Sticky elements with First Row Header and Footer z-index issue
- Sticky elements position with transparent Headers
- Social Icons in Footer
- Mobile Menu issue on scroll with Lateral menu on desktop
- Overlay Menu opacity with custom background colors
- Secondary images transitions with Async or Dynamic SrcSet
- Menu border on mobile visible when the Dropdown Menu is closed
- Dynamic Heading on Taxonomy pages
- Isotope columns calculation
- Check for portfolio CPT warning
- iLightBox deep-link behaviour
- iLightBox and Privacy Plugin modal Android
- Border color on transparent navbar on mobile
- Scroll to section on load
- WooCommerce Short Description formatting with Product Builder
- Dynamic SrcSet better check for image size
- Dark Skin color Selects (Windows)
- PHP 8 round value with SVG Menu fatal error
- PHP warning in Product search results
- PHP warning in WooCommerce pages

UPDATE:
- Uncode Core 2.5.0
- Uncode Wireframes 1.3.0
- Revolution Slider 6.5.9
- The official Change Log can be found at here.