
Carousels are very popular web element these days, but a lot of sites still don’t use one as part of their design. This is a missed opportunity, since a carousel can help you direct attention where you need or want it – such as towards your top posts.
Displaying a few handpicked posts using a carousel can help you hook in readers as soon as they land on your home page (or encouage them to read more at the end of an article). Well-designed carousels tend to catch the eye, so they are a perfect way to display compelling content and motivate visitors to spend more time on your site.
In this article, we’re going to talk about what a post carousel can do for you. Then we’ll teach you how to create one with Uncode, in three easy steps. Let’s get to work!
What Post Carousels Are (And How They Can Benefit You)
Carousels are slideshows of media that enable your visitors to move from one item to the next, either manually or automatically. These days, the terms ‘slider’ and carousel are basically interchangeable.
In many cases, carousels are made up of informative slides that tell people more about you, your site, or your services. However, they can also be used to highlight specific content, such as outstanding pages and posts. This is the type of carousel we’re concerned with in this article.
Let’s go over a few of the reasons we favor the content-driven approach over more generic carousels:
- It enables you to highlight your top posts – or hand-picked featured content – and lead readers to the pieces that will interest them the most.
- A compelling carousel can encourage your visitors to spend more time on your site (which gives you more chances to engage them).
- Compared to ‘top posts’ widgets and other common methods for displaying popular posts, a carousel is a more visual and eye-catching device.
A lot of the most popular slider plugins and tools focus entirely on generic, informational carousels (such as simple image and text combinations). Fortunately, Uncode provides you with many more options when it comes to customizing your website’s carousels. Let’s talk about how to create your own carousel of posts!
How to Create a Post Carousel With Uncode (In 3 Easy Steps)
If you’re new to Uncode, you may at first feel overwhelmed by all the options it provides. It will help if you view our theme as a vast collection of tools. It offers a feature to help you accomplish just about any task, but you don’t need to learn how to use all of them at once.
For this tutorial, we’re going to be using the Uncode Visual Composer plugin. To make sure the following process will work properly, navigate to the Plugins tab in your admin area, and make sure that the Uncode Core, Uncode Visual Composer, and Visual Composer Clipboard plugins are all installed and activated. When that’s done, you can move on to the first step.
Step #1: Add a Carousel to Your Post or Page
In most cases, you’ll want to add your post carousel directly to your home page, to maximize the number of people who see it. However, Uncode enables you to add this element anywhere you want, such as at the end of a post or page (to encourage further reading).
To get started, open the post or page you want to use, and make sure you’re in the right mode by clicking on the Backend Editor button:
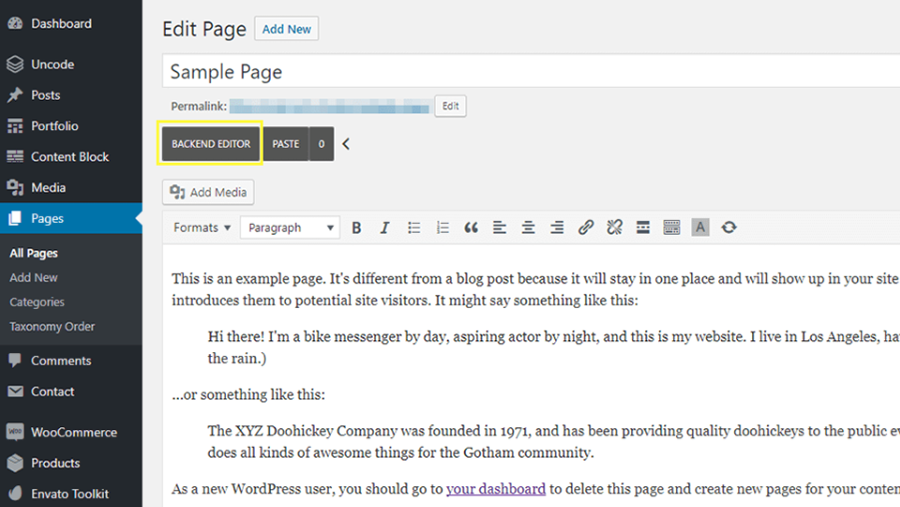
This will enable the Visual Composer editor, which provides you with more control over the elements on your posts and pages. Now, you simply need to click on the plus sign where you want to add your new carousel:
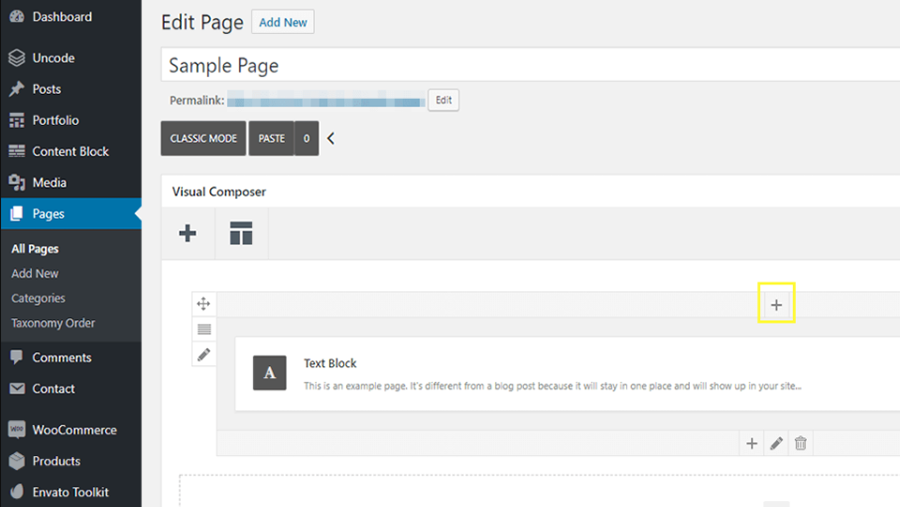
If you’re not sure how the Uncode rows and columns system works, check out our documentation for some pointers.
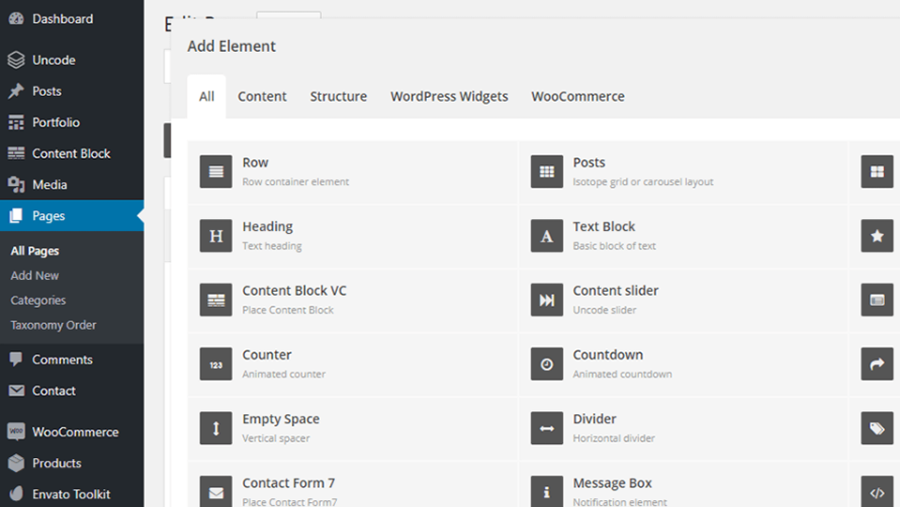
You should now see a long list of ‘modules’ that you can add to your page. Look for the one called Posts, which should be near the top of the list:
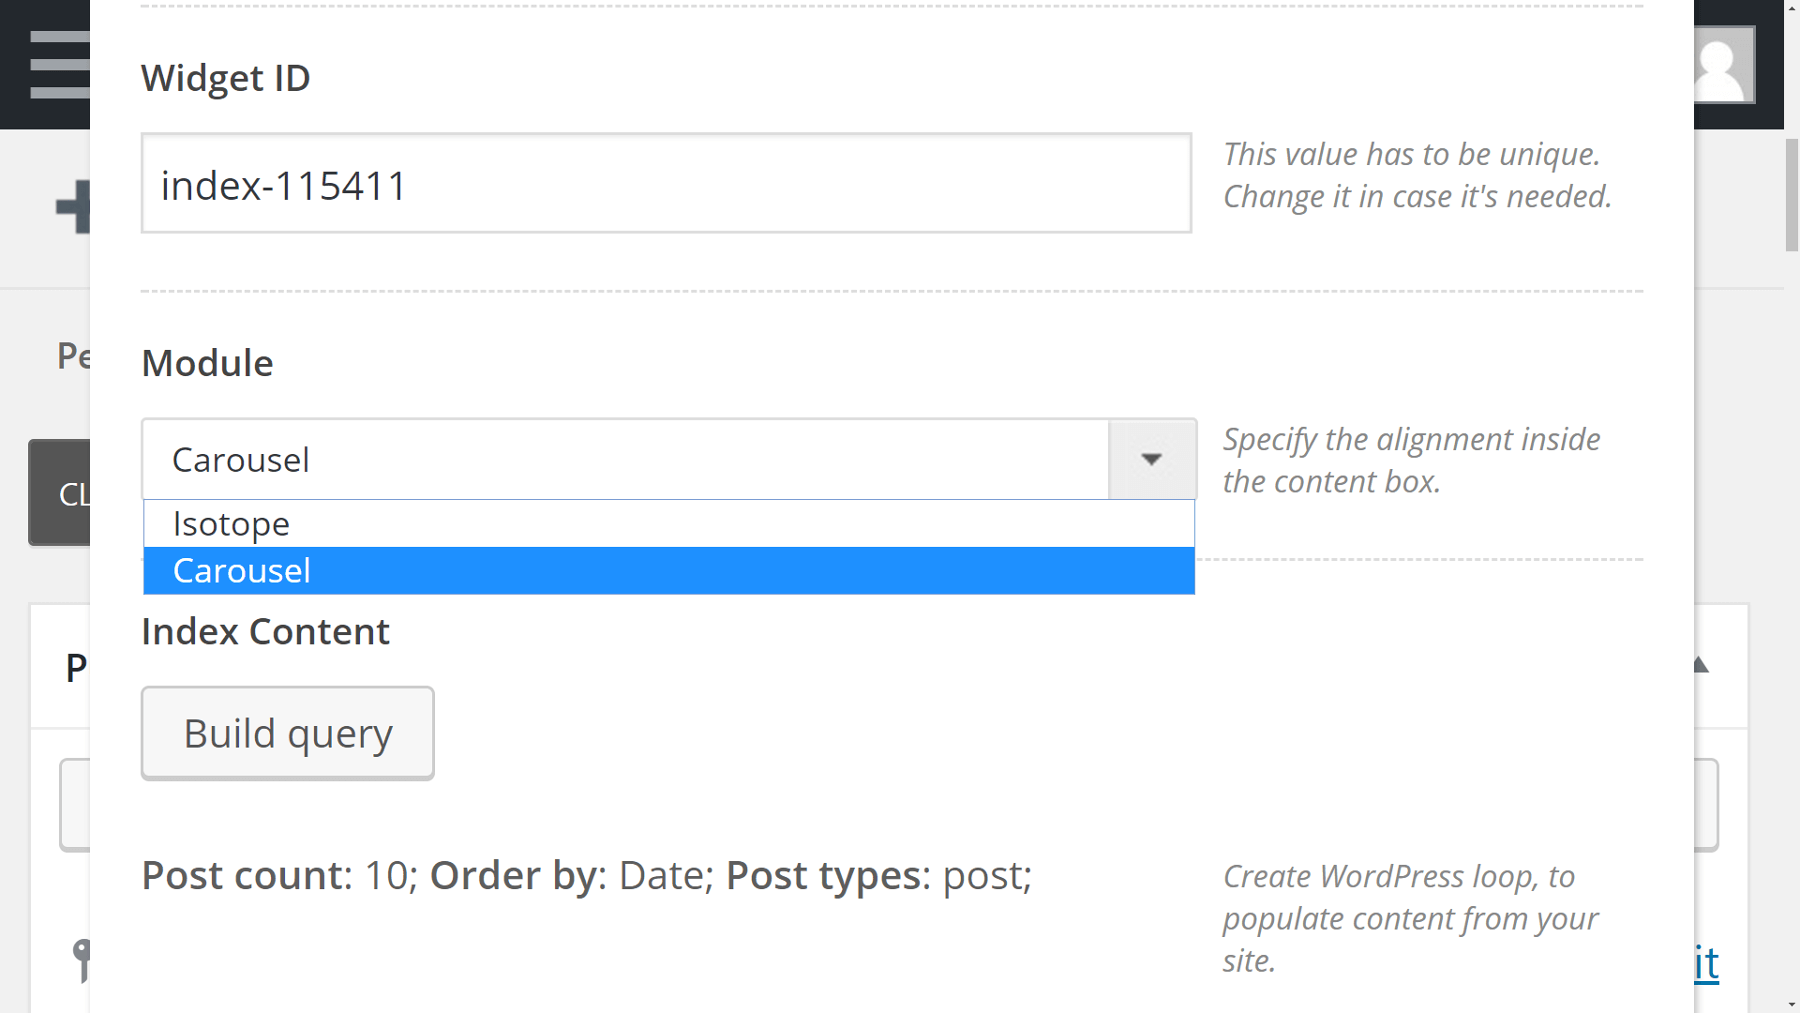
When you select the Posts module, a new Posts Settings window will open up. Look for the Module section under the General tab, and select the Carousel option from the drop-down menu:
Now click on the Save Changes button, and your carousel module will be added to your post or page. However, we still need to customize its contents.
Step #2: Configure Which Posts Will Appear on Your Carousel
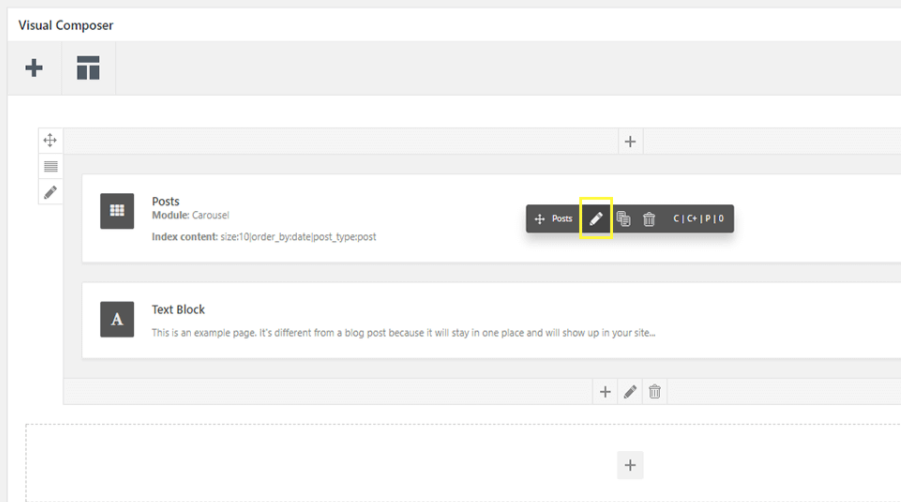
By default, your Uncode carousels will display your ten most recent posts. If you want more control over which posts to show off, you’ll need to return to your Posts module settings. To do this, mouse over the module and click on the pencil icon that appears:
In the Posts Settings, scroll down to the Index Content section in the General tab. This is where you can choose which posts your carousel will display. To change the default settings, click on Build query. The first thing you can do here is choose which types of elements you want to include in your carousel. You can pick from posts, pages, products, portfolios, and more. For now, we’ll stick with posts, but you can select whatever you’d like:
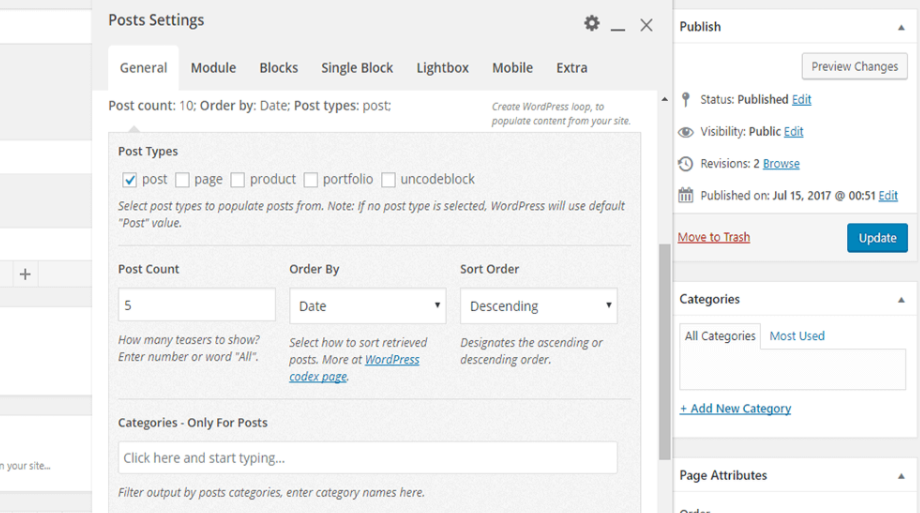
Next, you can select how many posts you want your carousel to include. Uncode sets the default to ten, but you can reduce the number if you find that it’s too many for your users to sort through. In addition, you can choose how to organize your posts – by date or title, for example – and whether to do this in ascending or descending order:
The following two sections enable you to limit your carousel to specific tags, categories, or taxonomies. If you want to implement these criteria, just start typing, and Uncode will help you pick the elements you want from a list of available options:
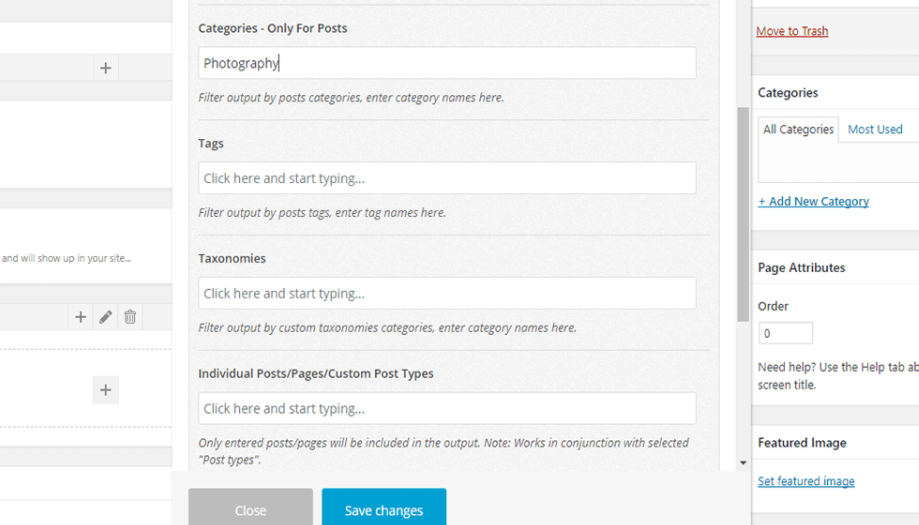
As you may recall, we discussed earlier that one of the upsides to post carousels is how you can hand-pick which elements you want to display. If you keep scrolling down, you’ll notice Uncode also includes an option to choose individual posts:
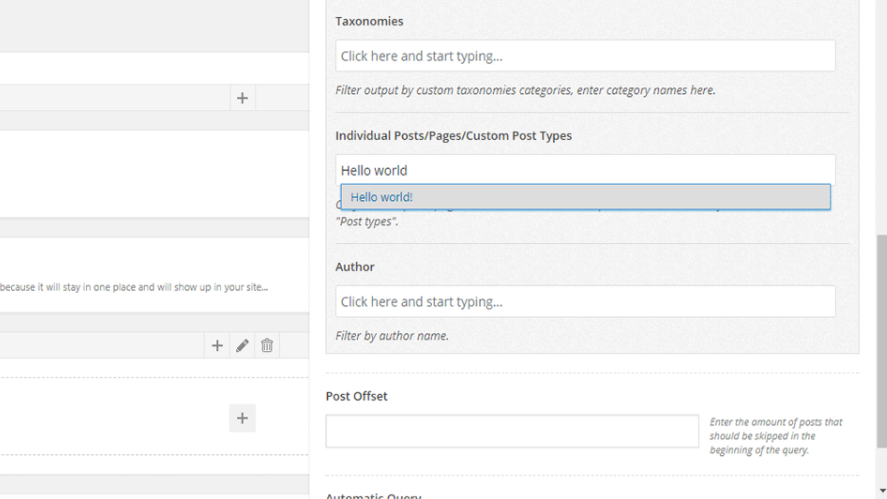
The process here is simple. Just start typing the title of each post you want to include, and Uncode will help you add it to the list.
All of these options will enable you to customize exactly what posts will be included in your carousel. Take your time and tweak these settings to meet your needs, then move on to the last step.
Step #3: Customize Your Posts Carousel
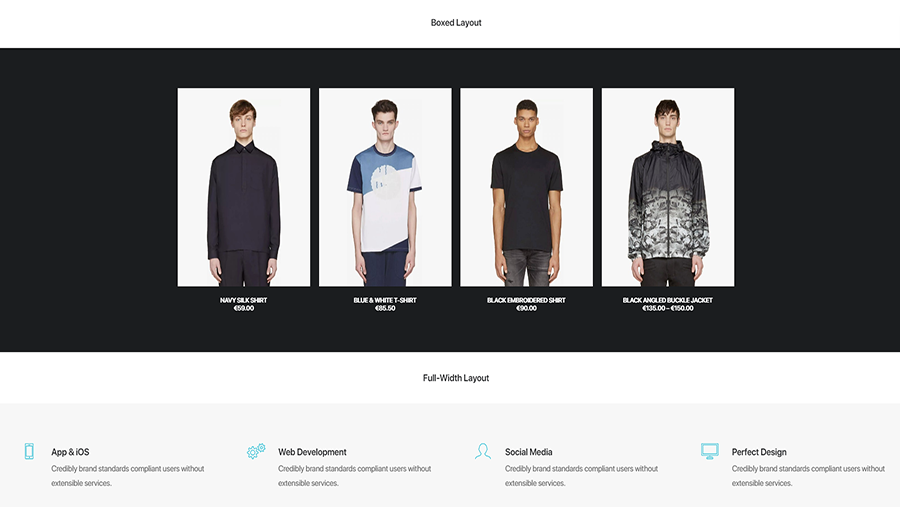
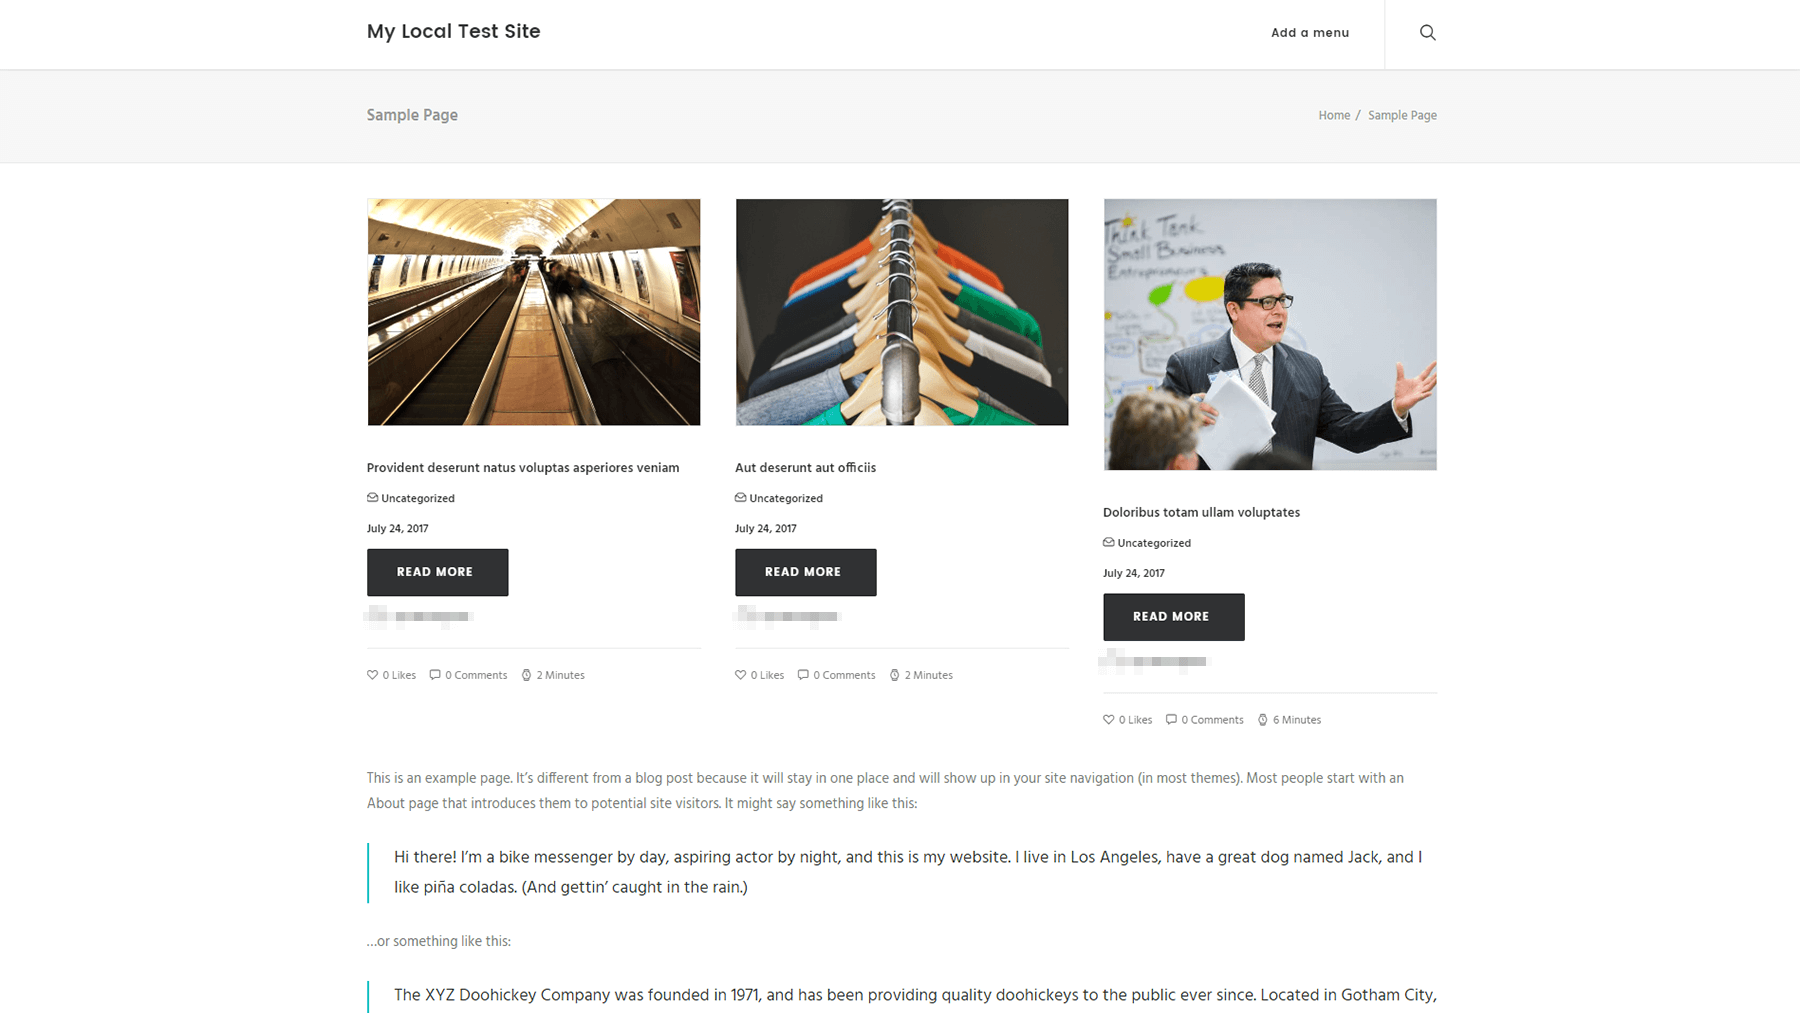
At this stage, you should have a fully working post carousel that looks something like this:
Your carousel is functional at this point, but you can still improve it by customizing its style. The Posts Settings screen offers a wide range of options for personalizing your carousel’s appearance and functionality. So far, we’ve done all our work inthe General tab, but now let’s switch over to Module:

In this tab, you can set a background color for your carousel, choose how many columns – or posts, in this case – to display at a time, and decide how large each thumbnail should be. Keep in mind that you can choose how many modules will display on various resolutions. This means you can micromanage how your carousel will look on different mobile devices.
If you keep scrolling down, you’ll also find the option to choose what information will appear below each post on your carousel. For example, we decided to disable the Category and Author tags, to make each slide look cleaner and more streamlined.
The next section enables you to ‘justify’ the featured images on your carousel, so they all appear as a uniform size. This feature makes your carousel look more professional, so we decided to enable it:
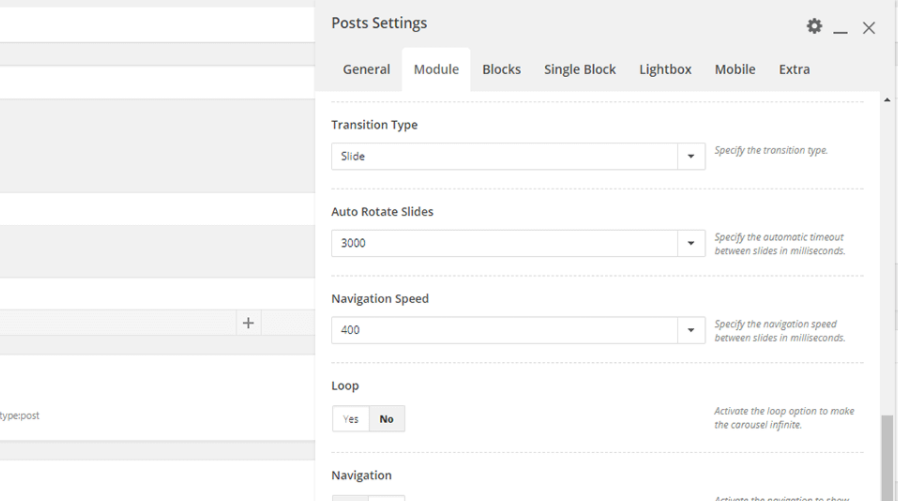
The next settings in the Module tab control how fast your carousel moves between slides, and enable you to add navigation arrows. These features provide users with more control, so they make for excellent additions to most carousels:
Once you’re happy with your choices in the Module tab, make your way to the next page – Blocks. Here, you’ll find several more options that enable you to change how your post carousel will look. For example, you can add rounded borders to your images and modify the size of your post titles:
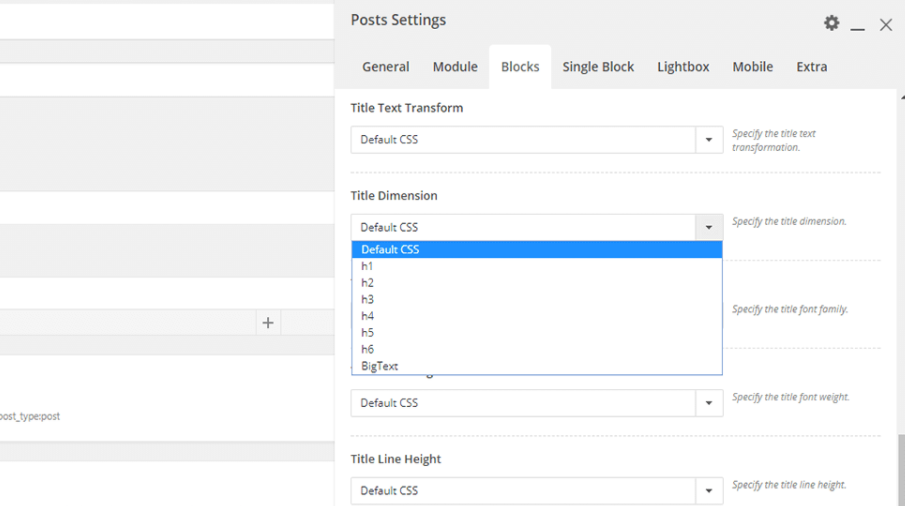
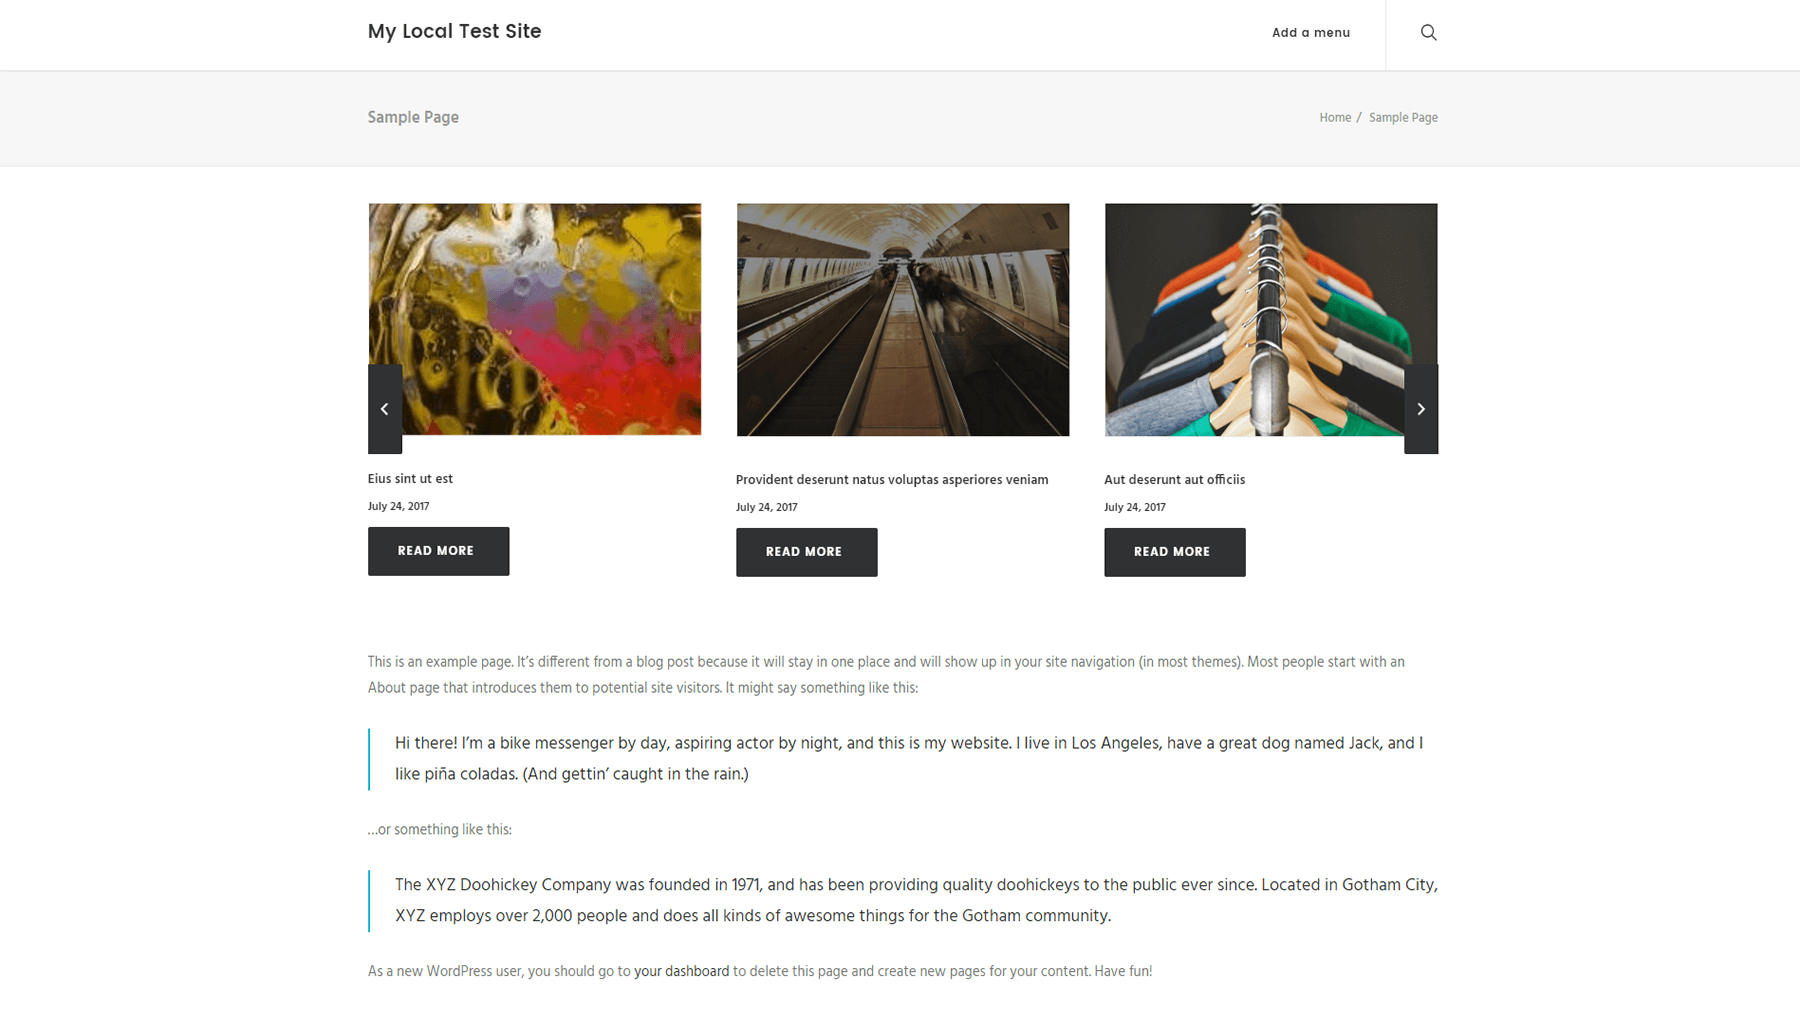
All the settings in this section are relatively straightforward, so feel free to tinker with them until you find a look you’re happy with. As an example, here’s what our post carousel looks like after a few more tweaks:
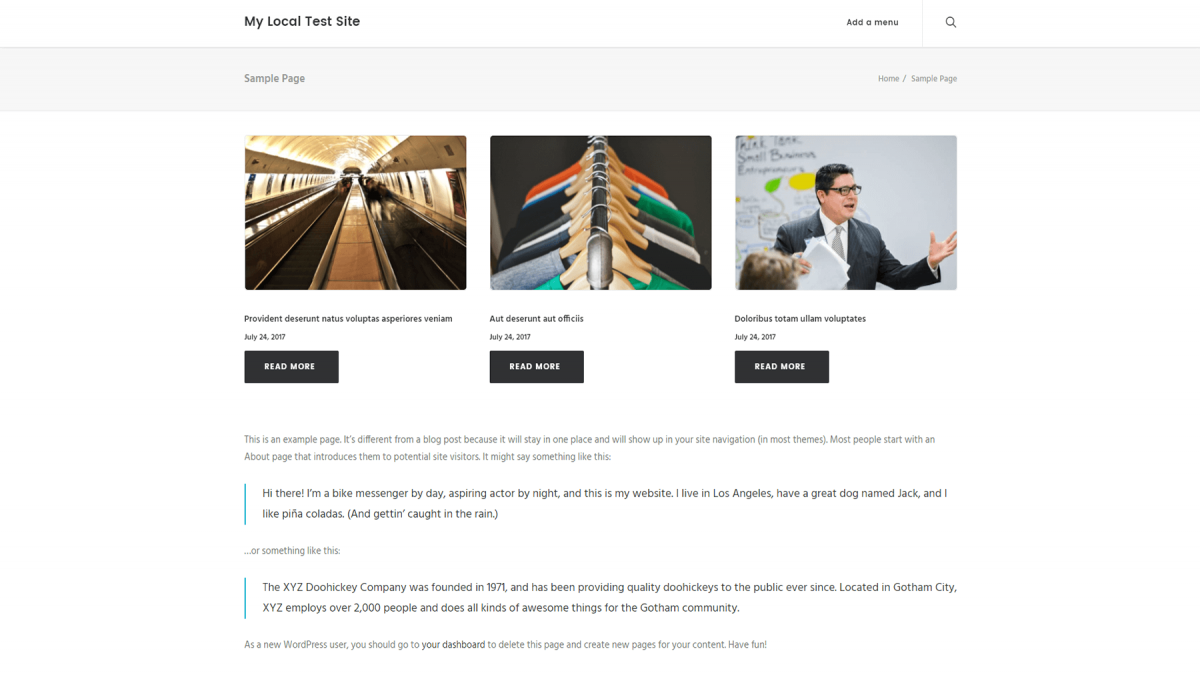
A screenshot can’t do justice to the dynamic nature of a carousel, of course, but it can give you some idea of what you’ll be able to accomplish. You’ll want to make sure your carousel’s style works well with the rest of your website. Fortunately, Uncode packs a lot of customization options, so that shouldn’t be a problem!
Conclusion
Post carousels can offer you better results than regular slides. Not only do they enable you to shine a spotlight on some of your best content, they also help you hook visitors and convince them to spend more time on your site. Plus, Uncode makes it easy to create post carousels, thanks to its integration with the Visual Composer plugin.
Let’s recap the three steps for using Uncode to create a posts carousel:
- Add a carousel to your post or page.
- Configure which posts will appear on your carousel.
- Customize your post carousel’s appearence and functionality.
Do you have any questions about how to create a post carousel in Uncode? Ask away in the comments section below!
Image credit: Pixabay.