Your website’s design plays a major role in how visitors perceive it. Even if your site functions smoothly and contains quality content, an uninspiring layout may persuade people to head elsewhere. On the other hand, a creative, eye-catching design will grab your visitors’ attention and engage them.
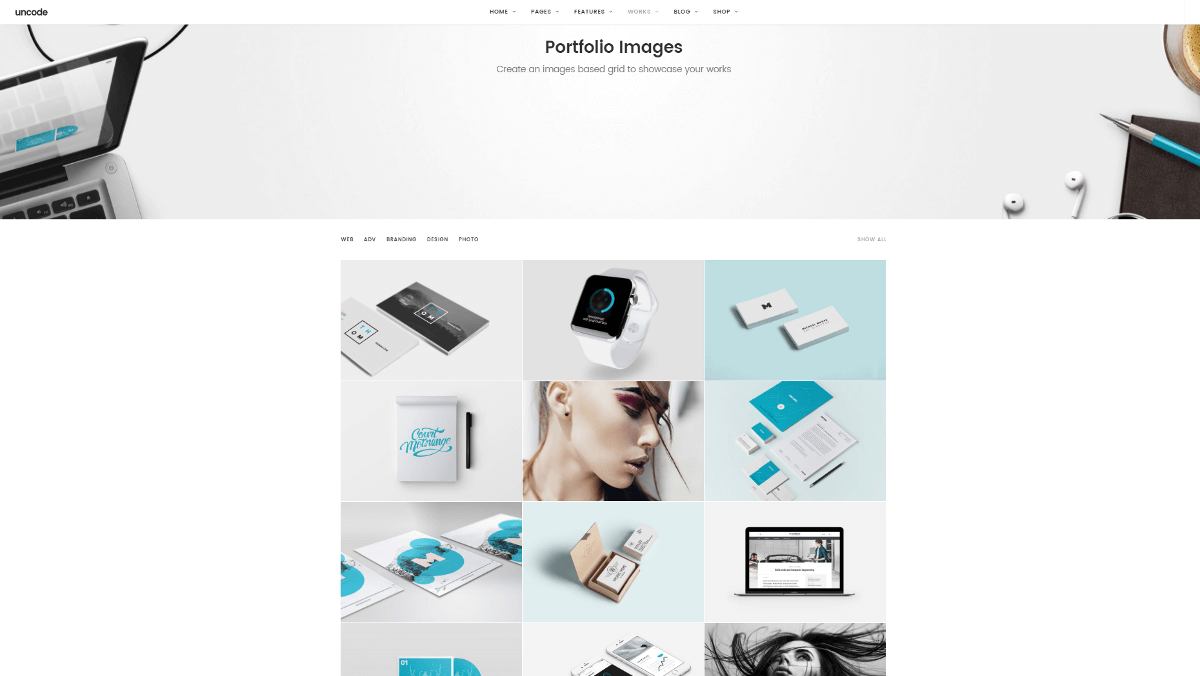
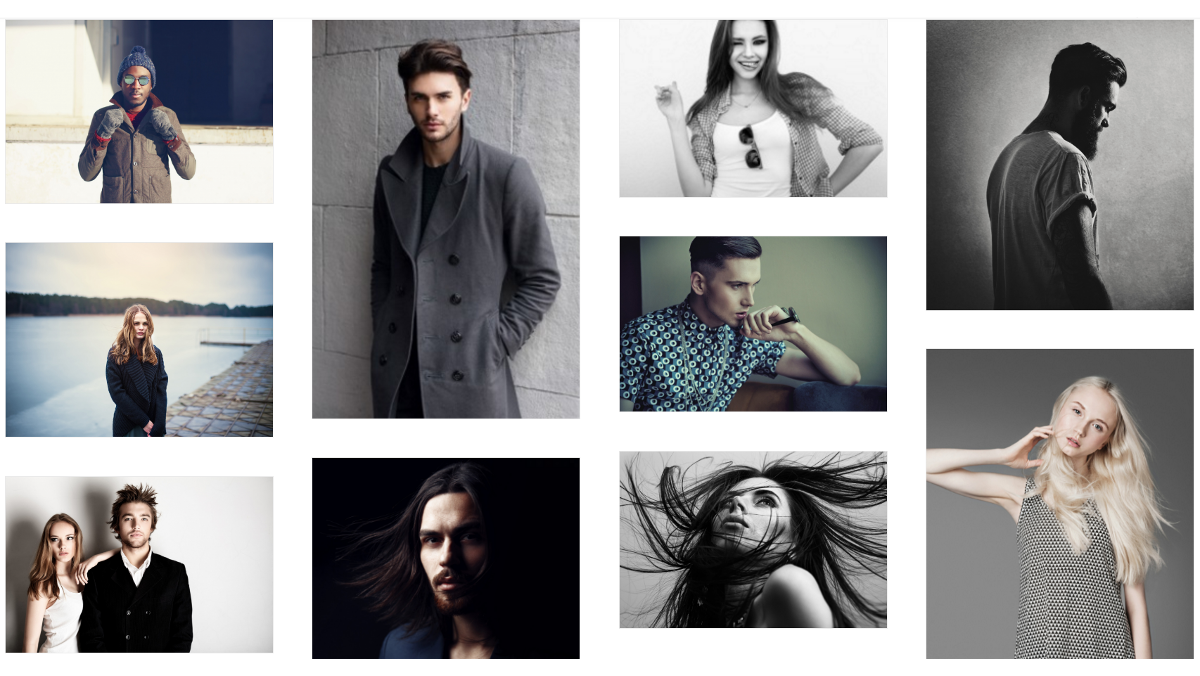
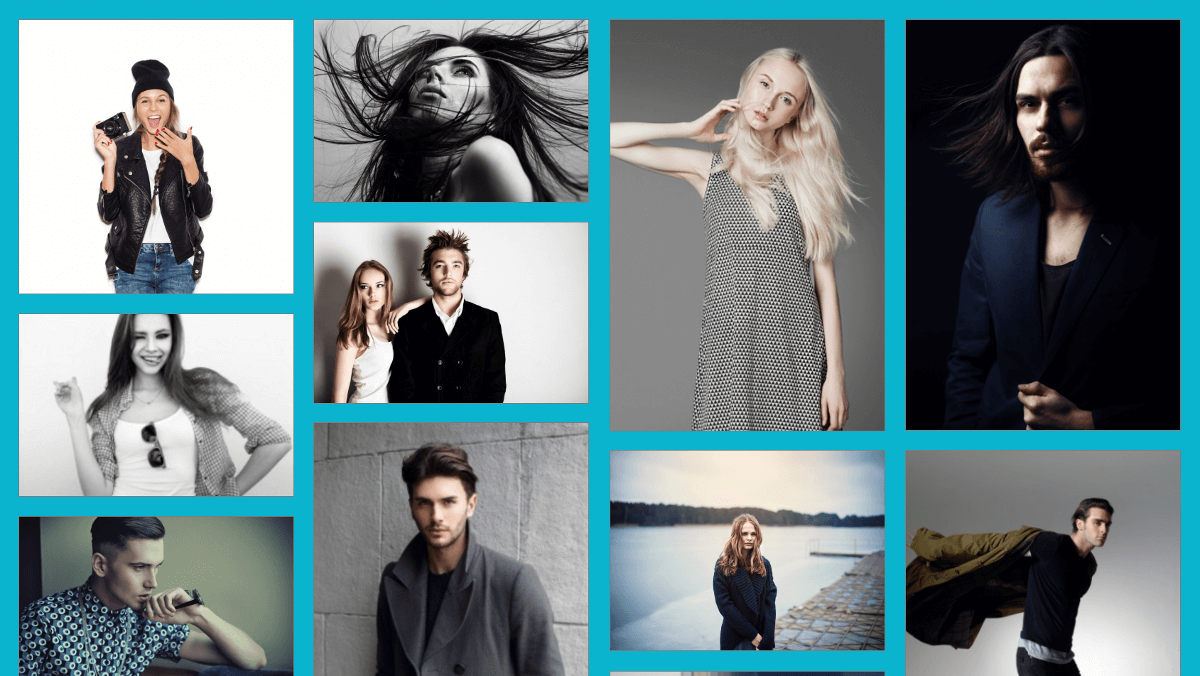
Using a grid layout is an easy and effective way to organize your content for maximum visual appeal. You can include this type of layout on your homepage to showcase photos or products, or create a dedicated image gallery page. Users who visit your site and are immediately presented with an array of stunning photographs will naturally be drawn in to explore further.
In this article, we’ll explain how to create a simple yet attractive image gallery using the Media Gallery feature within our Uncode theme. Before we do that, we’ll touch on some of the many ways image galleries can be used. Let’s get started!
When to Use an Image Gallery
Visuals are one of the most powerful tools available to you when creating your website. You’ll want to include plenty of them on your individual posts and pages, to support your content and break up long stretches of text. There are some situations, however, in which you want the focus to be entirely on your imagery. If that’s your goal, creating an image gallery is a stylish and effective way to accomplish it.
Some perfect situations for an image gallery include:
- Art showcases. If you’re an artist or photographer, you can use a gallery to display your works – whether you want to sell them or just show them off. You could also create an image gallery of crafts, recipes, or other creative works.
- Featured products. When you’re building a company website, creating a featured products page is often an excellent strategy. It could even be your home page, so visitors are immediately presented with your top sellers or most innovative designs. This is particularly true for e-commerce sites, which need to display products enticingly.
- Photo albums. What if your site is smaller and more personal? You can use an image gallery to display personal photos, create a family photo album, or show off pictures of all the locales you’ve visited. The possibilities are endless.
An image gallery might not be the best fit for every website, but as you can see from the examples above, its applications are numerous.
Now that you have some ideas for what kind of gallery to create, we’ll show you how to do it!
How to Create an Image Gallery With Uncode (In 4 Steps)
In this tutorial, we will be using the Media Gallery module that’s built into Uncode.
Before we start, you’ll want to make sure the Uncode Visual Composer plugin is running. To do that, navigate to Plugins > Installed Plugins and check the list. If you don’t see Uncode Visual Composer, make your way to Uncode > Install Plugins and select it from the plugins listed as To Install.
Once you’re done, you can move on to Step 1!
Step 1: Set Up Your Media Gallery
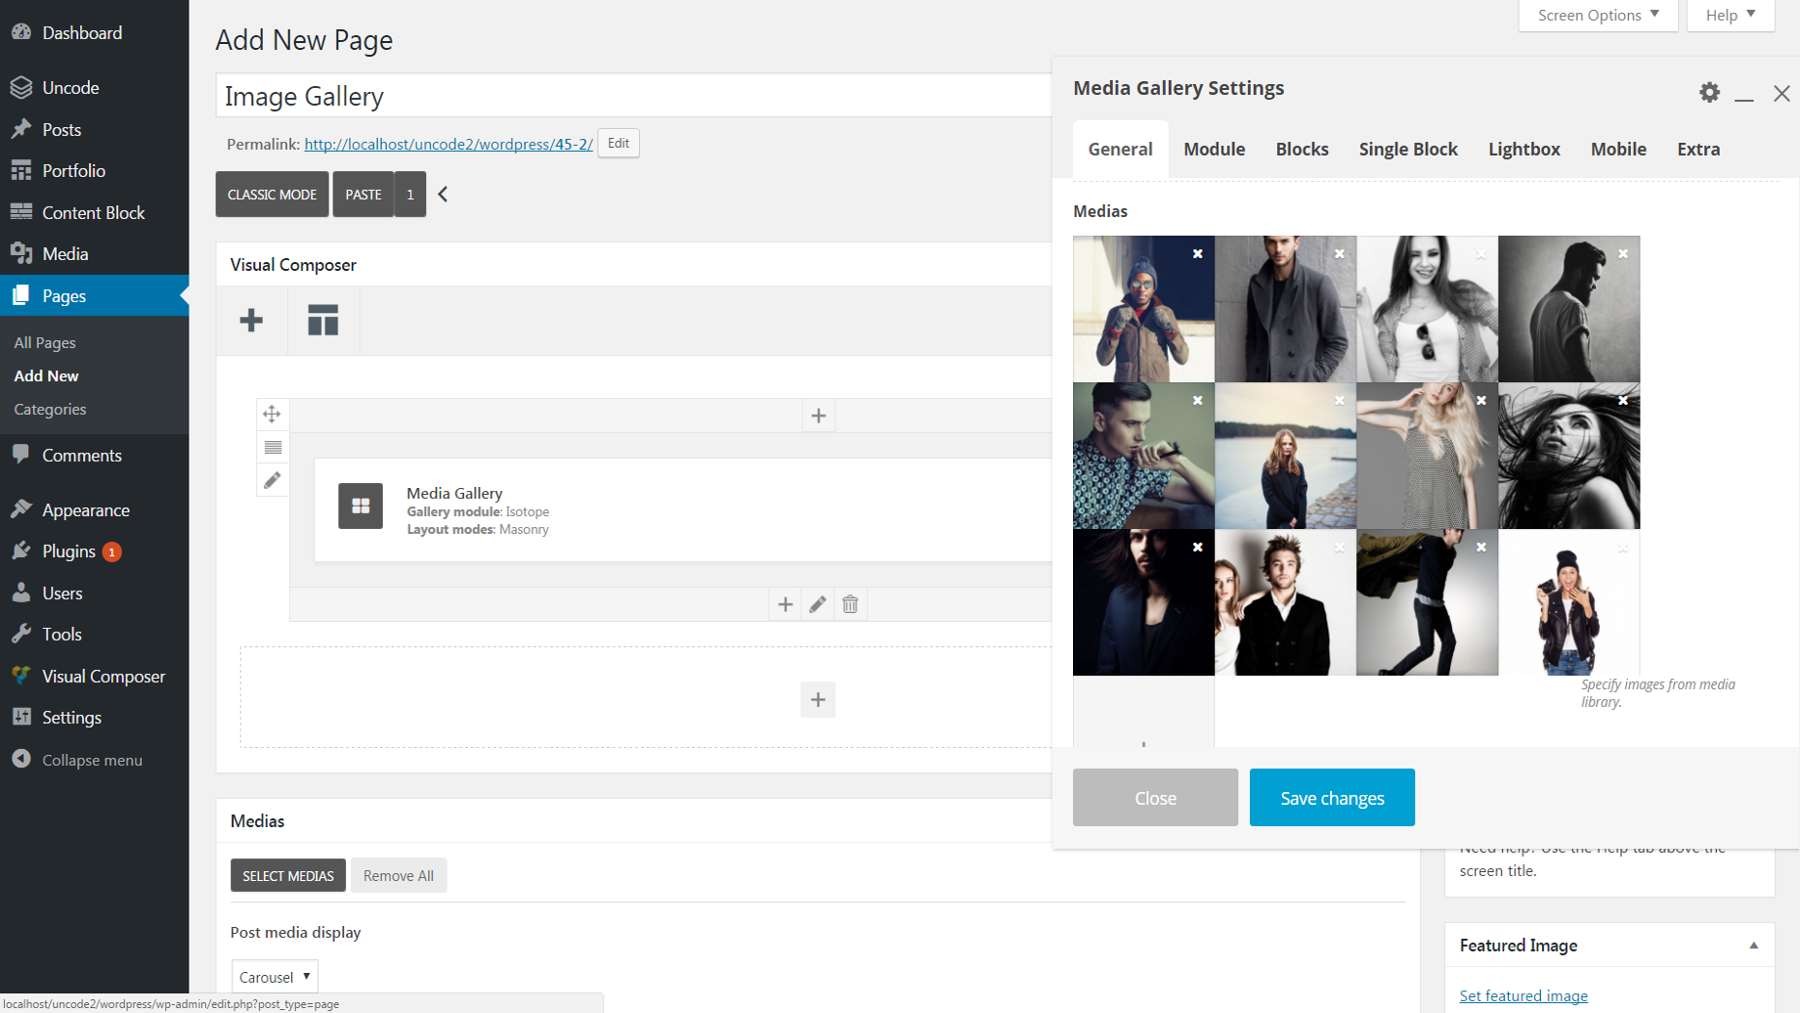
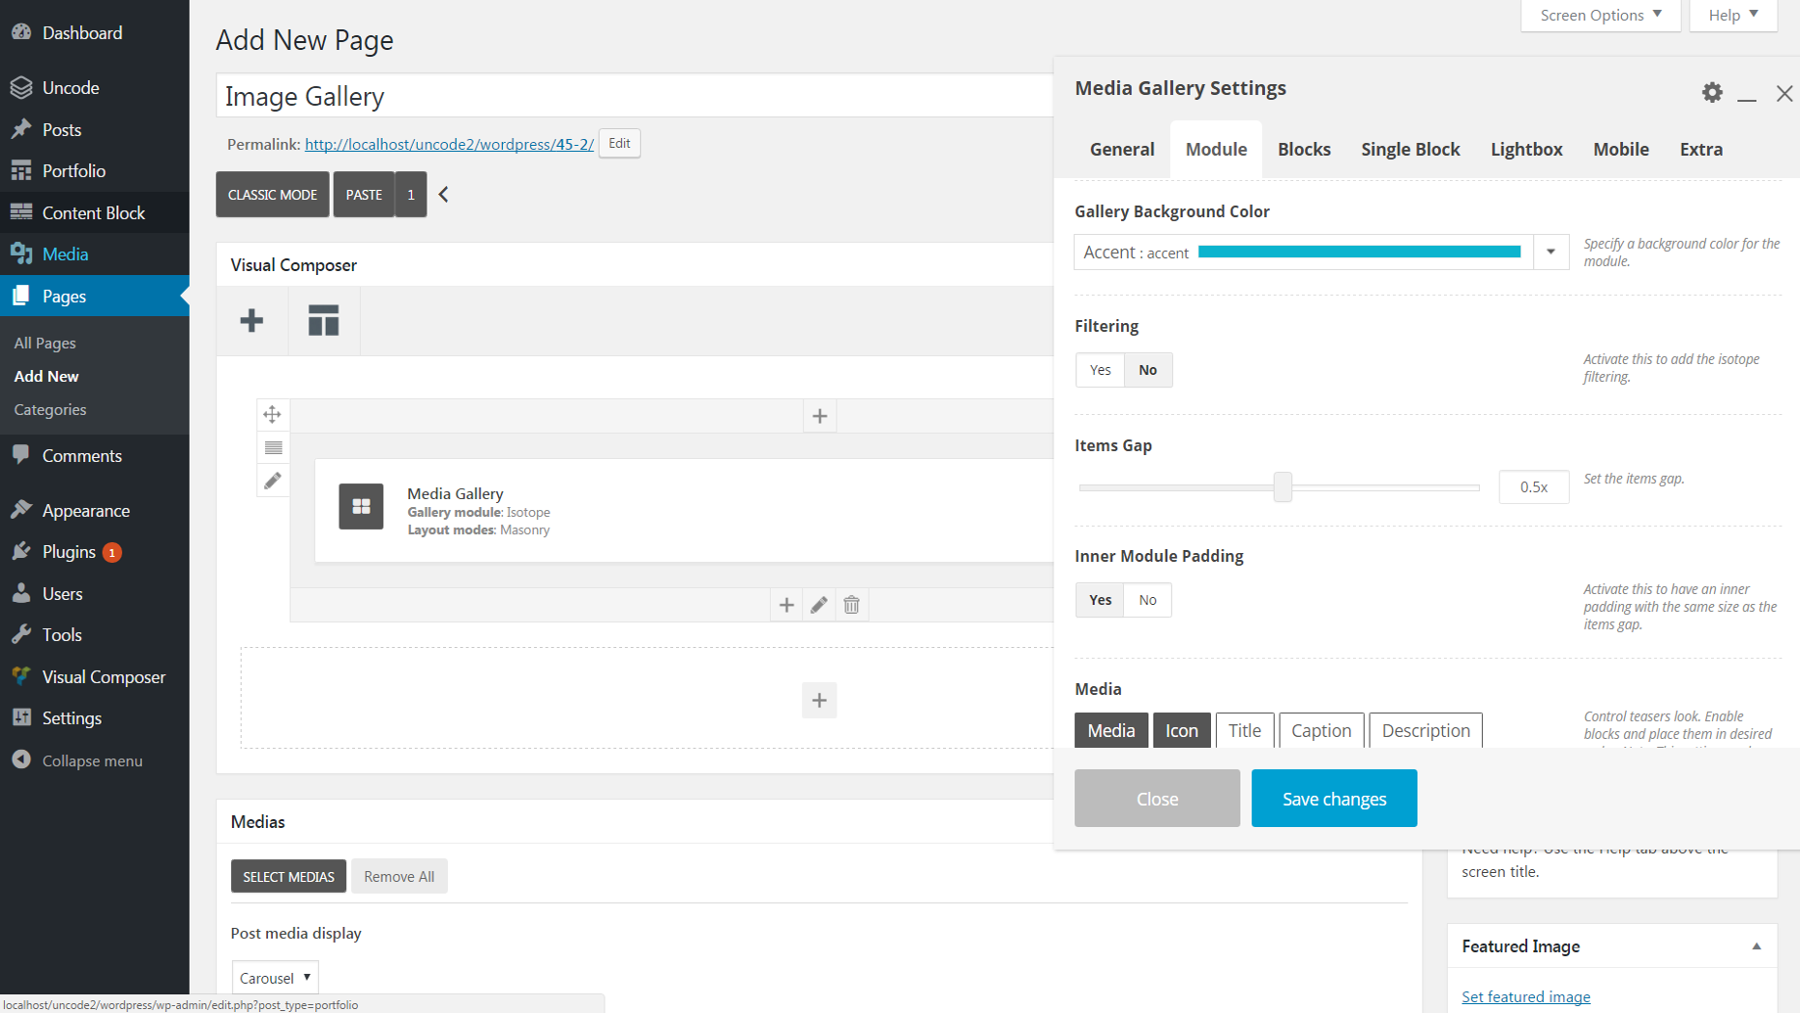
The first thing you’ll want to do is create a new page for your image gallery (or open up the existing page you’d like to add your gallery to). Make sure you are in Classic Mode – if not, click on the button that says Backend Editor to switch modes. Then you need to choose Add Element and select Media Gallery.
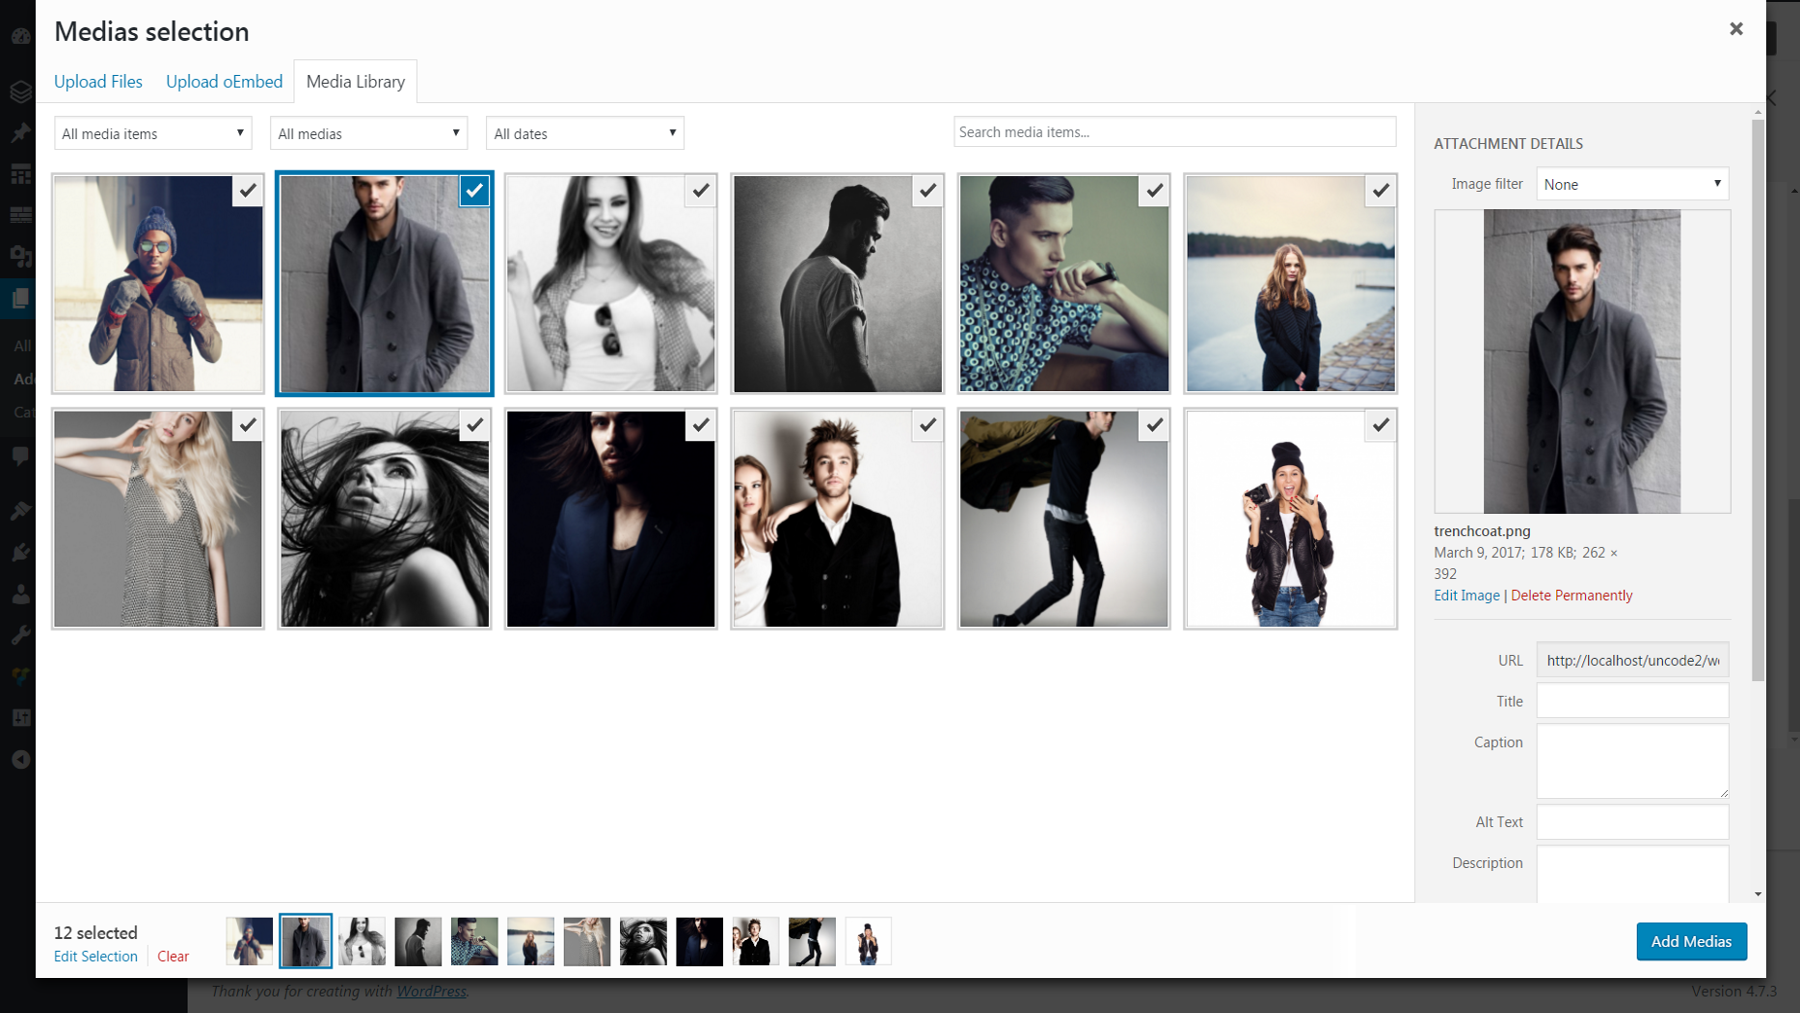
A menu will open labeled Media Gallery Settings. This is where you can add images, change the layout and appearance of your gallery, and edit various settings. Right now, what you want to do is select the plus sign under Medias on the first tab. You’ll be taken to your Media Library, where you can upload new images or choose from the ones already there. Simply click on all the images you want to be part of your gallery, and when everything you need is selected, choose Add Medias.
When you’re done, you will be taken back to the settings menu and you’ll see all the images you selected as thumbnails under Medias.
If you want to change the order in which the images appear, simply click on a thumbnail and drag that image where you want it to go. Alternatively, choose Yes under the Random Order option, and the images will display in a random layout whenever the gallery is visited or reloaded. Make sure to hit Save Changes when you’re done!
Step 2: Adjust Your Gallery’s Layout
Now that your gallery is loaded up with images, we can make some simple adjustments to how it will look. There are two relevant options for this under the General tab. Gallery Module will determine whether your gallery displays all images on a static page, or a few at a time in a rotating carousel. If you decide to go with Isotope – the static page option – Layout Modes will affect the way the images are arranged (check out this tool to see what affect each choice will have).
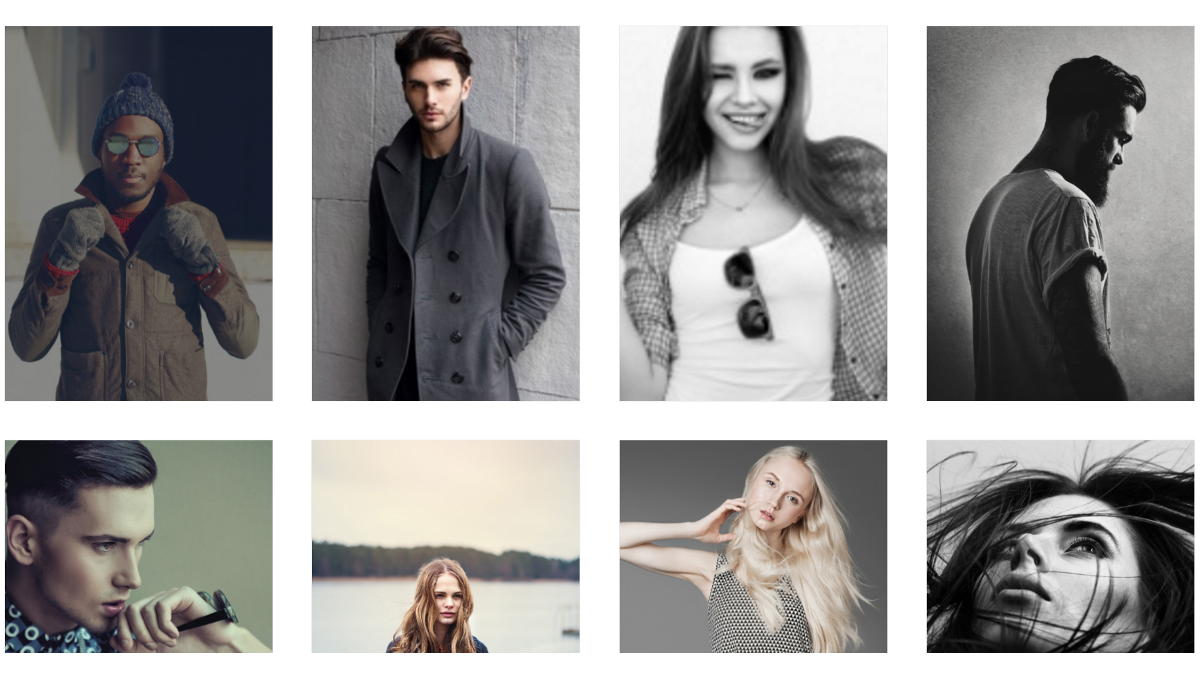
At the moment, if you preview your gallery you’ll see that all your images are displayed in their natural dimensions. If you want to change that, you have a few options. Under the Module tab, change Style to Metro if you want all the images in a static gallery to have the same height and width. Alternately, if you’ve chosen to create a carousel, you can scroll down to Carousel Items Height in the same tab and select Equal Height for similar results.
Finally, we can also adjust how the images are laid out within the gallery. Still under the Module tab, use the Items Gap slider to change the amount of space between images. Then navigate to the Blocks tab and choose a different Width if you want to alter how many images appear in each row (smaller fractions mean more images per line).
Step 3: Customize Your Gallery’s Appearance
By this point your gallery should be shaping up the way you want it. However, there are still plenty of little touches we can add to personalize it. We’ll start with colors. Under the Module tab, you can select a Gallery Background Color that will appear around and between the images. If you do this, we also recommend you also select Yes under Inner Module Padding. This change will ensure your background color appears on the left and right borders of your gallery.
When you add a background color, you might notice that each image has a thin border around it – the default border is white. To change this to gray instead, go to Blocks > Skin and select Dark. Alternatively, you can use the No Border option under the same tab to remove the border completely.
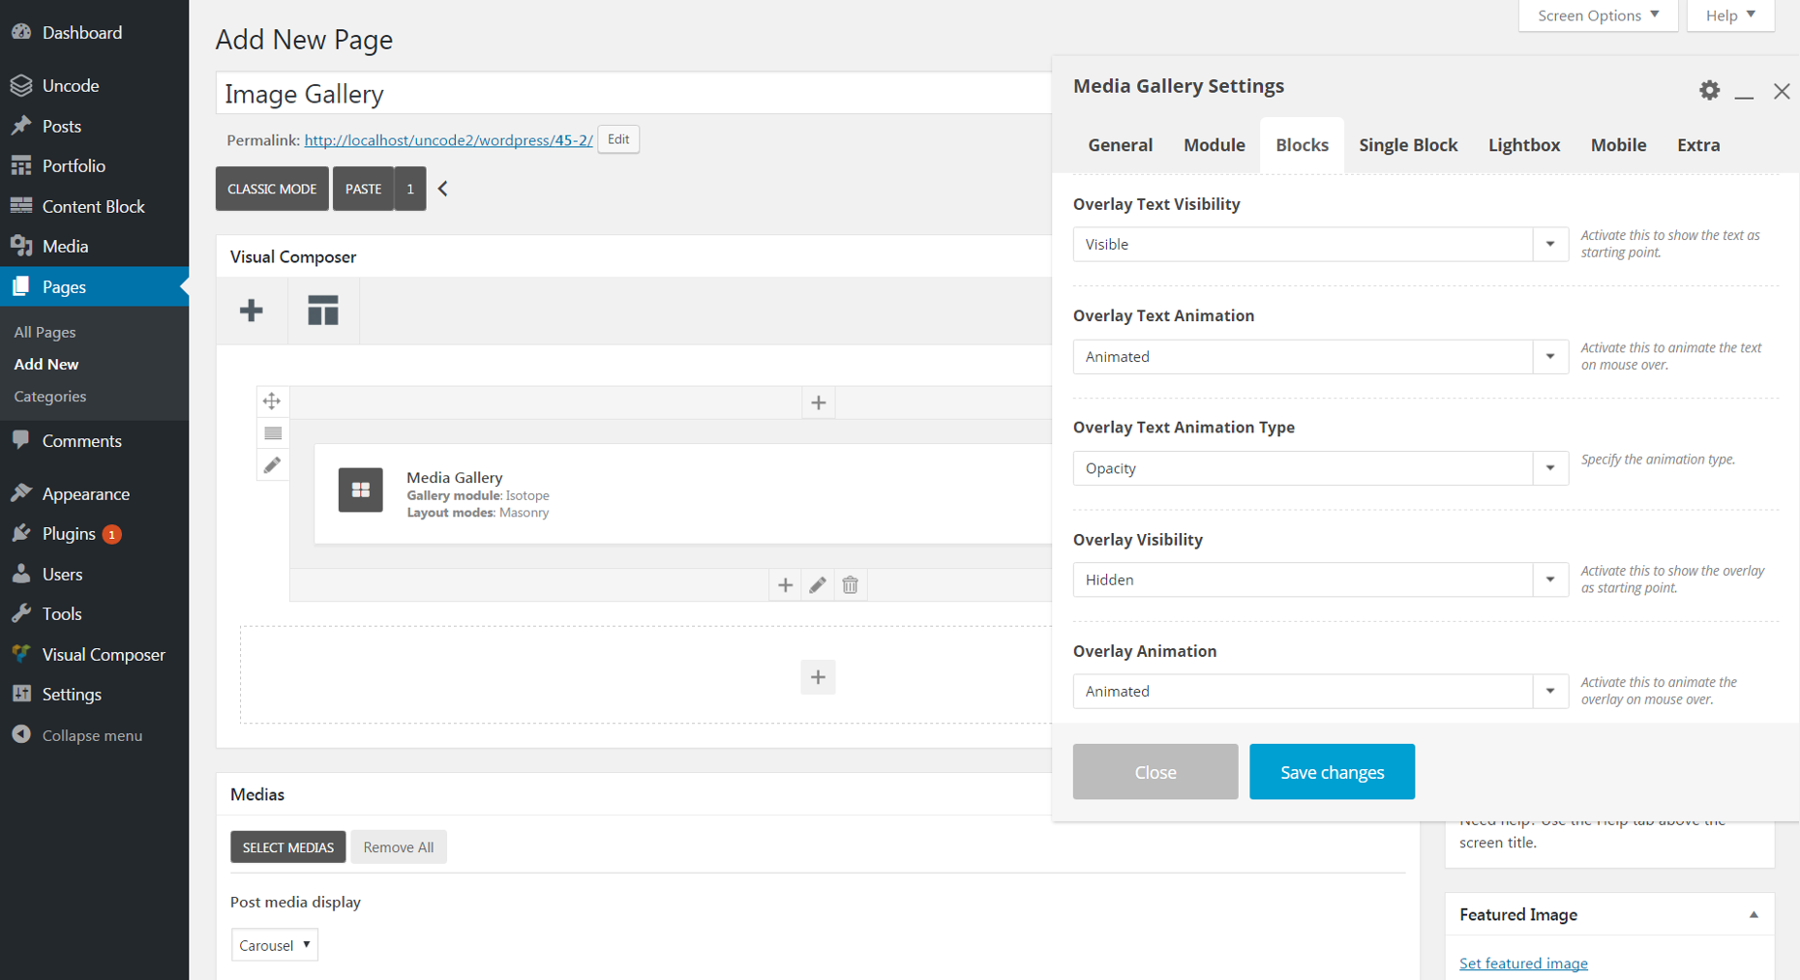
You can also add text to each image. First, go back to your Media Library and enter the text you want in the Title field for each image. Then reopen the Media Gallery Settings menu and go to Module > Media. Click on the Title button to enable the title text. By default this text will only appear on a mouseover. To make it permanently visible, go to Blocks > Overlay Text Visibility and choose Visible.
So far, we’ve been making overall changes to the entire gallery. It’s worth noting, however, that you can edit most of the settings we’ve been talking about for individual images as well. Just go to the Single Block tab and click the pencil icon next to the name of the image you’d like to change. You can alter the layout, border, colors, text, and so on for each image this way.
Step 4: Edit Your Lightbox Settings
By now your gallery should be just about ready to go! Before we wrap this up, however, let’s talk about the Lightbox feature.
When you click on any image in your gallery, a full-sized version will appear – along with left and right arrows viewers can use to scroll through each gallery image in turn. This is a handy feature that enables your images to be viewed more closely.

Naturally, the settings to customize this feature appear under the Lightbox tab. You can set the Skin to Light or Dark to change the background color behind each image. You can also change the scrolling direction to vertical if you’d like. If you want the same title text we discussed earlier to appear above each Lightbox image, just enable it under Text. There are also options to turn social media buttons, thumbnails, and navigation arrows on or off.
And we’re done!
If you follow these directions, you’ll be able to create a simple but elegant image gallery. However, there are far more options available in the Media Gallery feature than we can cover here. Feel free to continue exploring the various settings to further personalize your gallery.
Conclusion
Images are one of the most powerful, engaging tools you have for making your site stand out from the crowd. Fortunately, creating an awesome image gallery to showcase your photographs or products can be easy and fun. Uncode’s Media Gallery feature is packed with options that enable you to design your gallery just the way you want.
Simply follow the steps we’ve outlined above to create and customize your image gallery:
- Set up your media gallery.
- Adjust your gallery’s layout.
- Customize your gallery’s appearance.
- Edit your Lightbox settings.
Do you have any creative ideas for using an image gallery on your website? We’d love to hear them in the comments section below!
Image credit: Wikimedia Commons.